Agreement
We use cookies on our website to provide you with the best possible experience. By clicking "Accept All" you agree to the use of all cookies and to our privacy policy.
Sign documents yourself (advanced)
In this tutorial we will explain how you can sign a document yourself very quickly and easily.
Updated on 22.03.2023
References from the video and related links:
- Article on signature standards and use cases
- Tutorial on Collecting signatures (without workflow)
- Tutorial on Collecting signatures (with workflow)

Step by step
In this tutorial, we will show you how to use sproof sign to legally sign your documents yourself with just a few clicks.
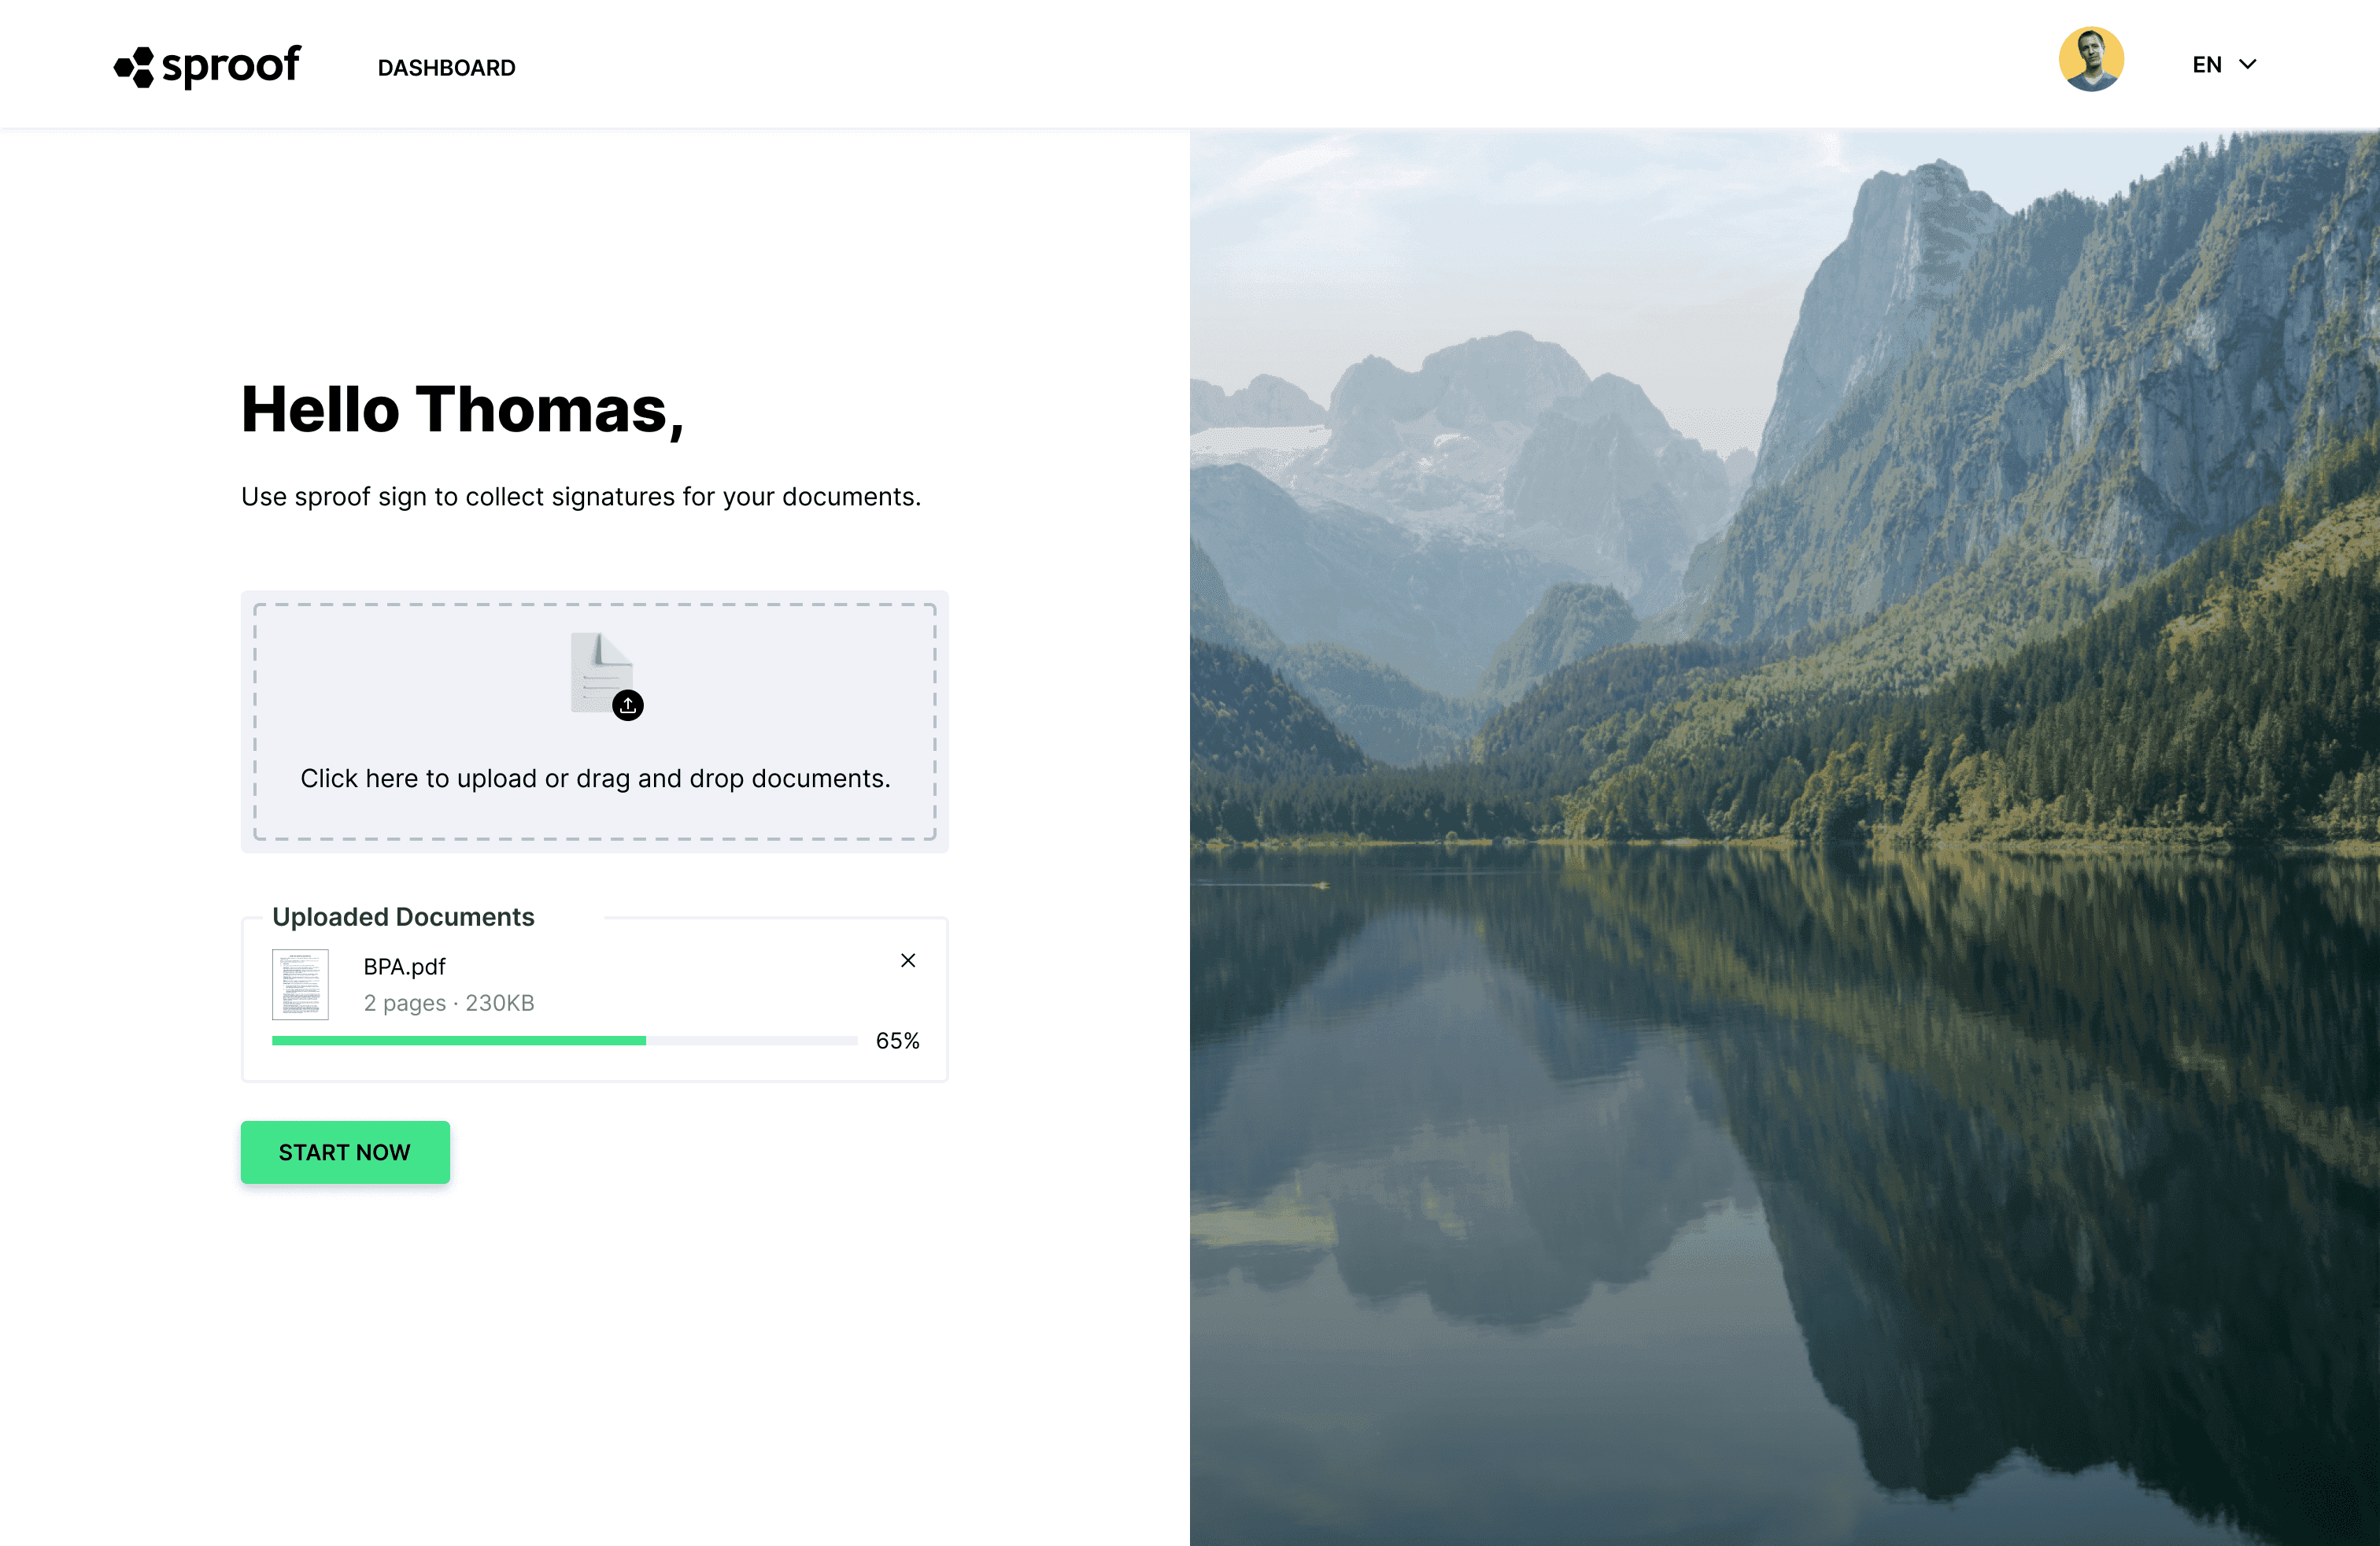
When you are in the dashboard, you can "upload document" in the top right corner.
Select your desired document or drag & drop the document onto the gray upload area.
Then click on "Start Now" and the document will be uploaded.
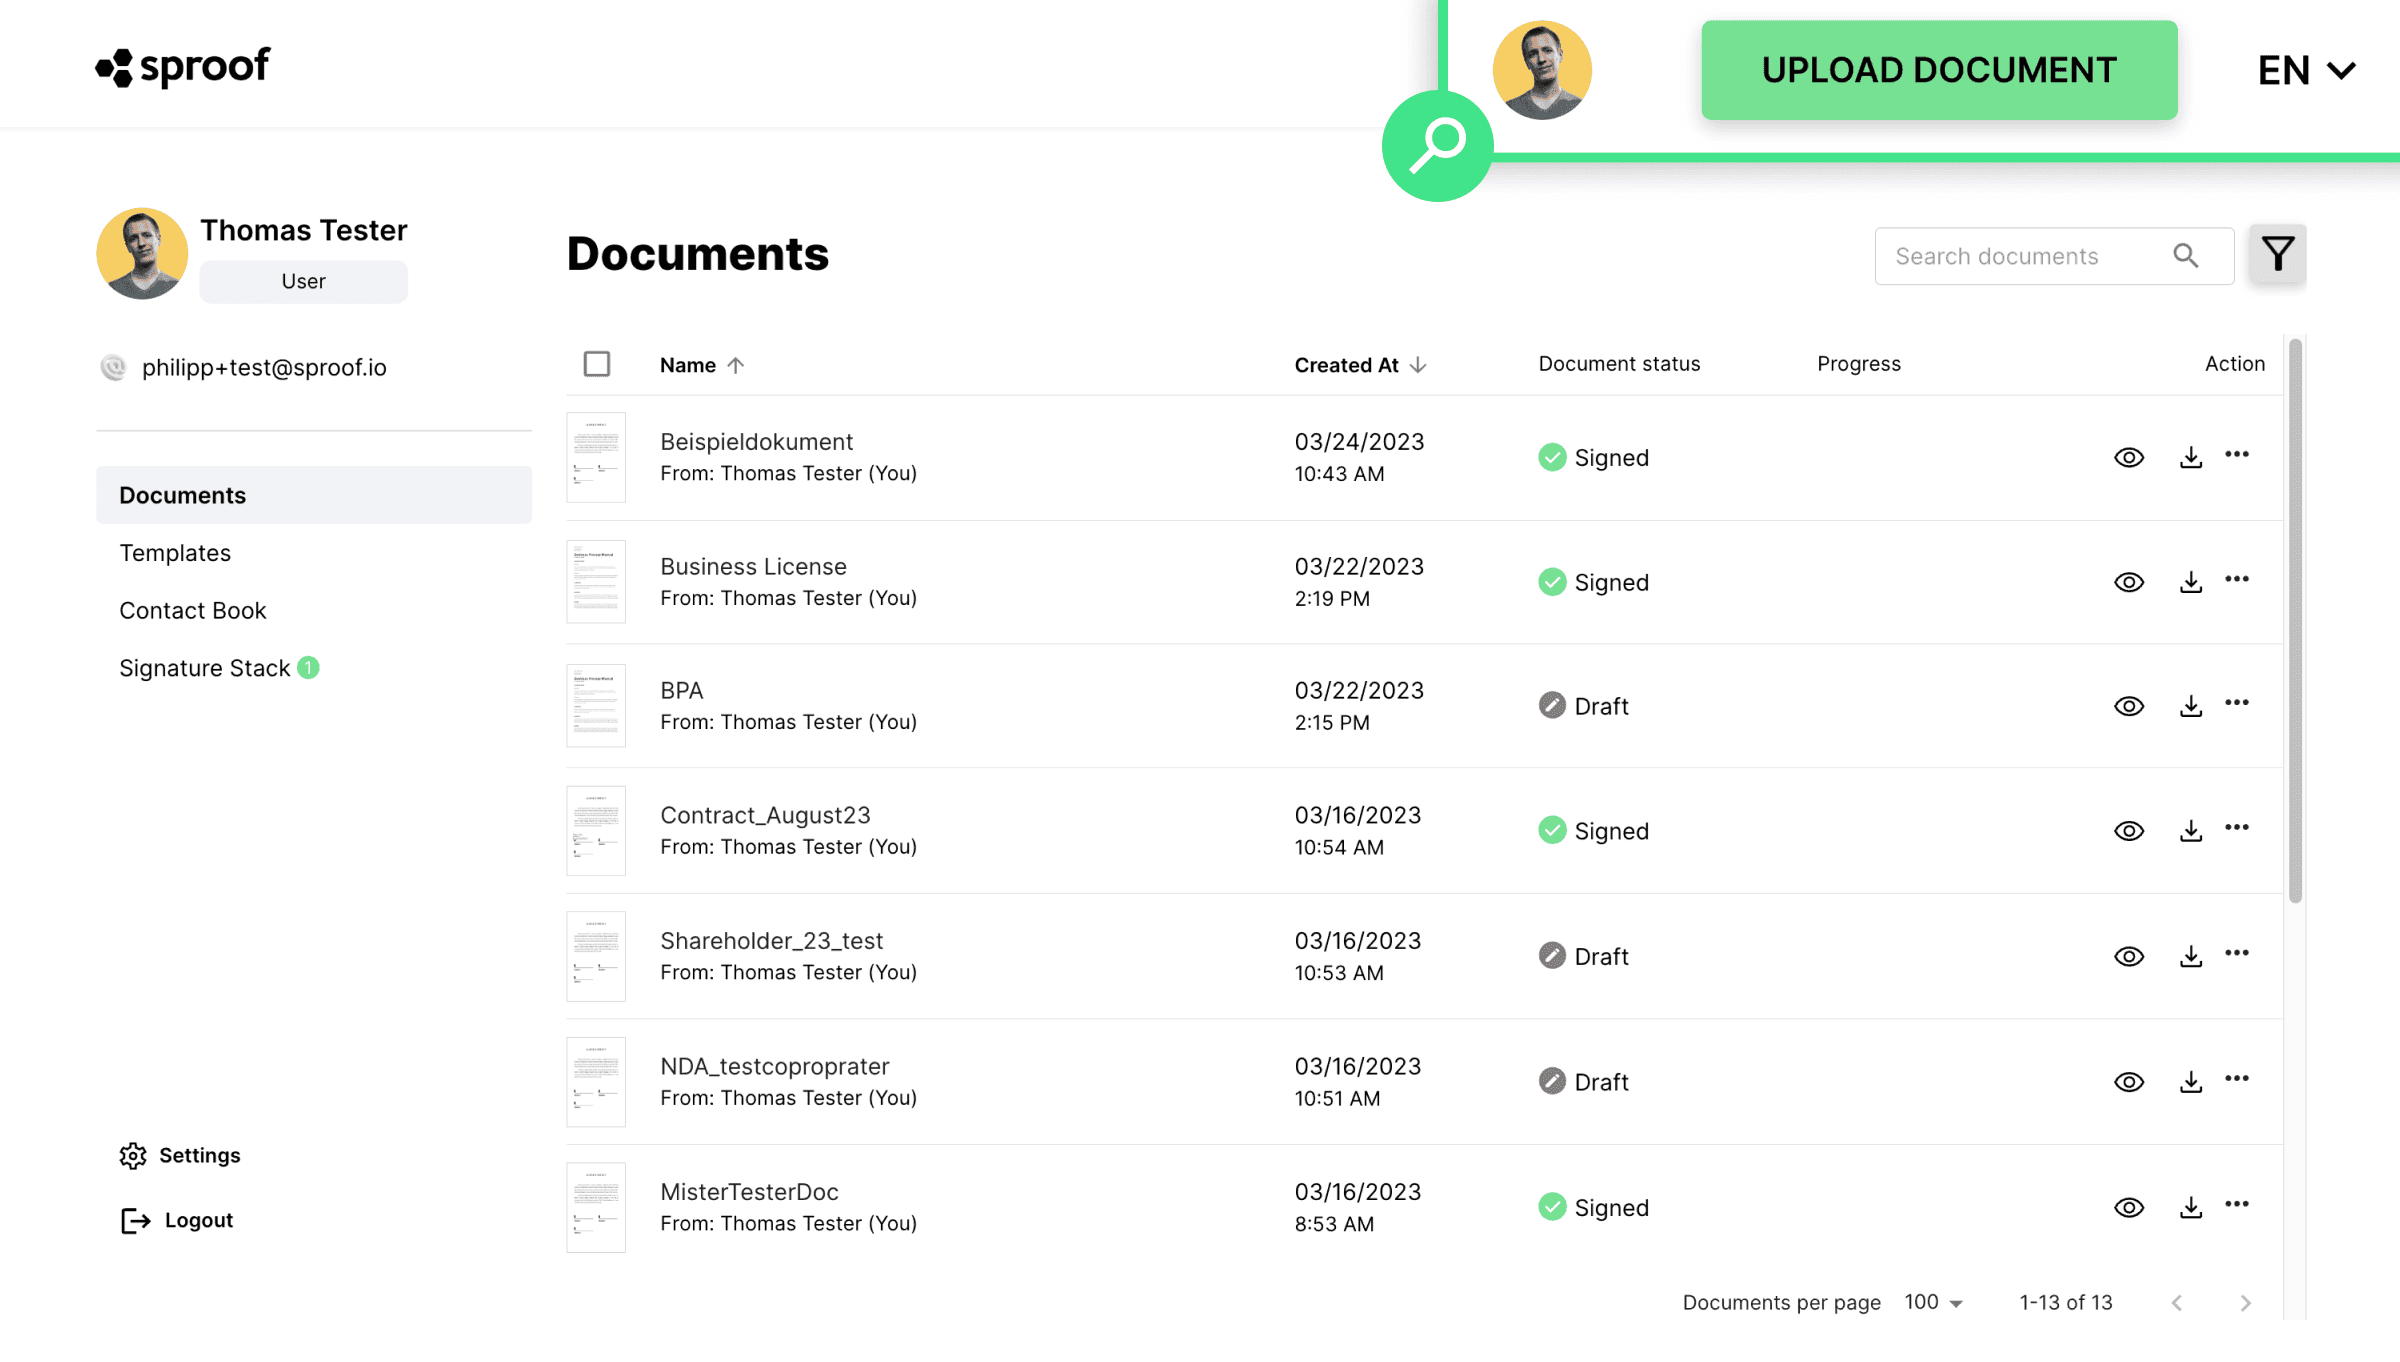
Open the document by clicking on the document name in the dashboard.
- Open in the editor, you can navigate through the document.
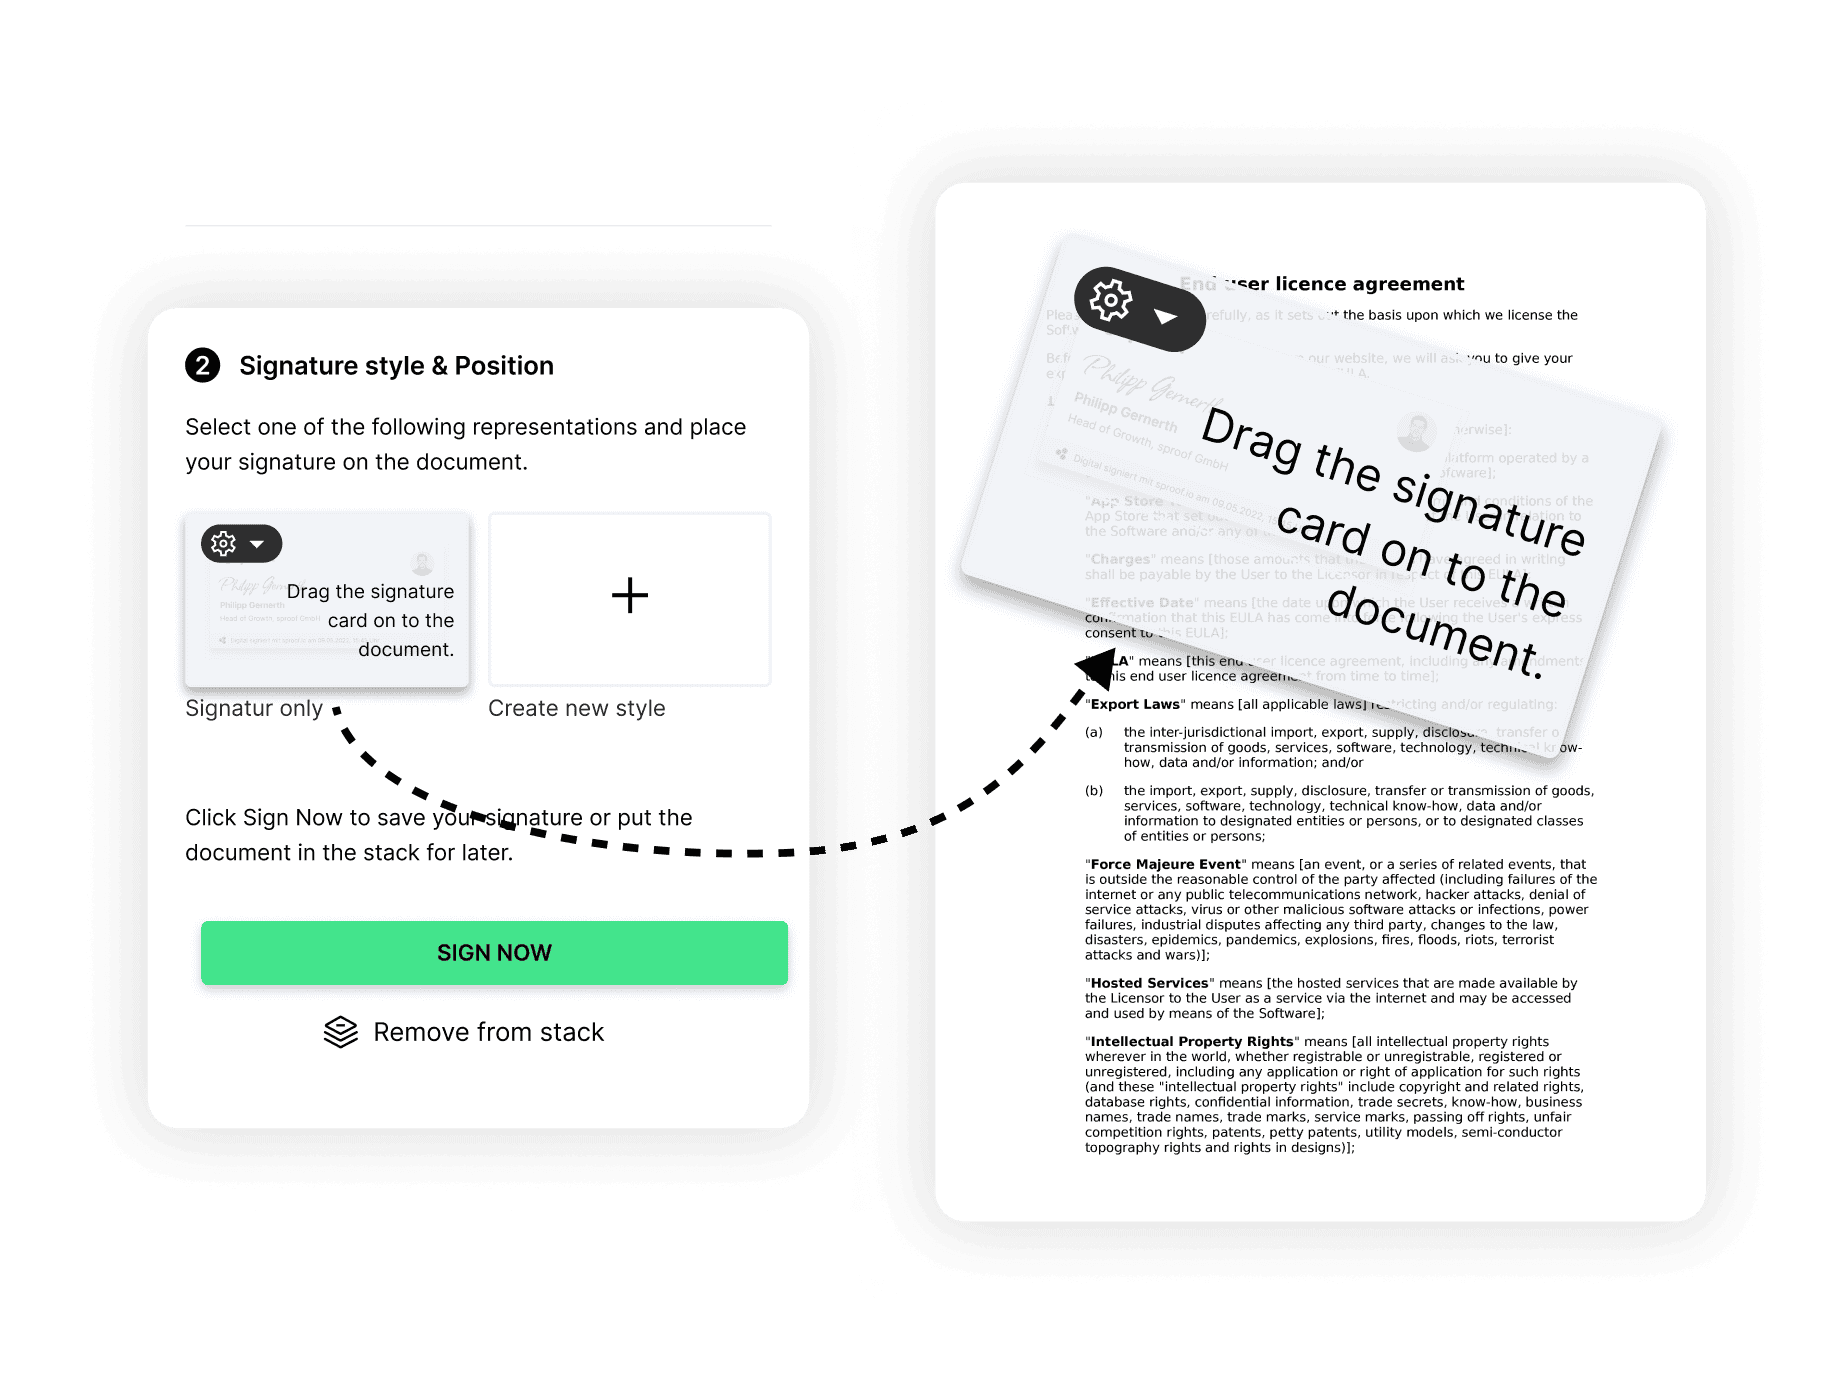
- After that, open the "Sign yourself" tab.
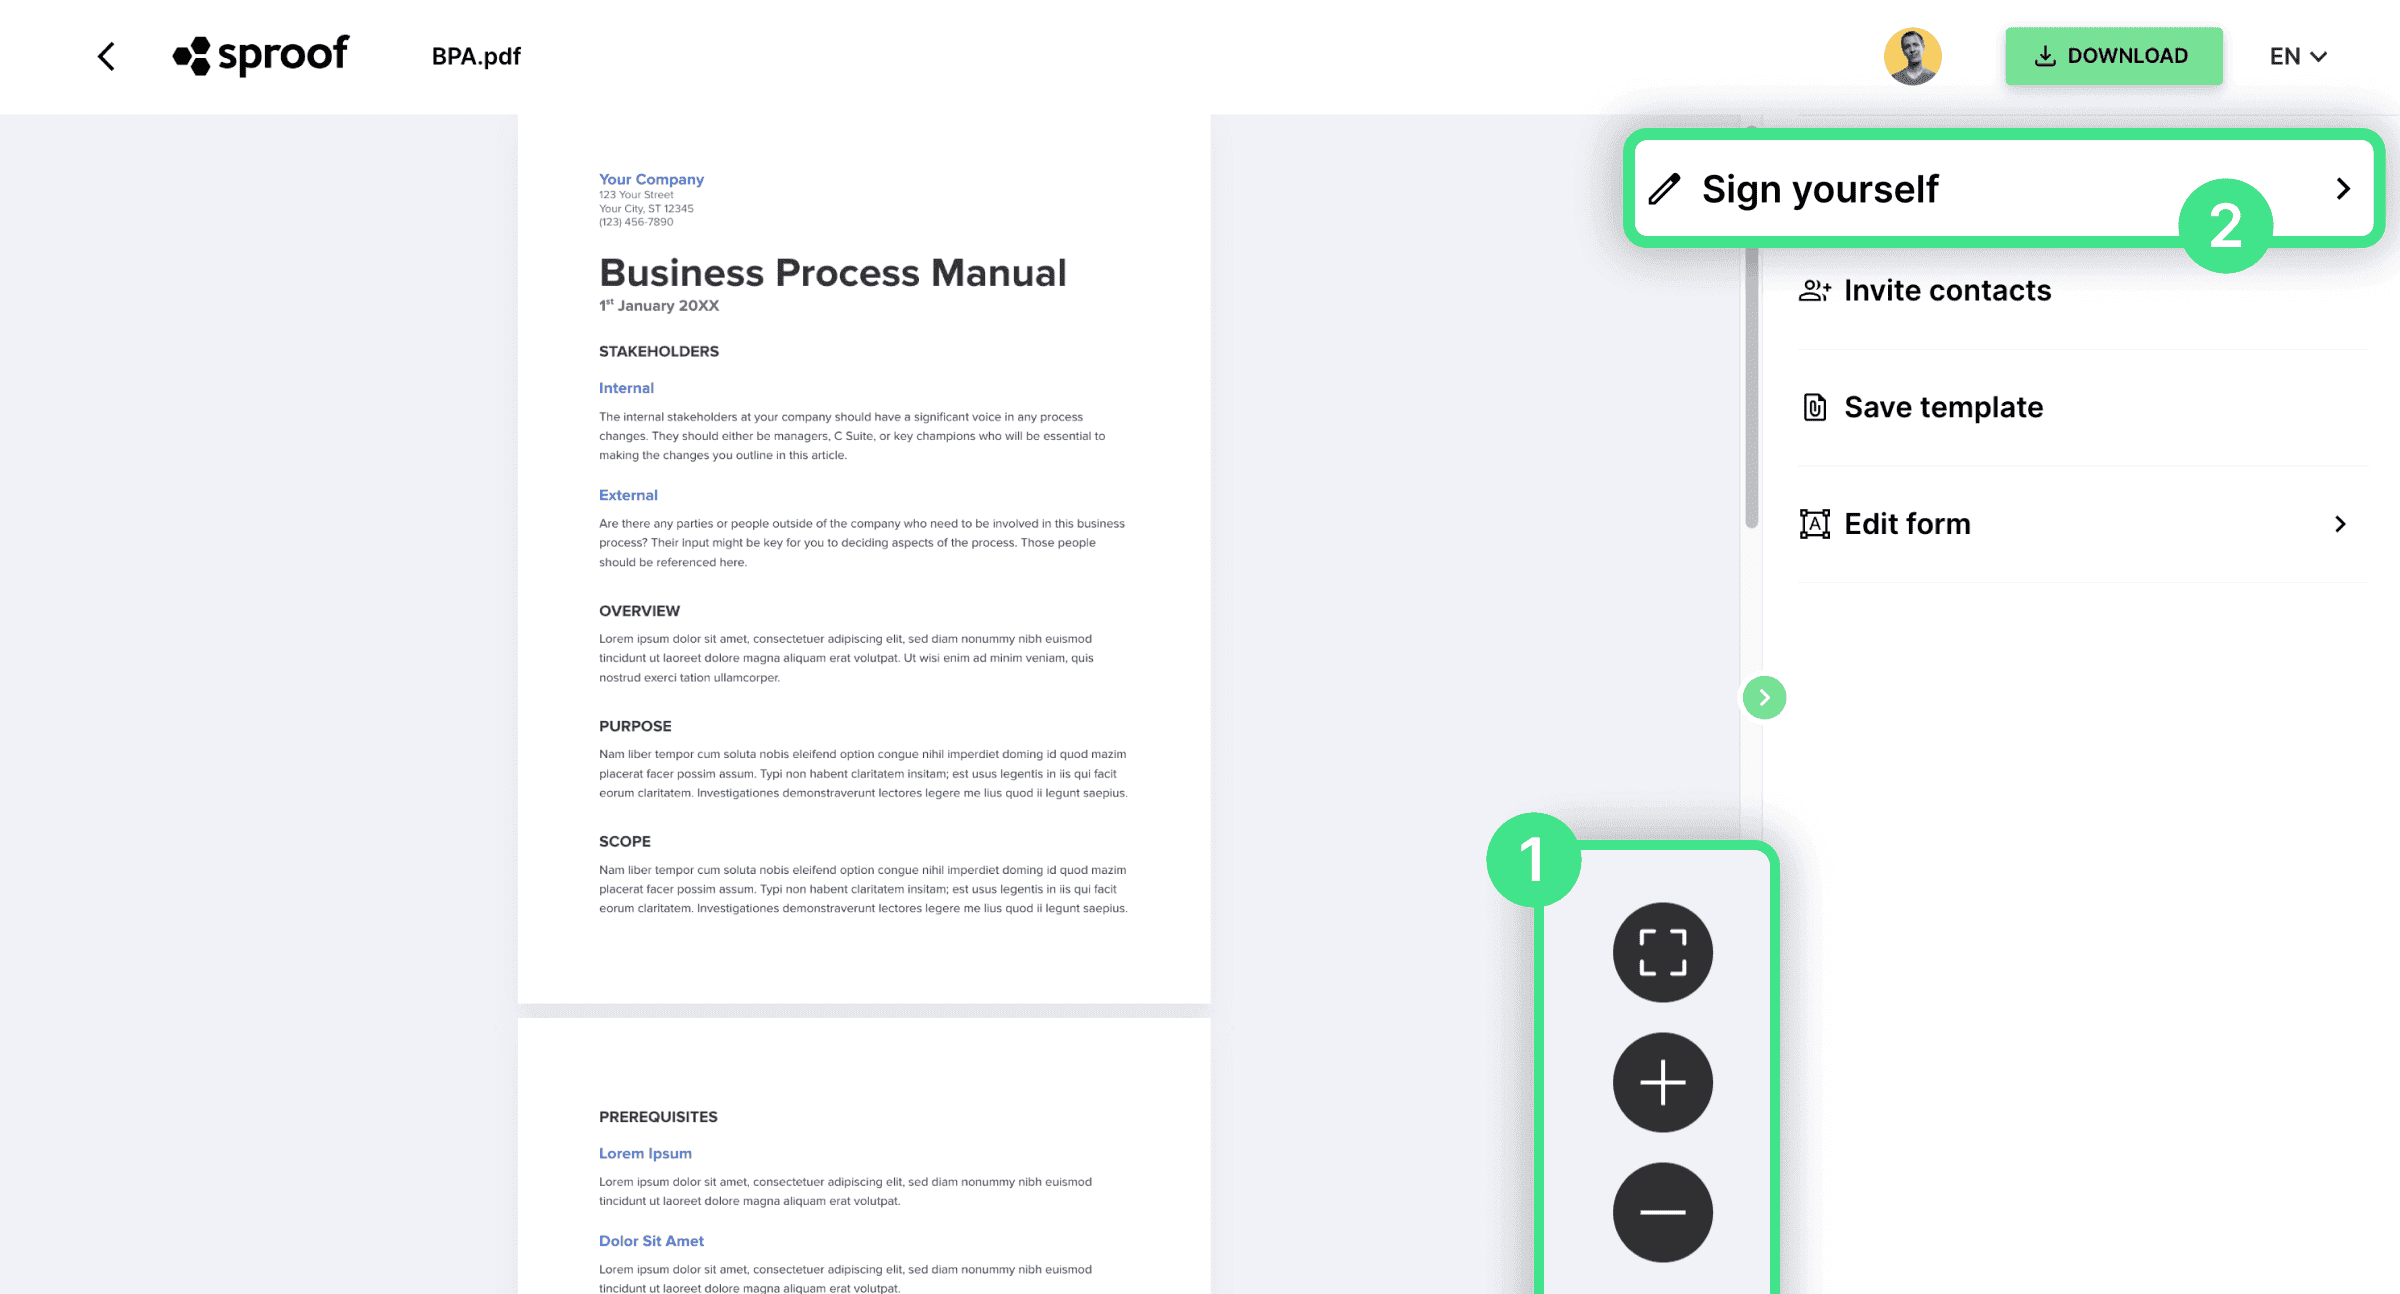
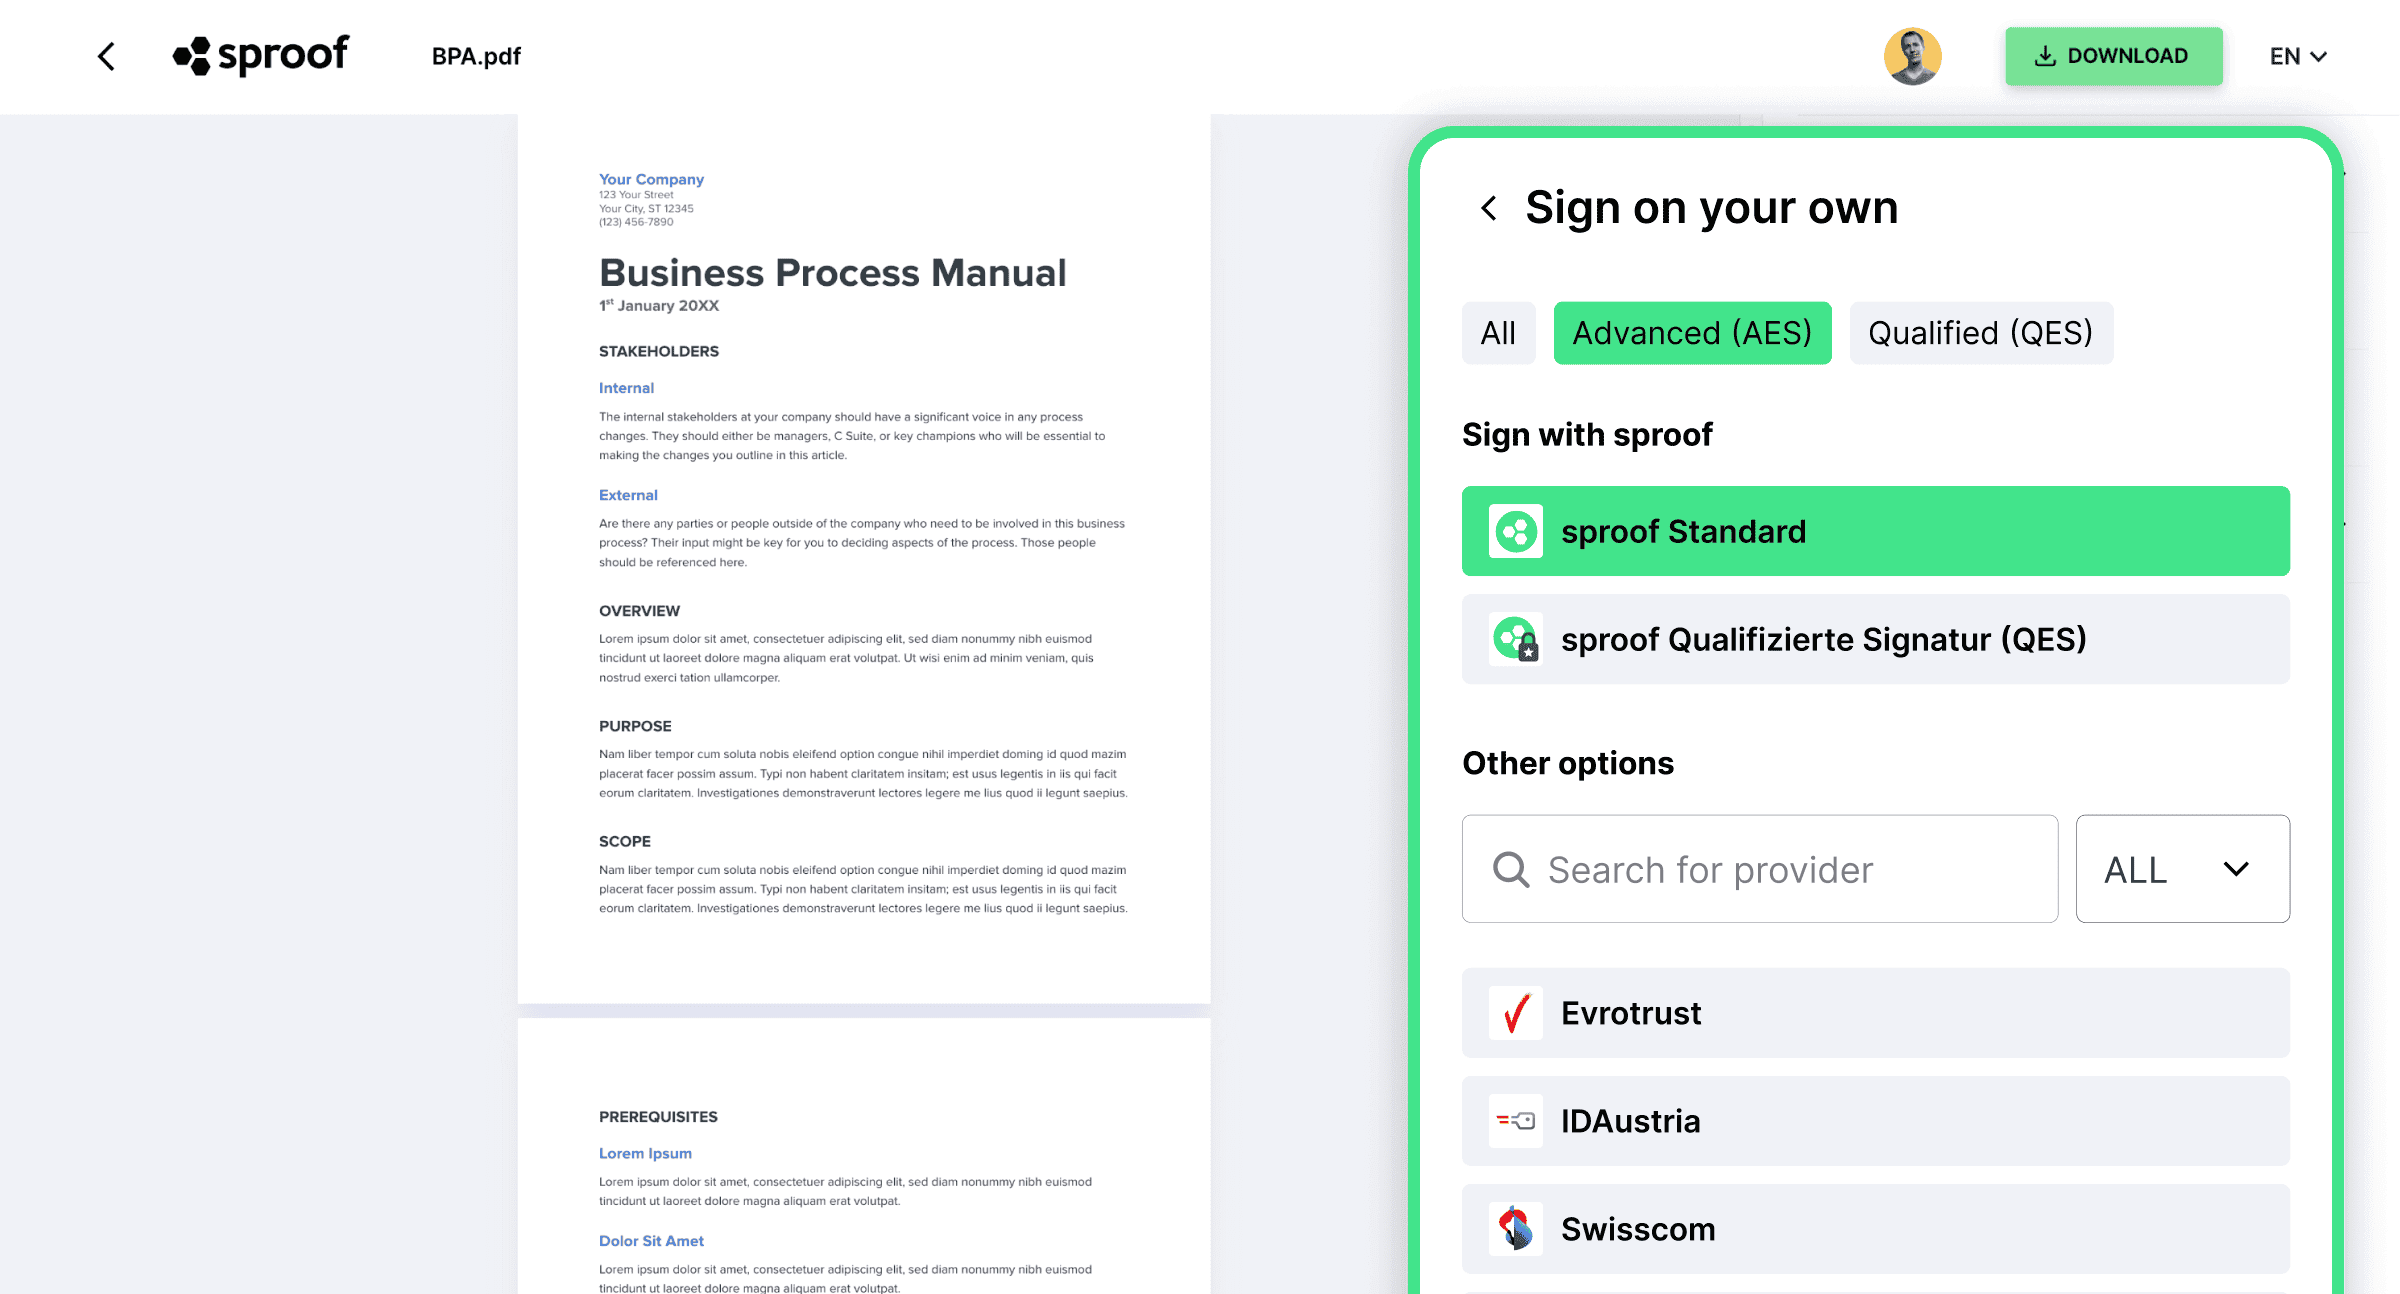
Click on "Type of signature" to select the desired signature standard. In this example, the user has only one user license and can sign the document with the "sproof standard" advanced.
If you have a User+ license with sproof sign, you also have the option to identify and use sproof sign's standard QES signature. All important information about the different signature standards and use cases can be found here .
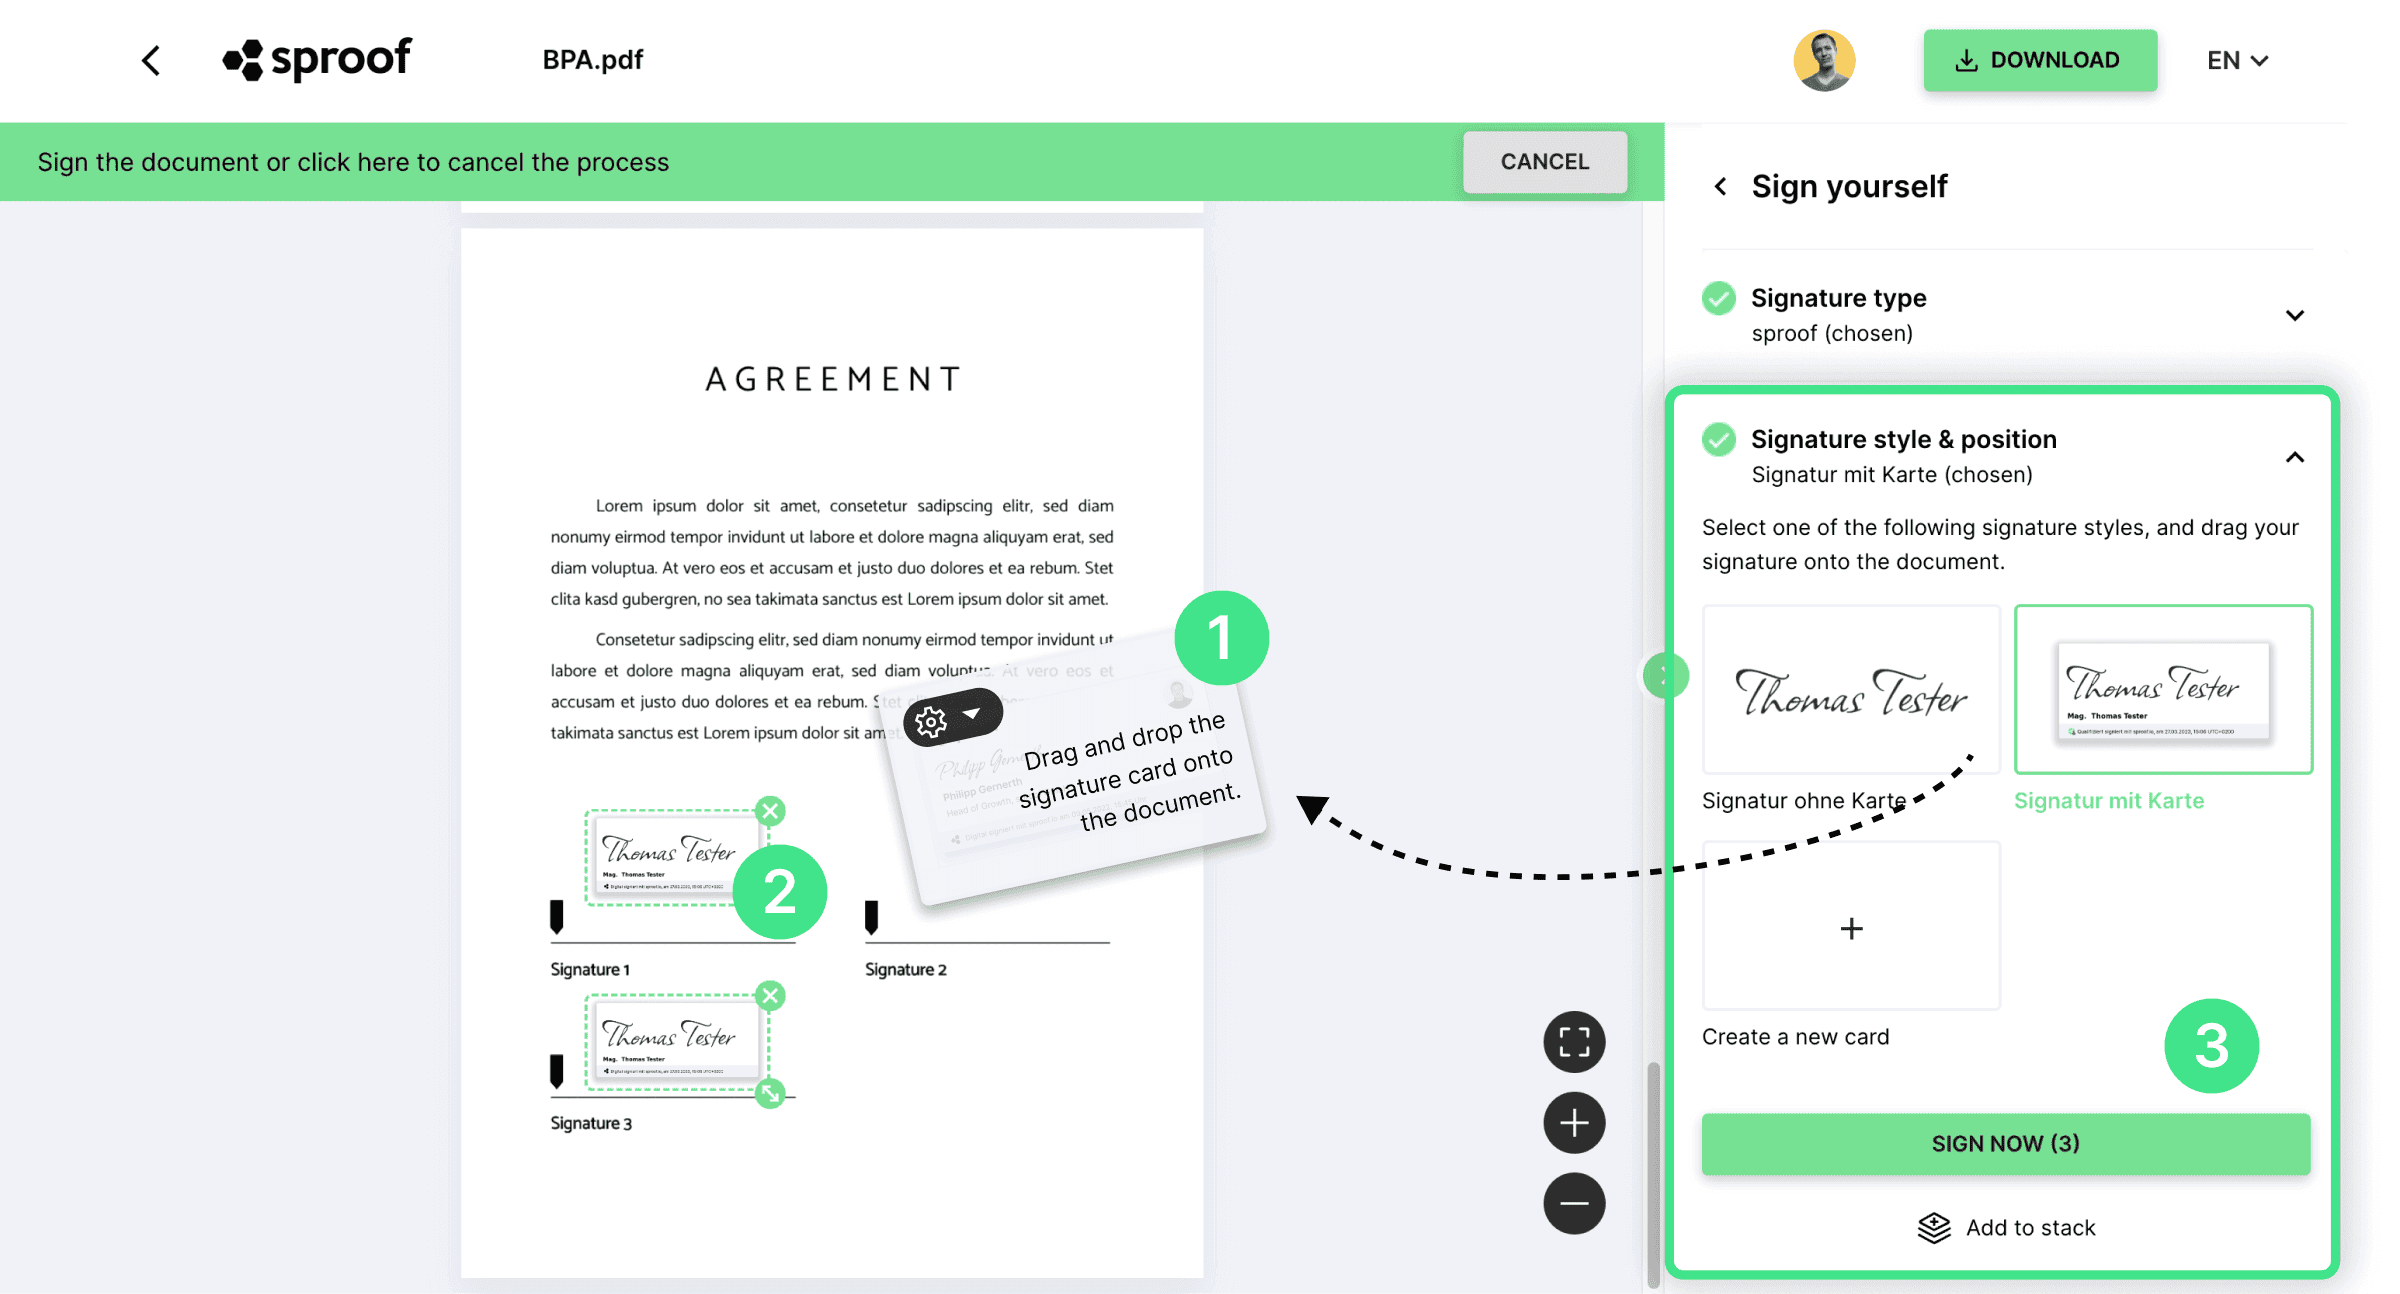
- We select the advanced signature in this example and
- place a signature card on the document. The size and placement can be customized by you.
- Click "Sign now" to complete the signature process.
You can also sign the document more times as you wish by dragging multiple signature cards onto the document.
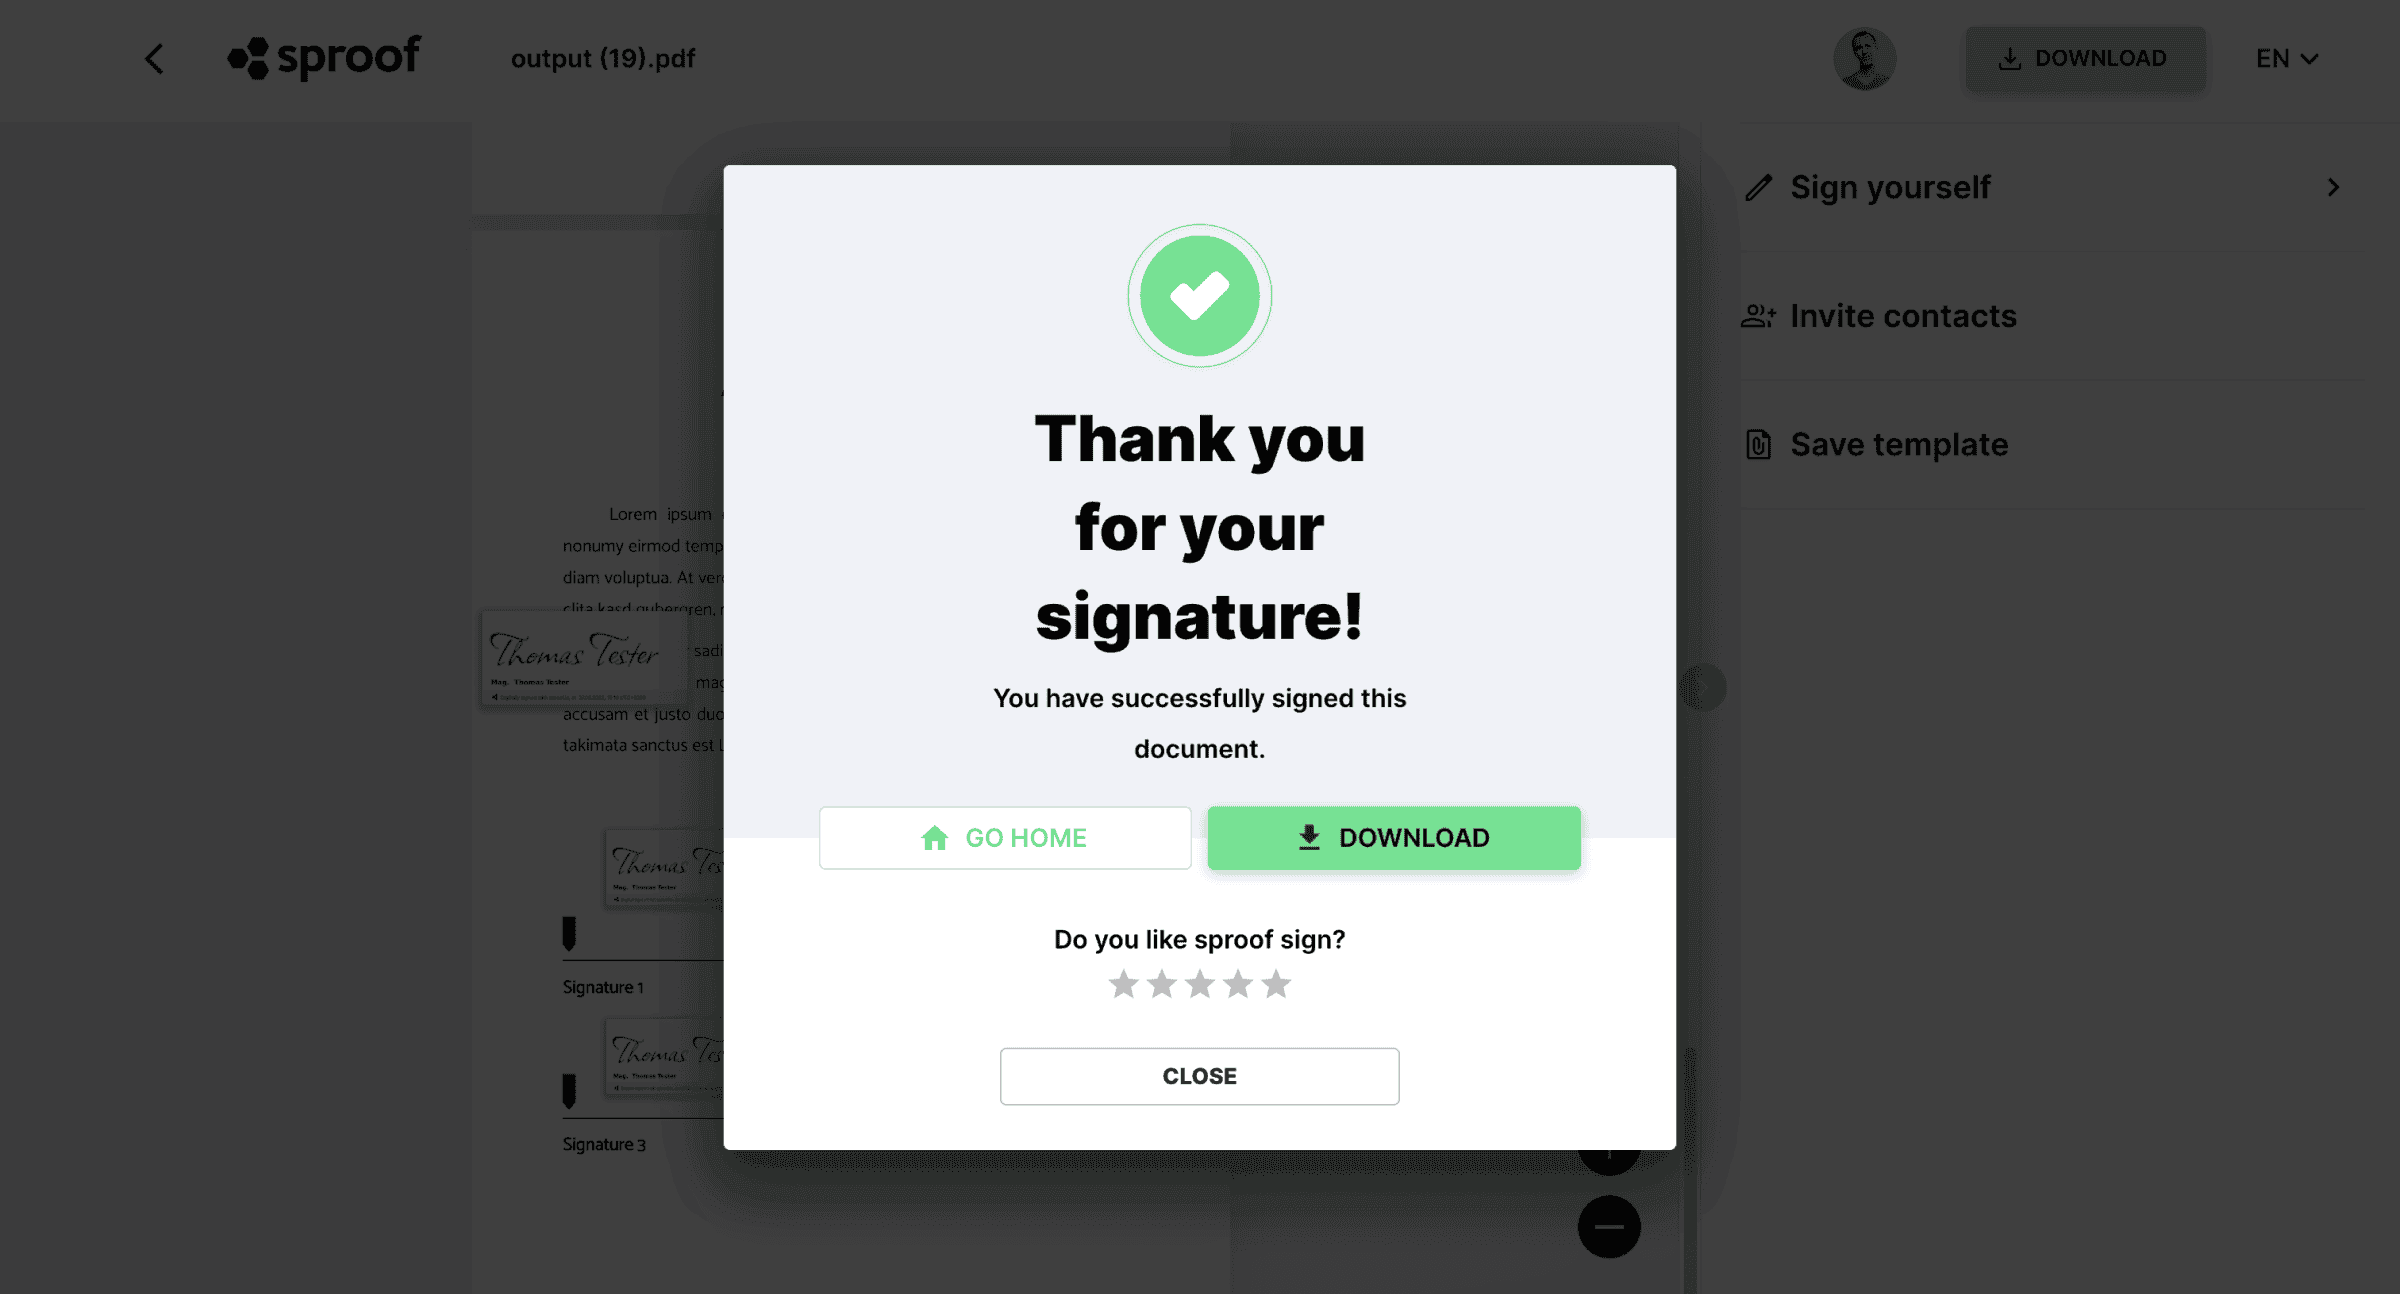
You can download your signed document immediately. In addition, the document is stored in your dashboard, which you can quickly reach via the "Go to Start" button. There, your documents are available to you at any time.
We wish you much pleasure and many uncomplicated signature processes.