Contact sales:+43 50 423
Agreement
We use cookies on our website to provide you with the best possible experience. By clicking "Accept All" you agree to the use of all cookies and to our privacy policy.
Necessary cookies
Performance cookies (incl. US-provider)
Personal Settings & Profile
You want to set up and customize your profile or personal settings in sproof sign? In this tutorial we will show you how to configure and customize your settings.
Gloria Dzida
Updated on 27.04.2023
Updated on 27.04.2023

References from the video and related links:
- Tutorial on Defining Absence & Substitution
- Tutorial on QES setup & QEs-Ident procedure
- Tutorial on Creating Individual Signature Styles

Step by Step
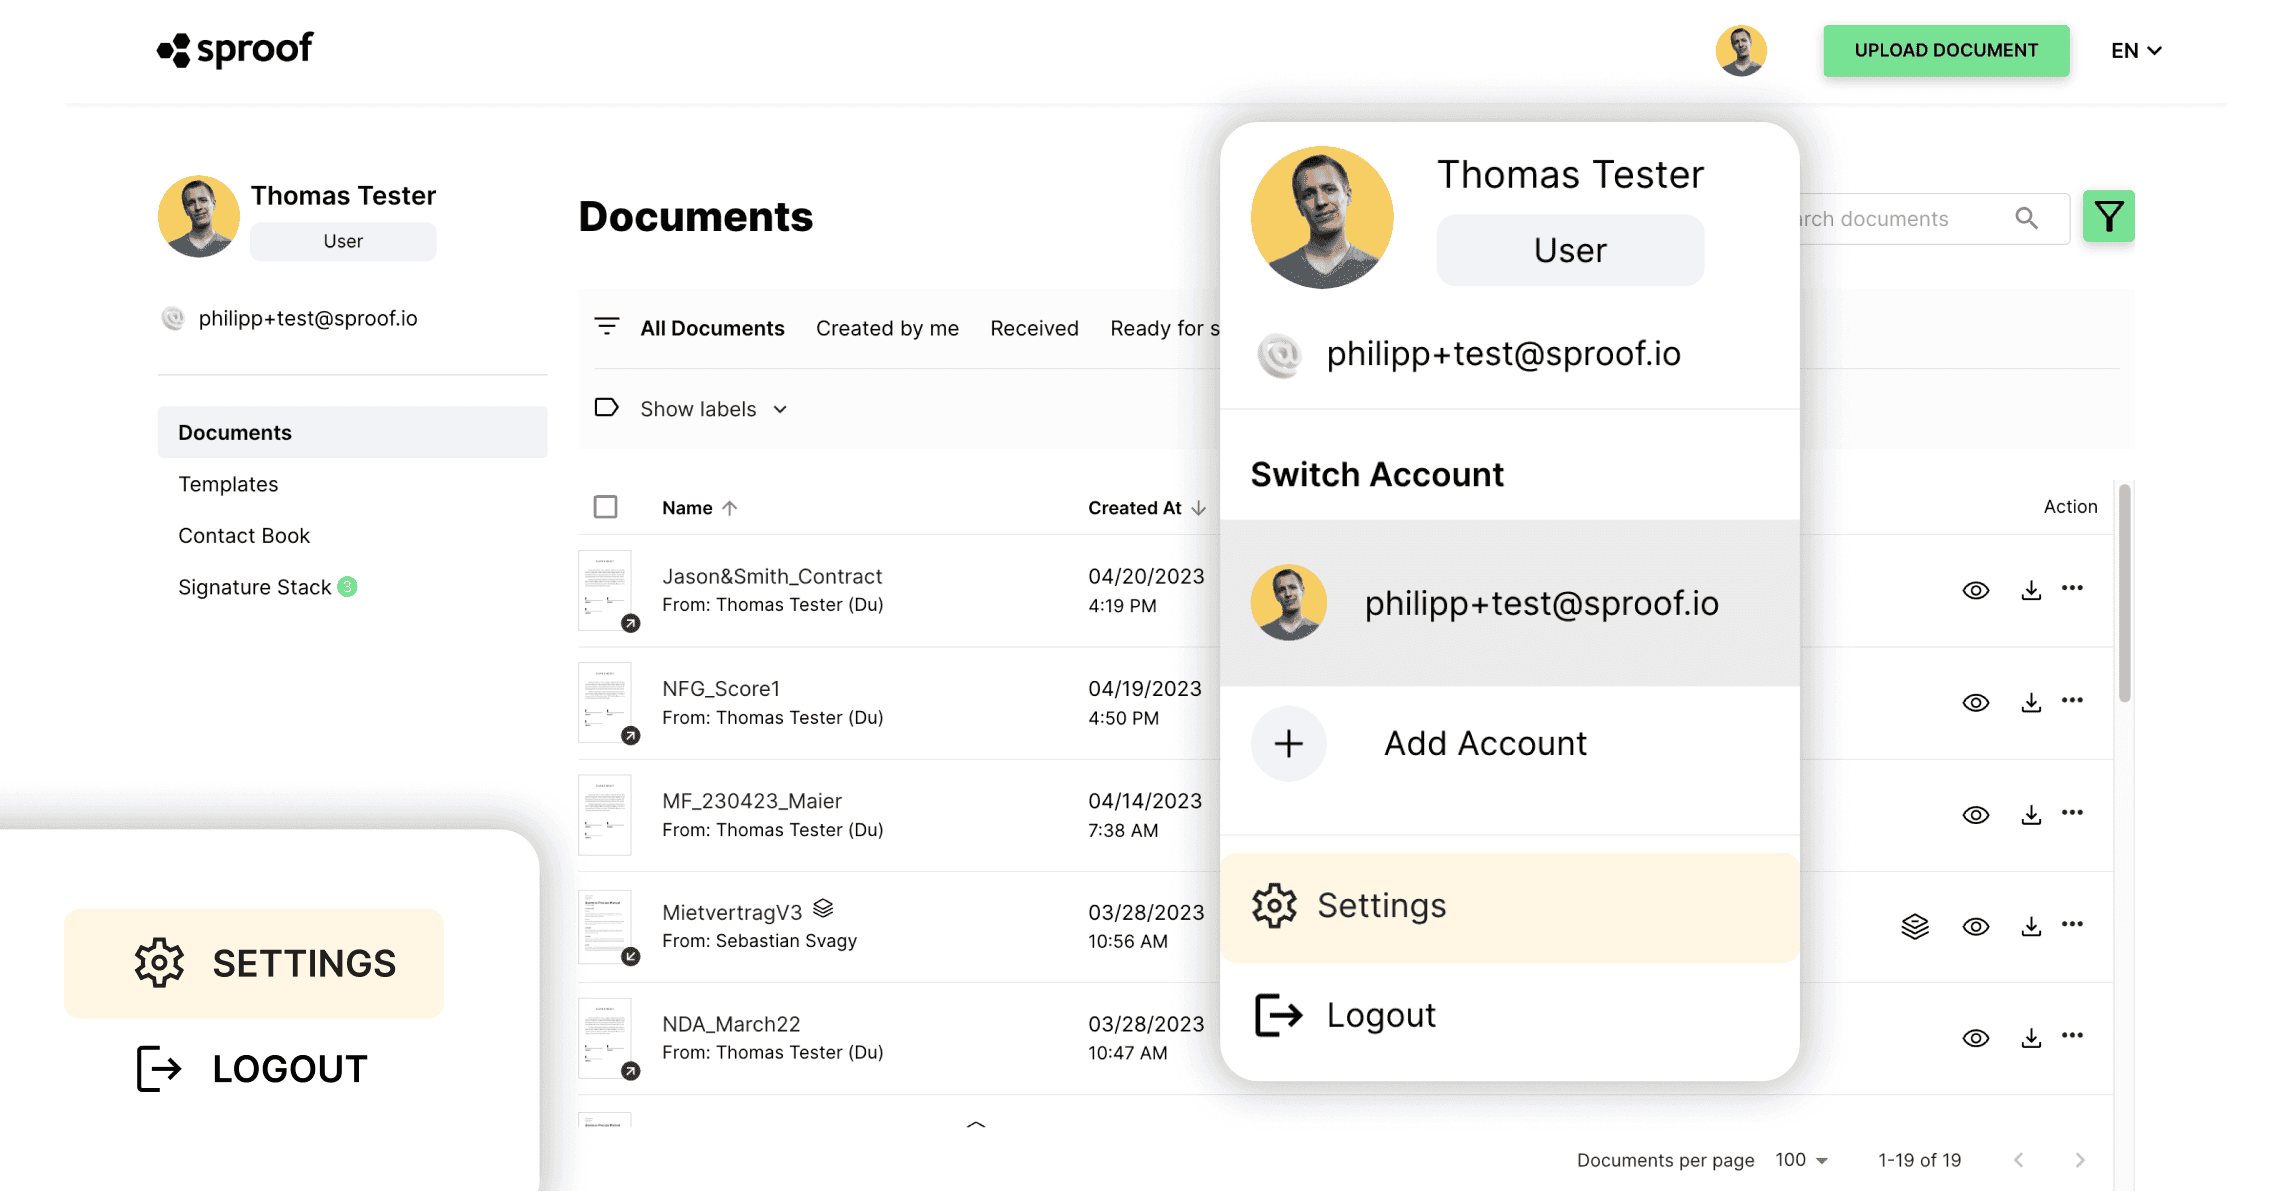
Once you have logged in and landed in the dashboard view, navigate to the settings either in the bottom left corner or in the top right corner by pressing on your avatar.
- You are in the "My Profile" tab.
- Here you can set and change your avatar image and password can reset.
- Title, First name, Last name, Job title and Language can be customized here.
This information is relevant for your signature card, for example.
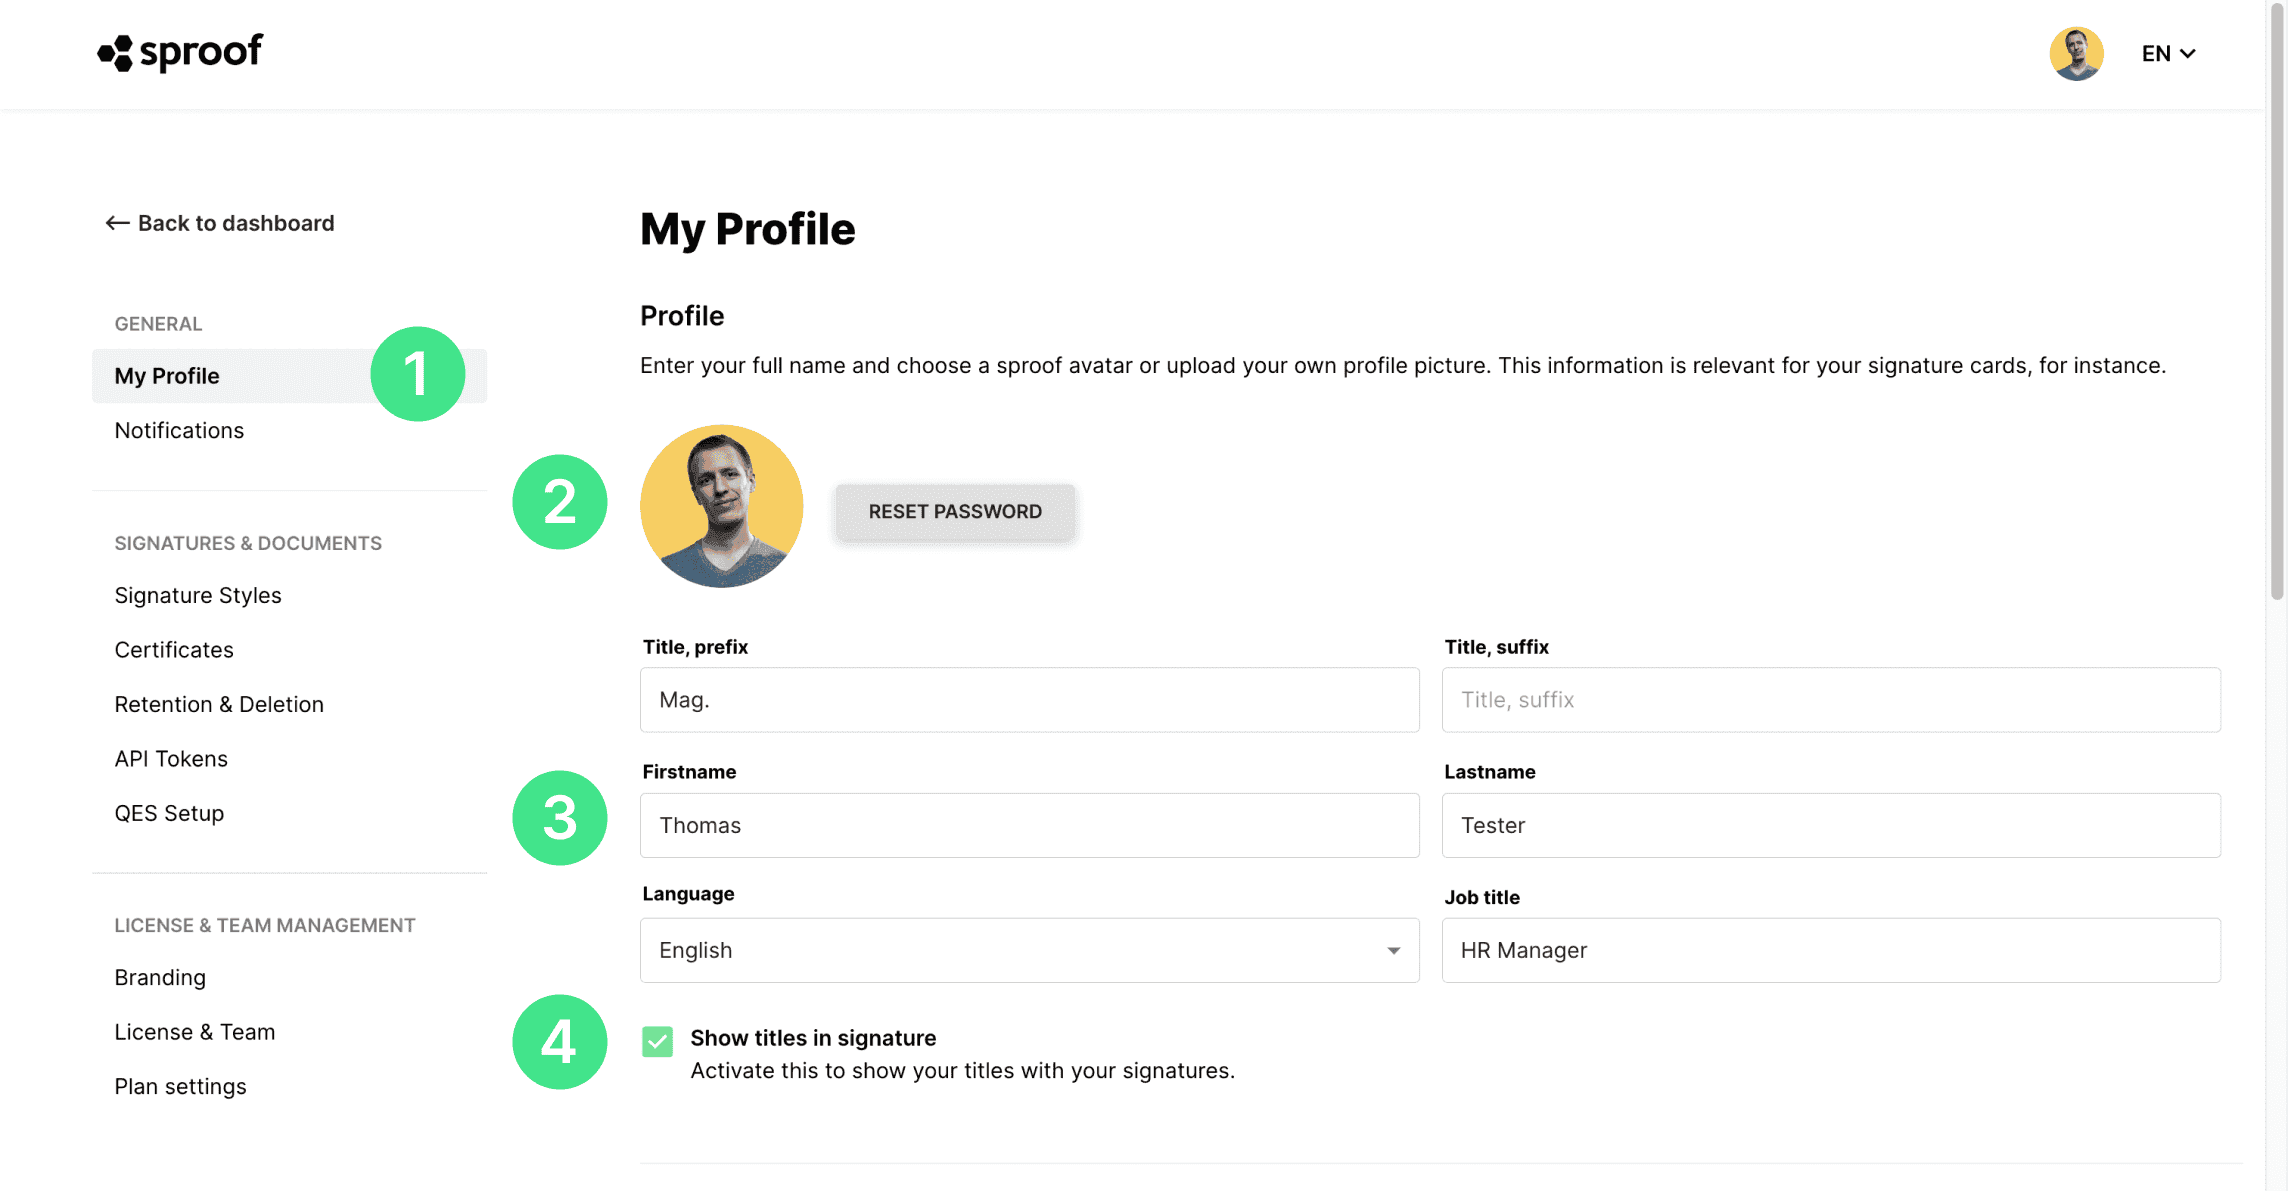
- Activate this checkbox if you want to display your title in the signature.
- In the **"Absent"**section you can enter your absence and set a substitution. You can find a detailed tutorial on how to do this here .
- In the next section, you can add more email addresses to get all signature requests in ONE dashboard.
Fill in the email address and description field and click "Add Email Address". Then check their email inbox and confirm your email address.
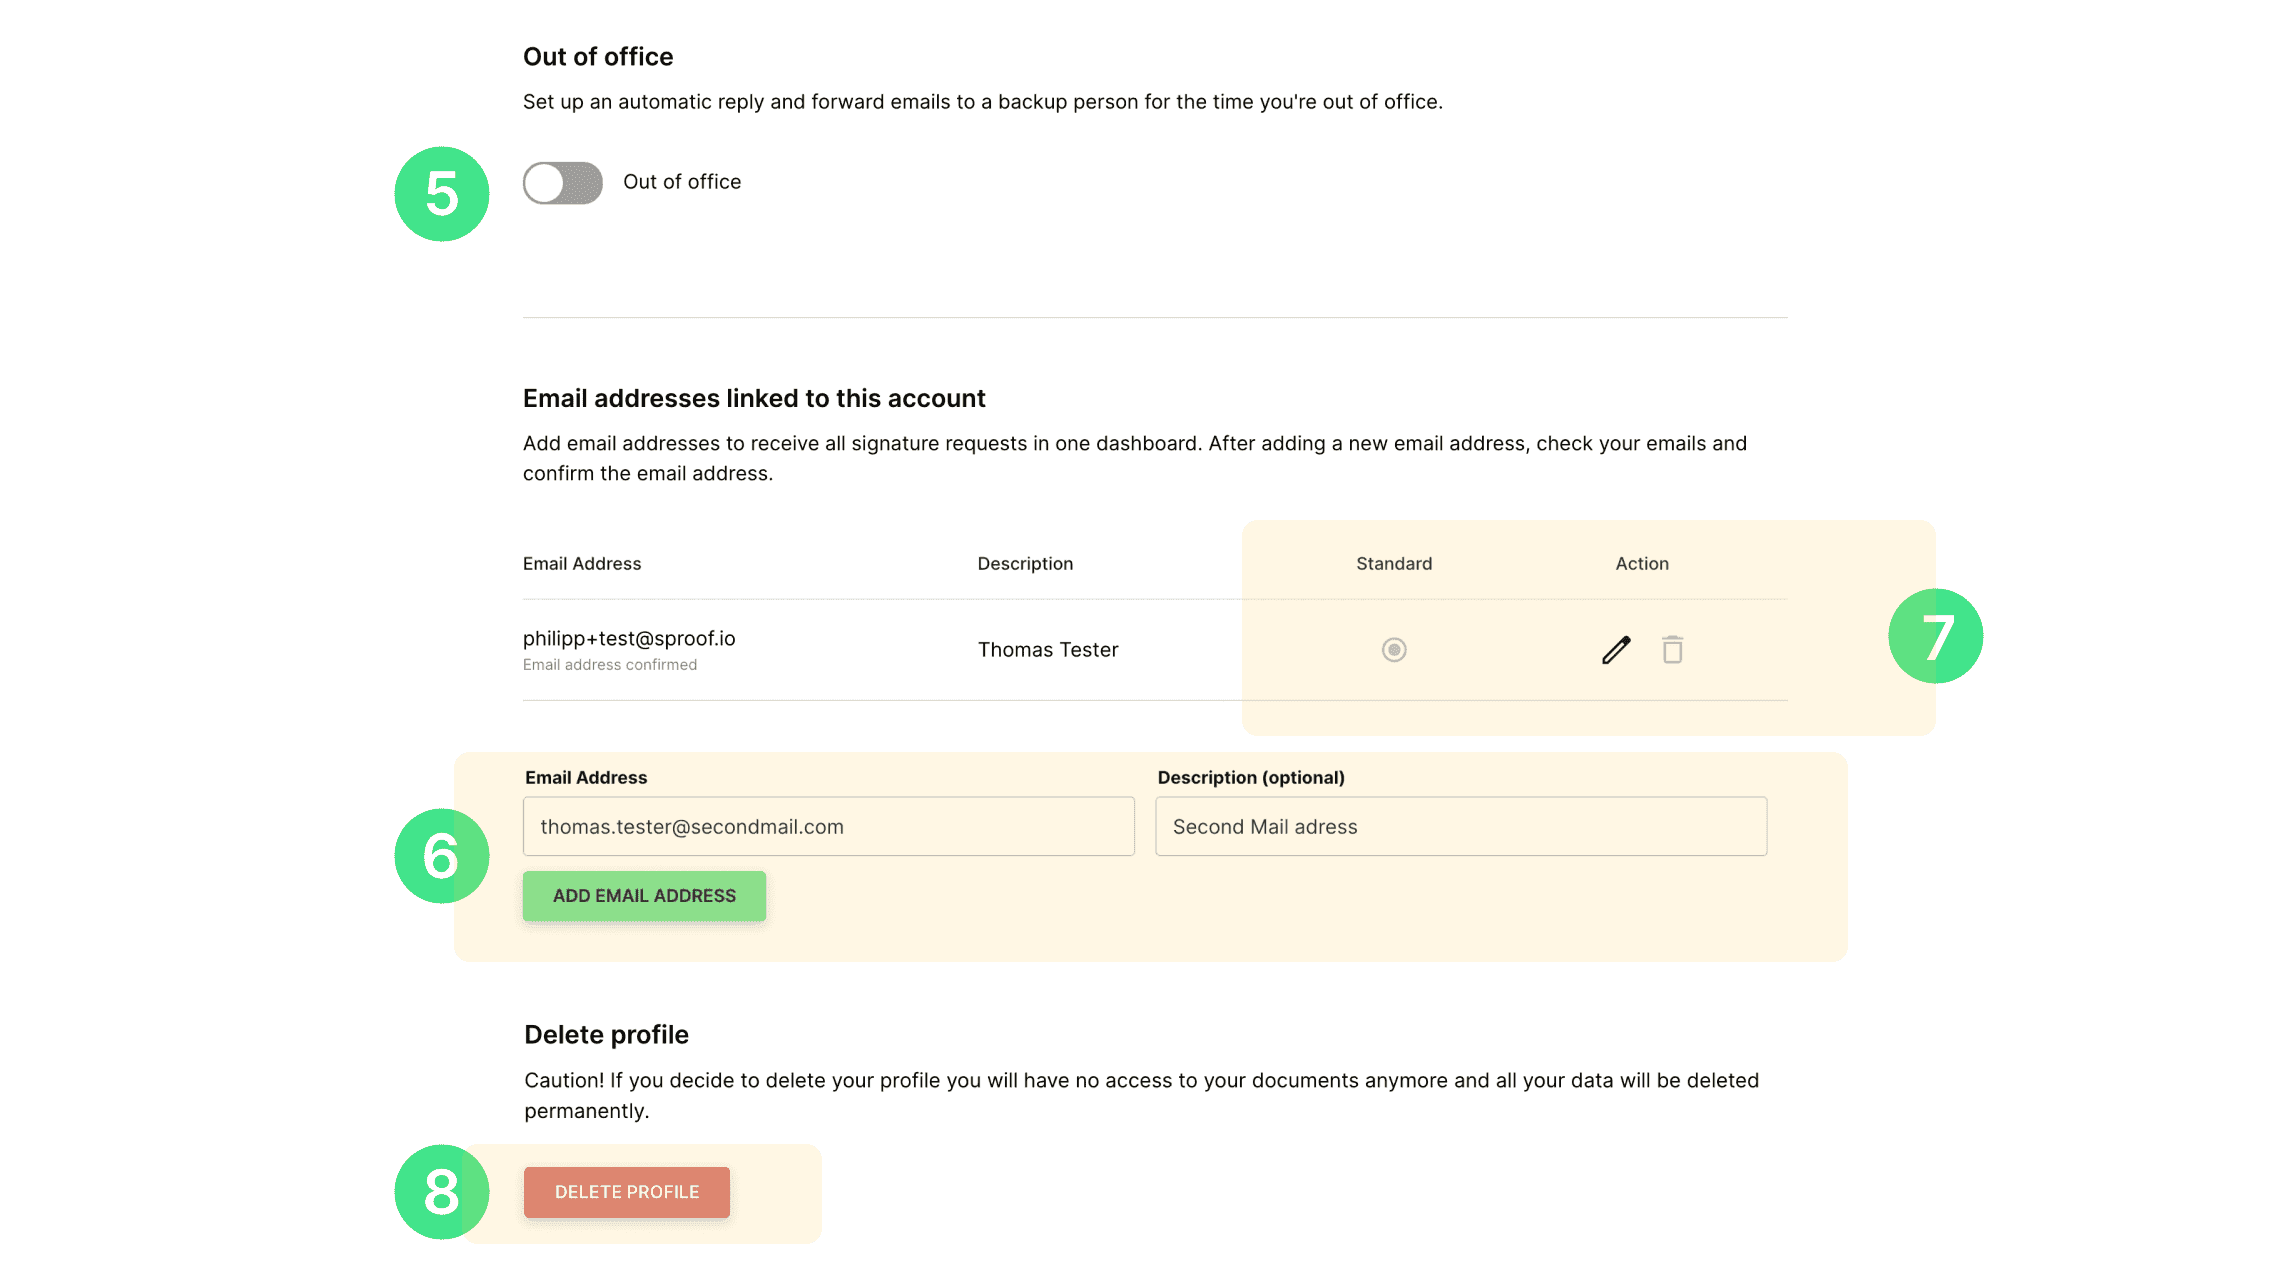
- By clicking on the pencil icon, the entry can be edited. By clicking on the recycle bin, email addresses can also be deleted again. The default email address associated with the account can neither be edited nor deleted.
- At the end of the profile settings, the profile can be deleted. But **Caution!**If you decide to delete your profile, you will no longer have access to your documents and all your data will be permanently deleted.
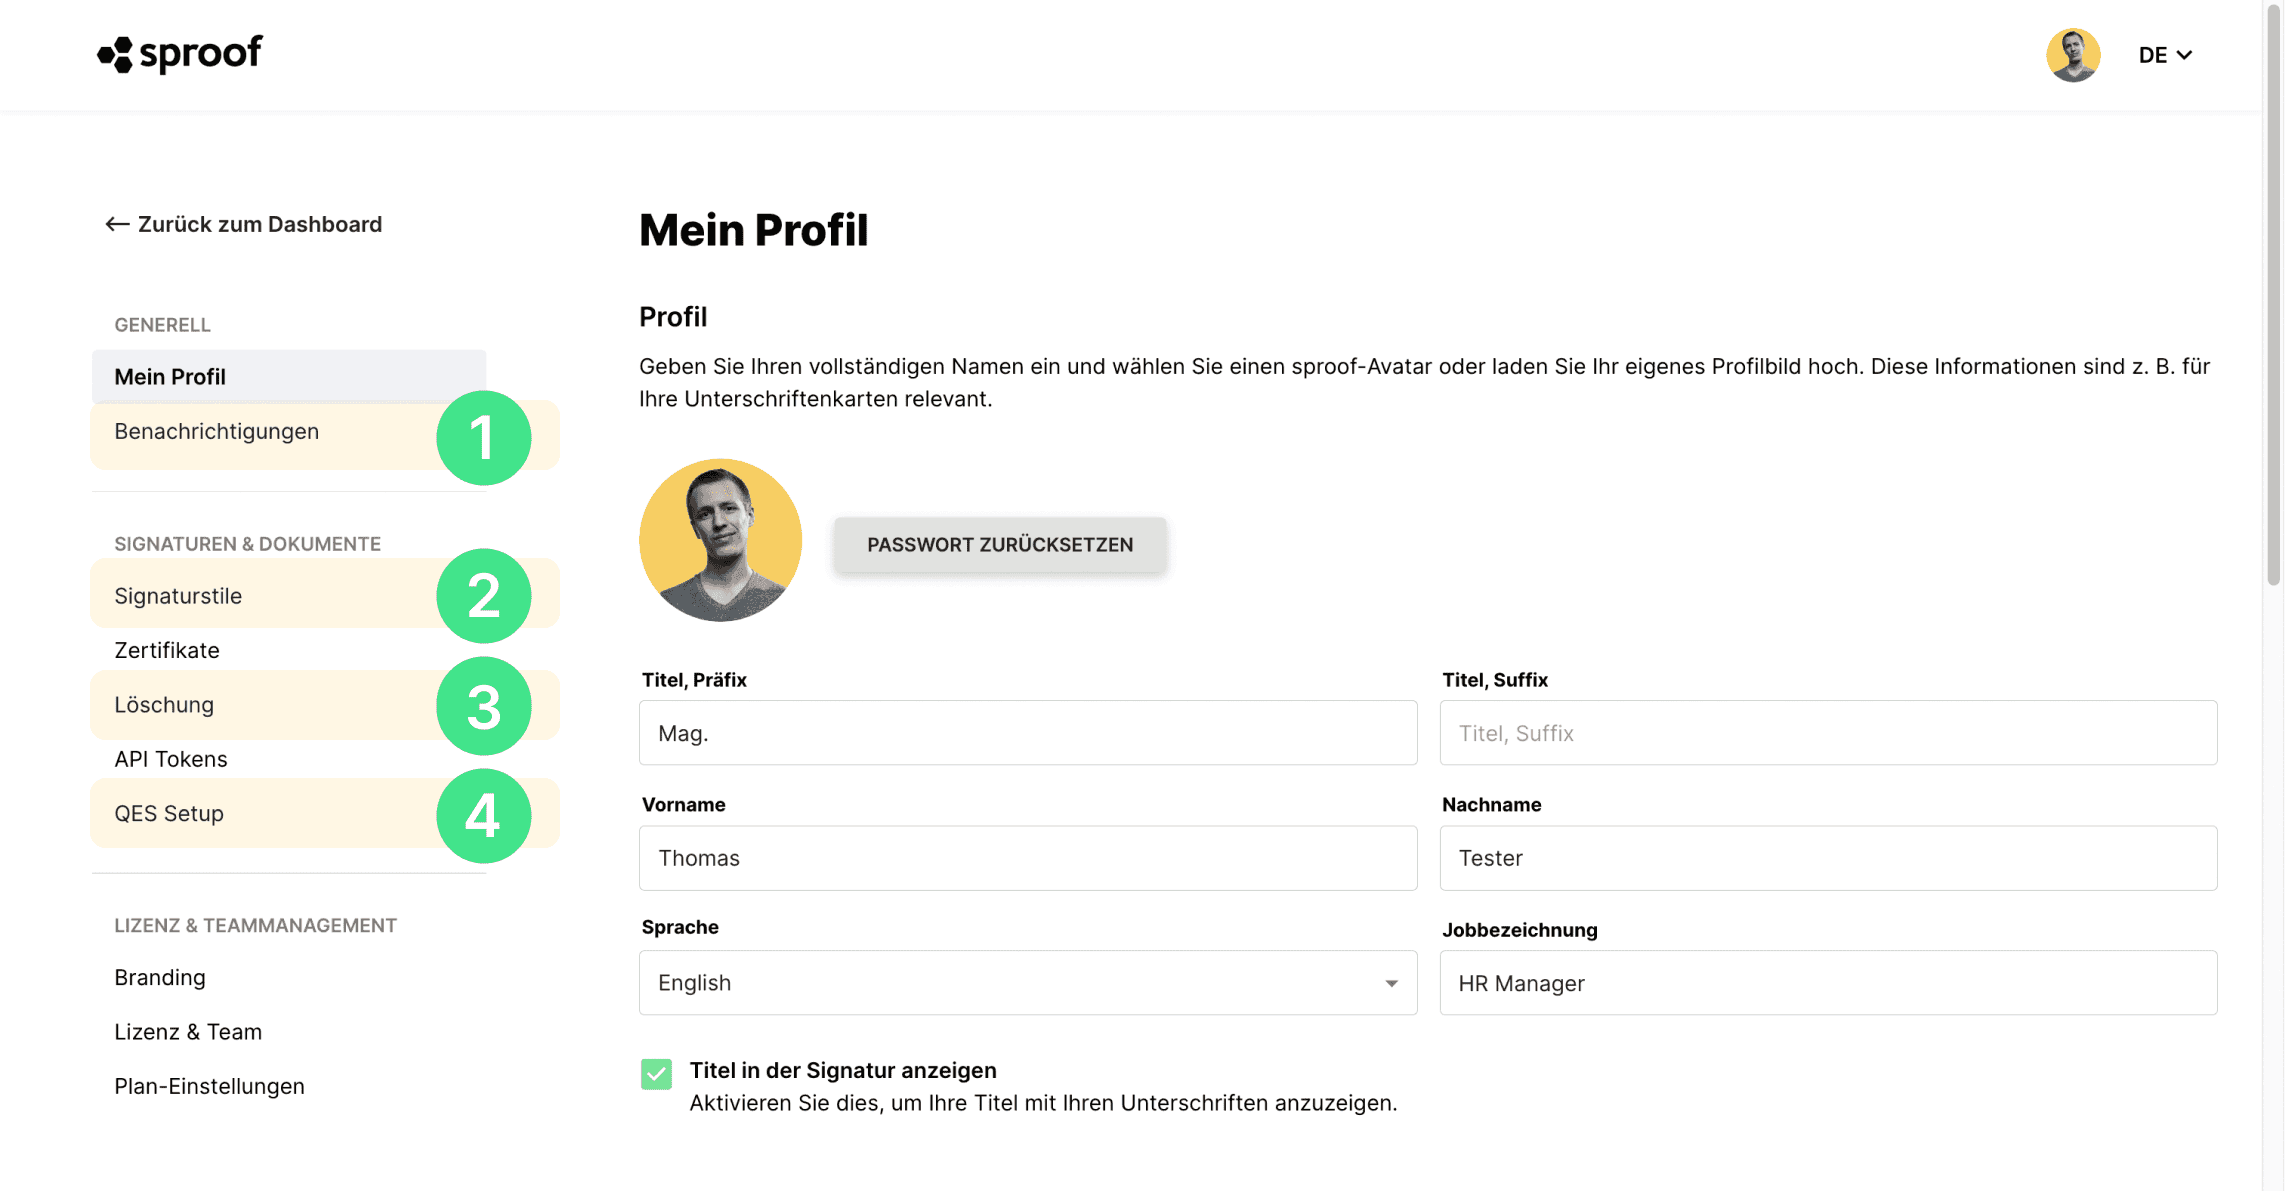
- Now scroll back to the top of the page to switch to "Notifications" on the left. Here you can specify which notifications you would like to receive from sproof sign via email.
- To manage your signature styles, click on "Signature styles" on the left under the "Signatures & Documents" tab. Here you will see the two default signature styles "Signature without card" and "Signature with card". These signature styles can be selected and placed on the document when signing. In the free version of sproof sign, you can create an additional signature style. With a paid plan, you can create unlimited signature styles. To create a new signature style, click on "create new style". In sproof sign there are several ways to create your own personal and individual signature styles. For this you can find here again a separate tutorial.
- If you click on "Delete" in the menu on the left, you can define when you want your documents to be deleted automatically. It can be decided between "delete after 30 days" and "no automatic deletion".
- Last but not least, you can click "QES Setup" on the left to identify yourself for sproof sign's personal qualified signature, view your identification date and start a re-identification. We also have a proprietary tutorial for you to do this.