Agreement
We use cookies on our website to provide you with the best possible experience. By clicking "Accept All" you agree to the use of all cookies and to our privacy policy.
Create & manage contacts
In this tutorial we would like to show you how to add and manage contacts in sproof sign.
Updated on 27.04.2023

References from the video and related links:
- Tutorial on Signing yourself
- Tutorial on Collecting signatures (without workflow)
- Tutorial on Collecting signatures (with workflow)

Step by step
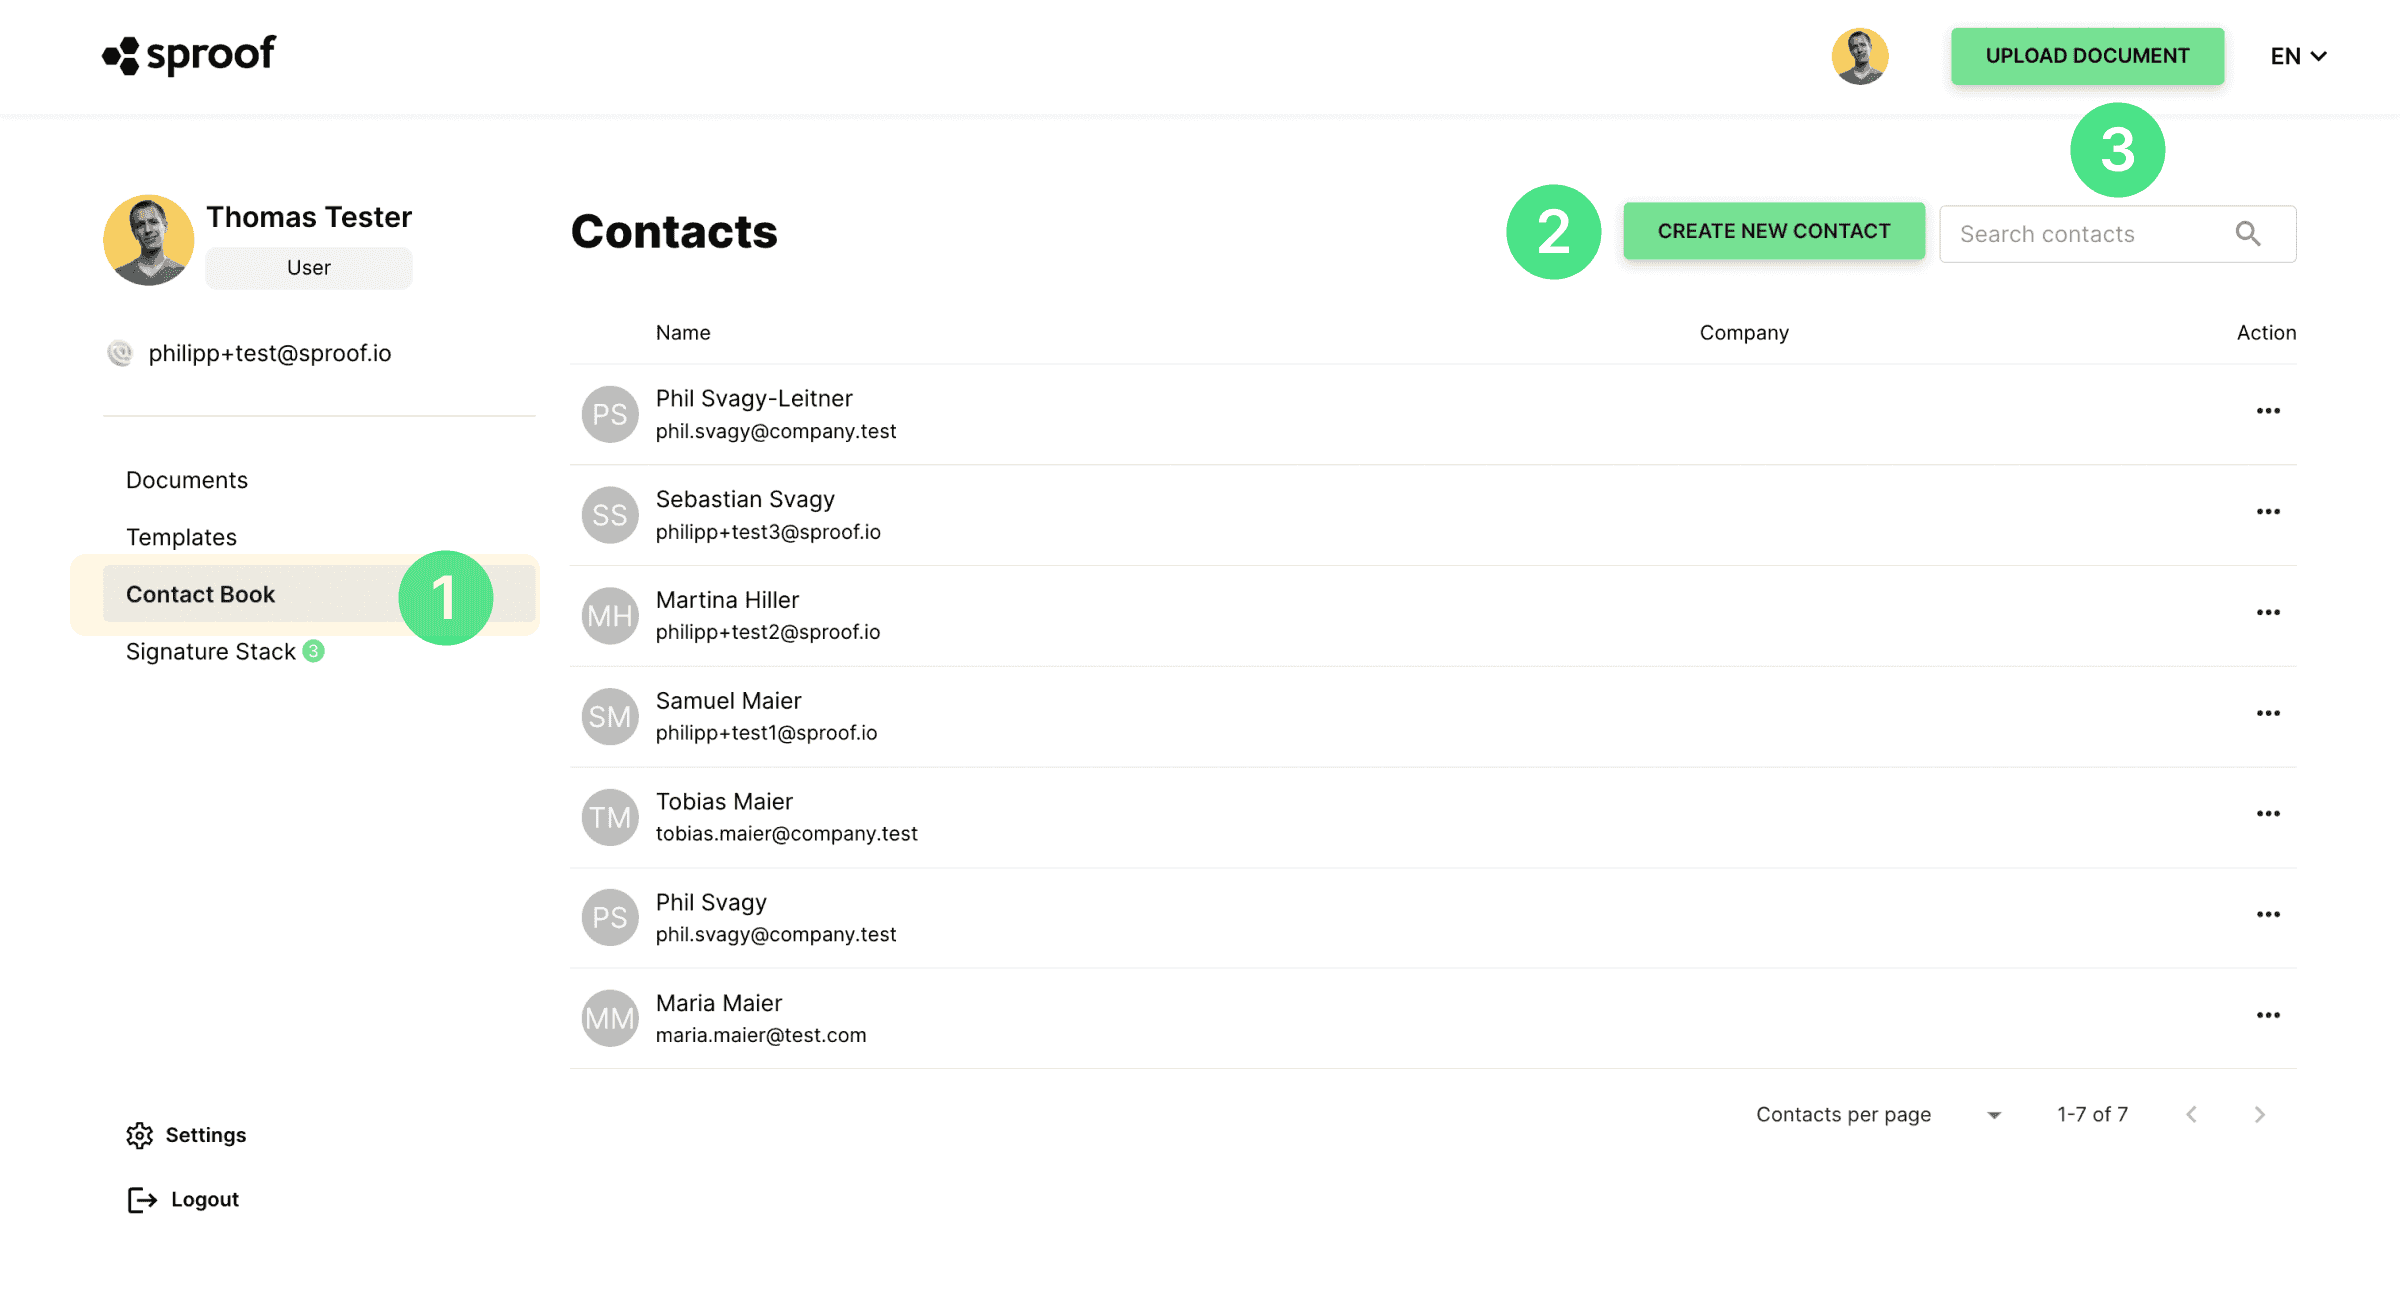
- Once you have logged in and landed in the Dashboard view, navigate to the "Contact Book" on the left. Here you will see all the contacts you have already invited to sign.
- To add another contact to the contact book, click on the "Create new contact" tab on the top right.
- Here you can search for existing contacts.
When you create a new contact, you can enter in this window all the data of the person you want to save as a contact. The fields "First Name", "Last Name" and "Primary Email Address" are mandatory to fill in in order to save the contact.
Under "Additional Contact Information" you can enter additional data, such as the person's company and address.
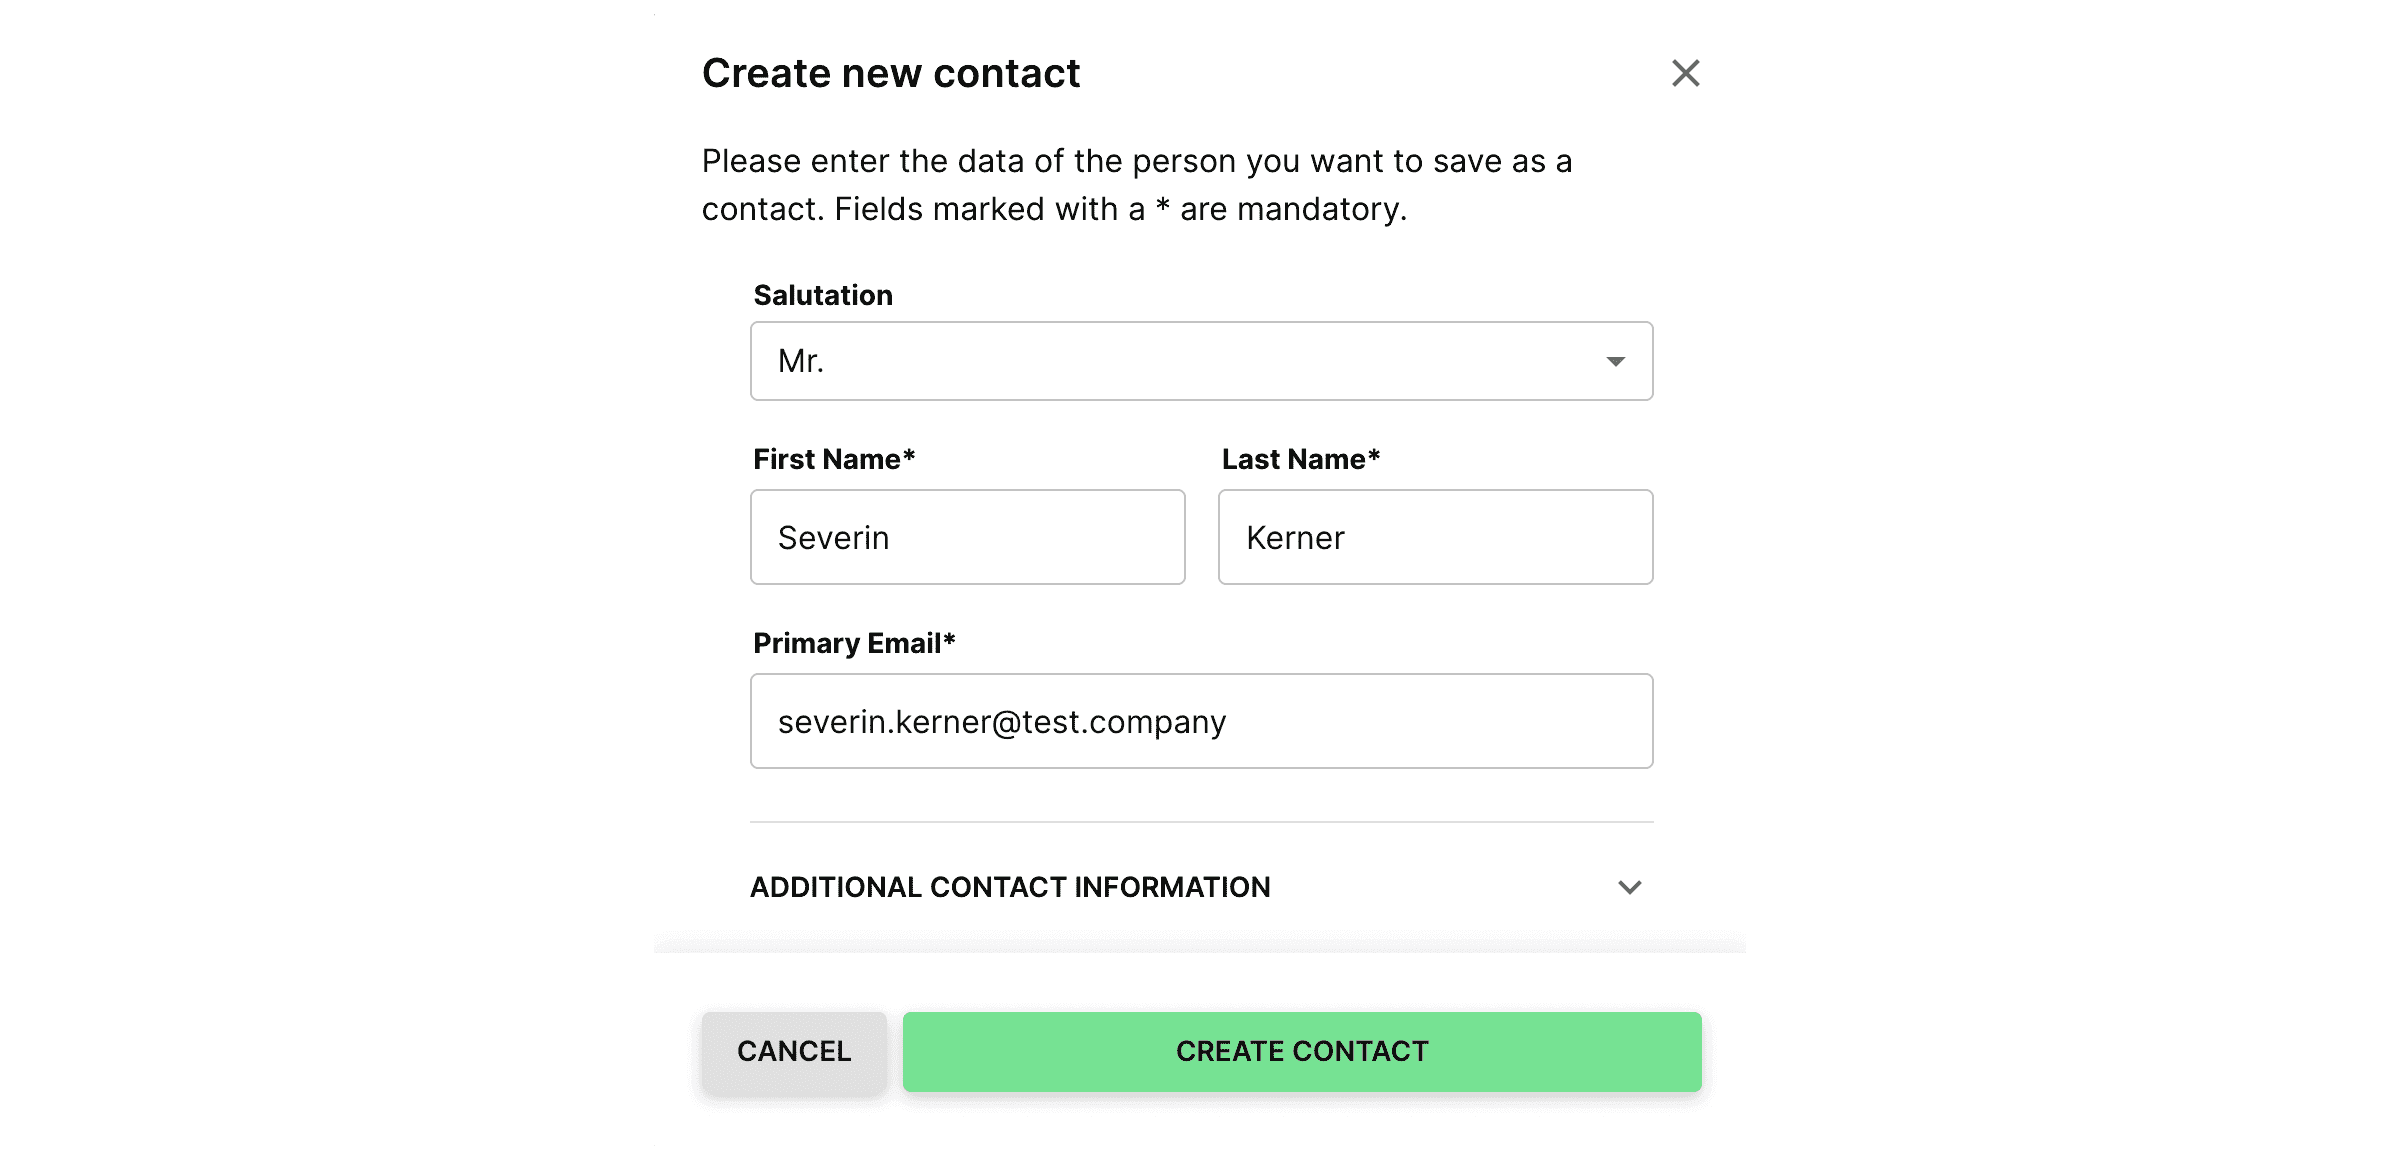
Once you have entered all the desired data, you can click on "Create contact" to add the contact. A new entry has now been entered at the top of the contact list.
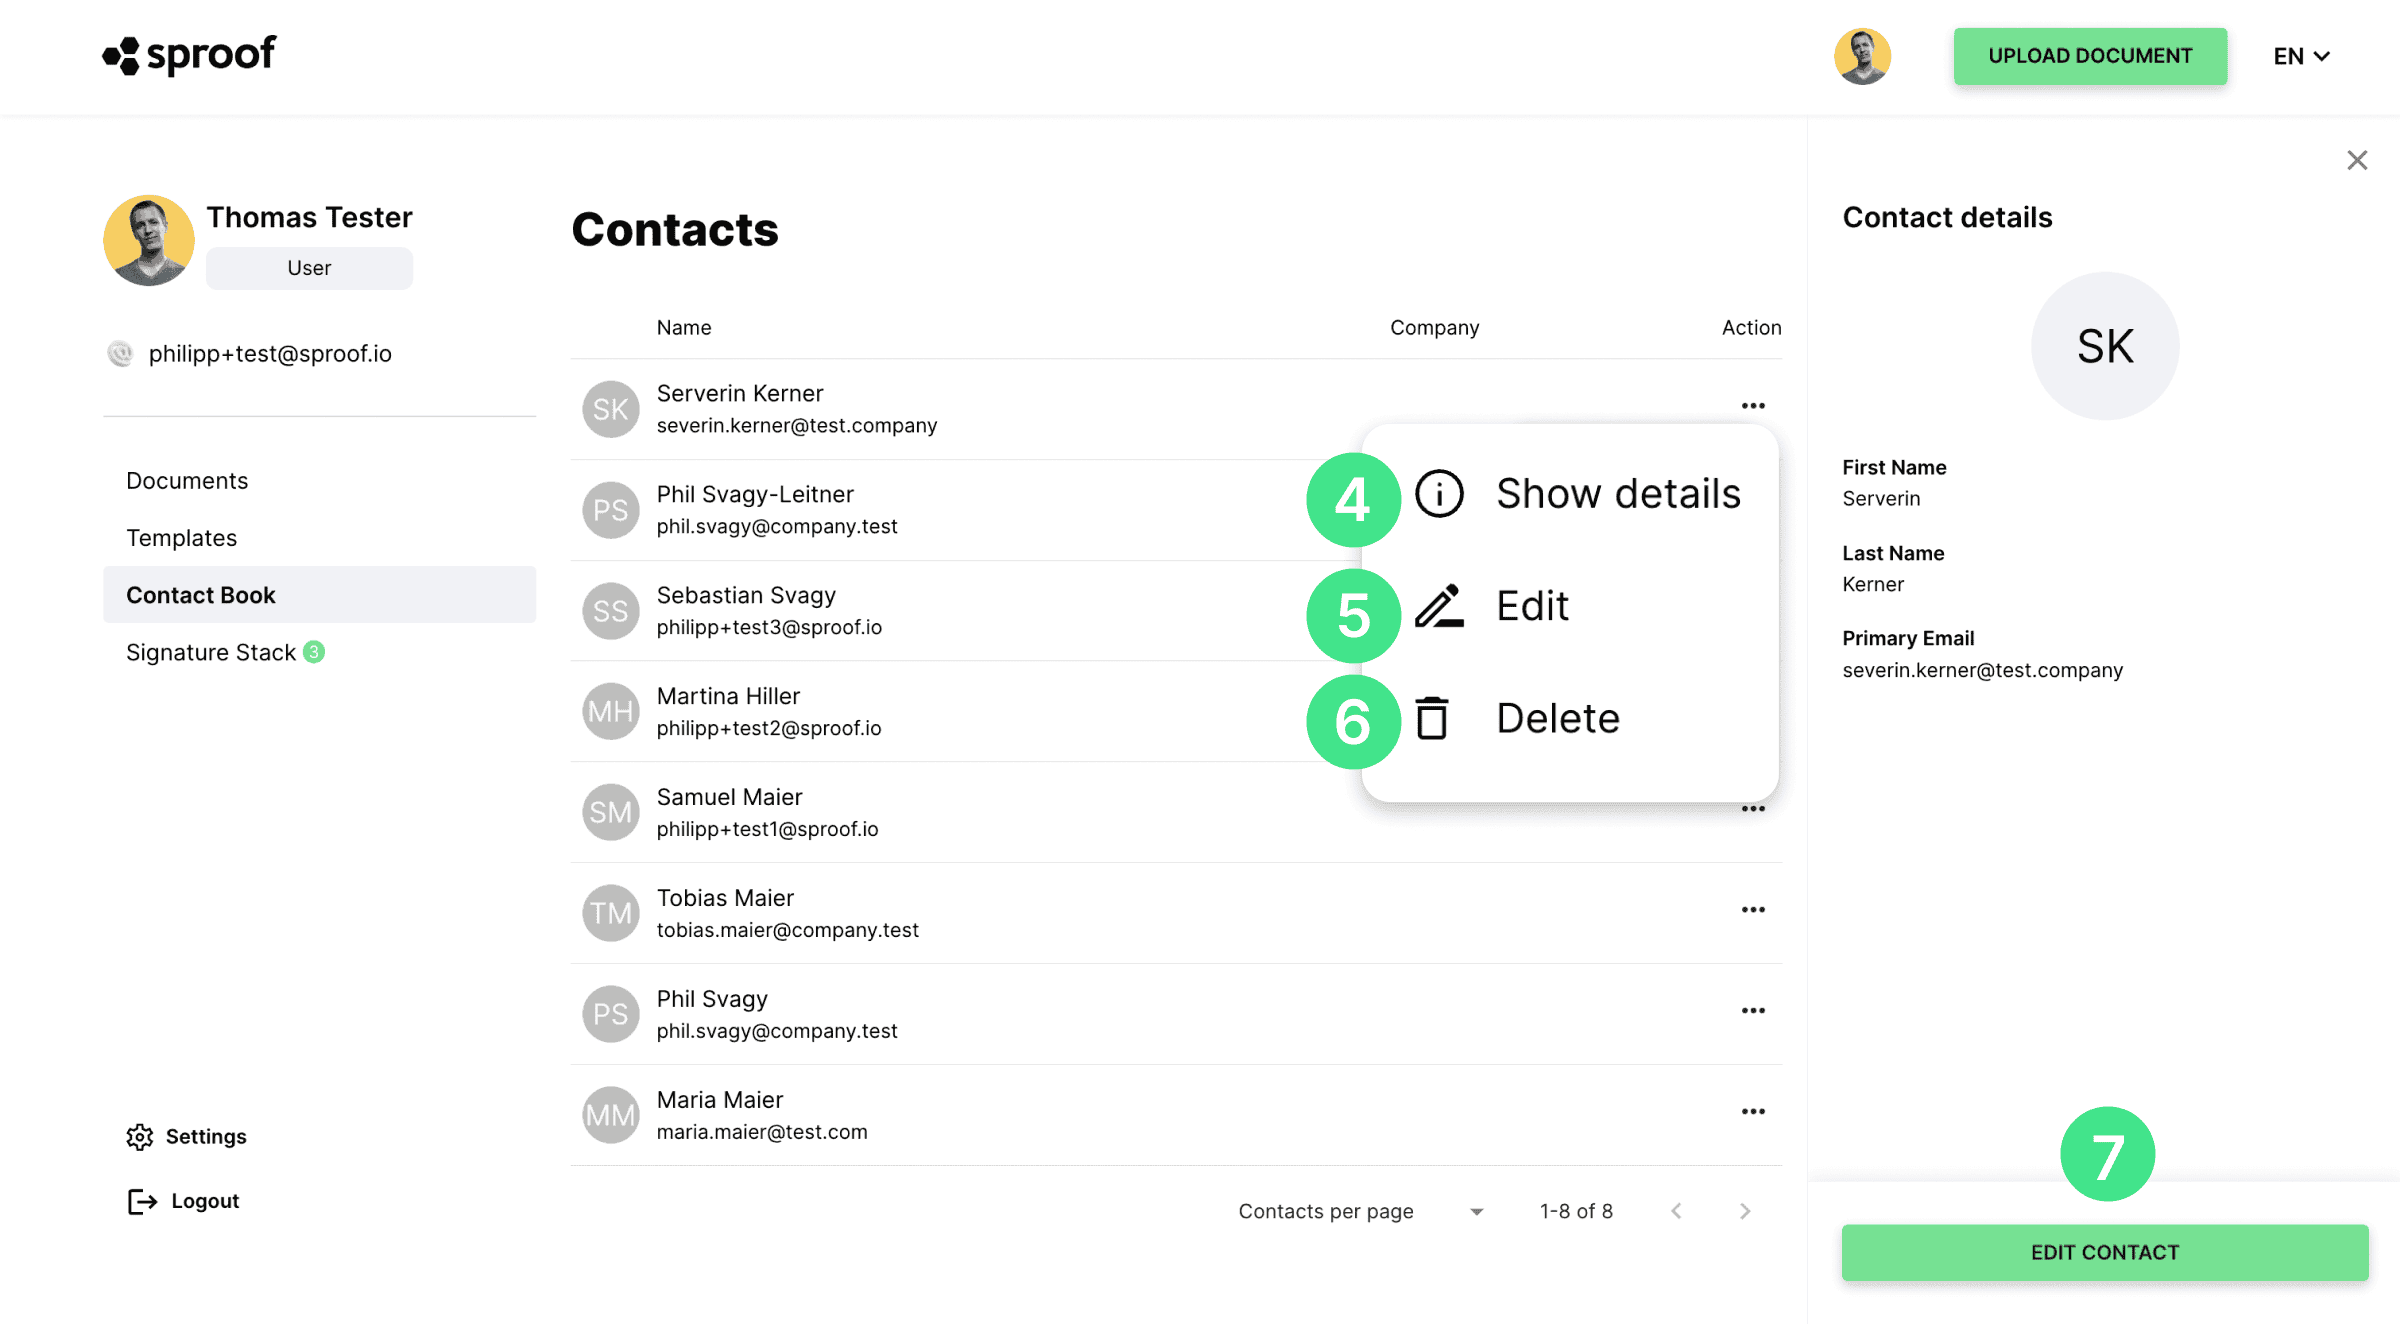
To edit, view or delete the contact, click on the three dots for "Action" on the far left.
- When you press "View Details", the details of the selected contact are displayed to the left of the contact table.
- Clicking **"Edit"**all contact information of the selected person can be changed and clicking "Save changes" will save all data.
- Do you want to remove a contact? Then simply click on the action field "Delete" and confirm the deletion process again by clicking on "delete" in the pop-up window.
- The contact can also be edited in the detail view.
So you can easily add new contacts and manage existing contacts on sproof sign. Have fun managing your contacts!