Agreement
We use cookies on our website to provide you with the best possible experience. By clicking "Accept All" you agree to the use of all cookies and to our privacy policy.
The batch signature: sign multiple documents at the same time
You sign a lot of documents every day and want to sign several documents at the same time in just one go. The batch signature comes to your aid and makes your work easier.
Updated on 31.05.2023
References and further links:
- Tutorial on QES identification

Step by step instructions
With the batch signature, you can sign any number of documents at the same time. If there are documents in the batch that should be signed with a qualified signature, you only need to confirm the 2nd factor once for all documents.
To be able to use the batch signature in sproof sign, you must
- be a User+
- Have an identification with the internal sproofsign QES (Swisscom) for the batch signature with the QES.
- A signature position must be defined for each document in the batch. Regardless of whether you want to sign with the AES or the QES in the batch.
Note: The QES stack signature only works with the standard QES signature from sproof sign. Documents that (have to) be signed with other QES providers cannot be placed on the stack and must be signed individually.

You can find out how to create your personal qualified signature in a separate video .
If you meet the above criteria, nothing stands in your way of using the batch signature.
Note: In principle, any document can be placed in the batch if a signature placeholder position has already been defined.
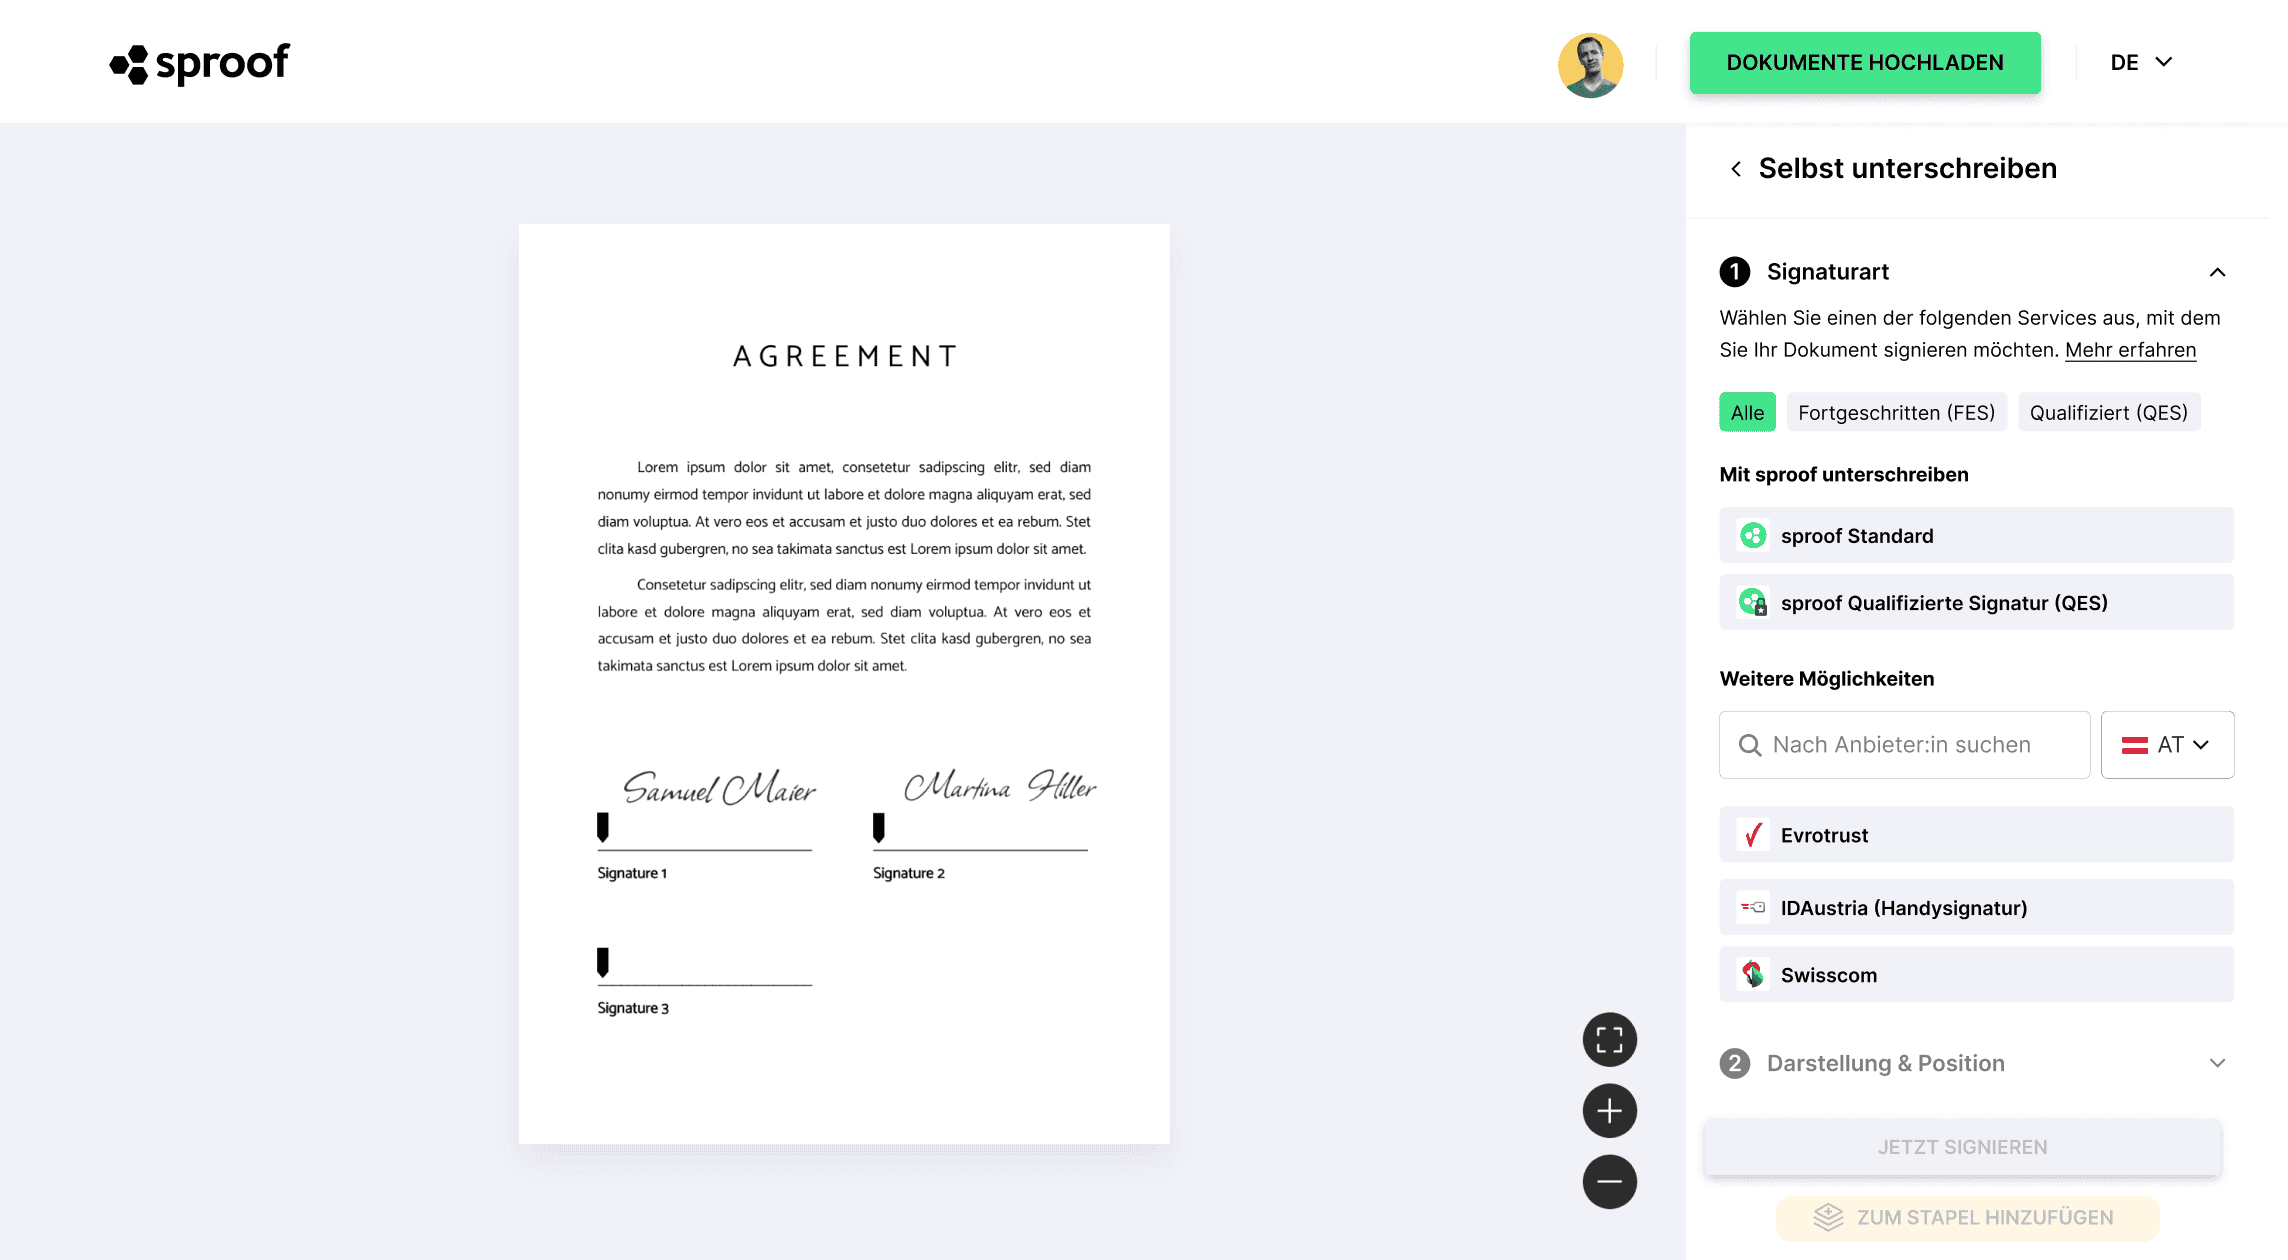
Open a document and click Sign. Select your preferred sproof signature standard as usual and place your signature card on the document. In the sidebar on the bottom right, you now have the option to sign the document immediately or place it on the stack.
This procedure also works for documents that you have received and have been invited to sign.
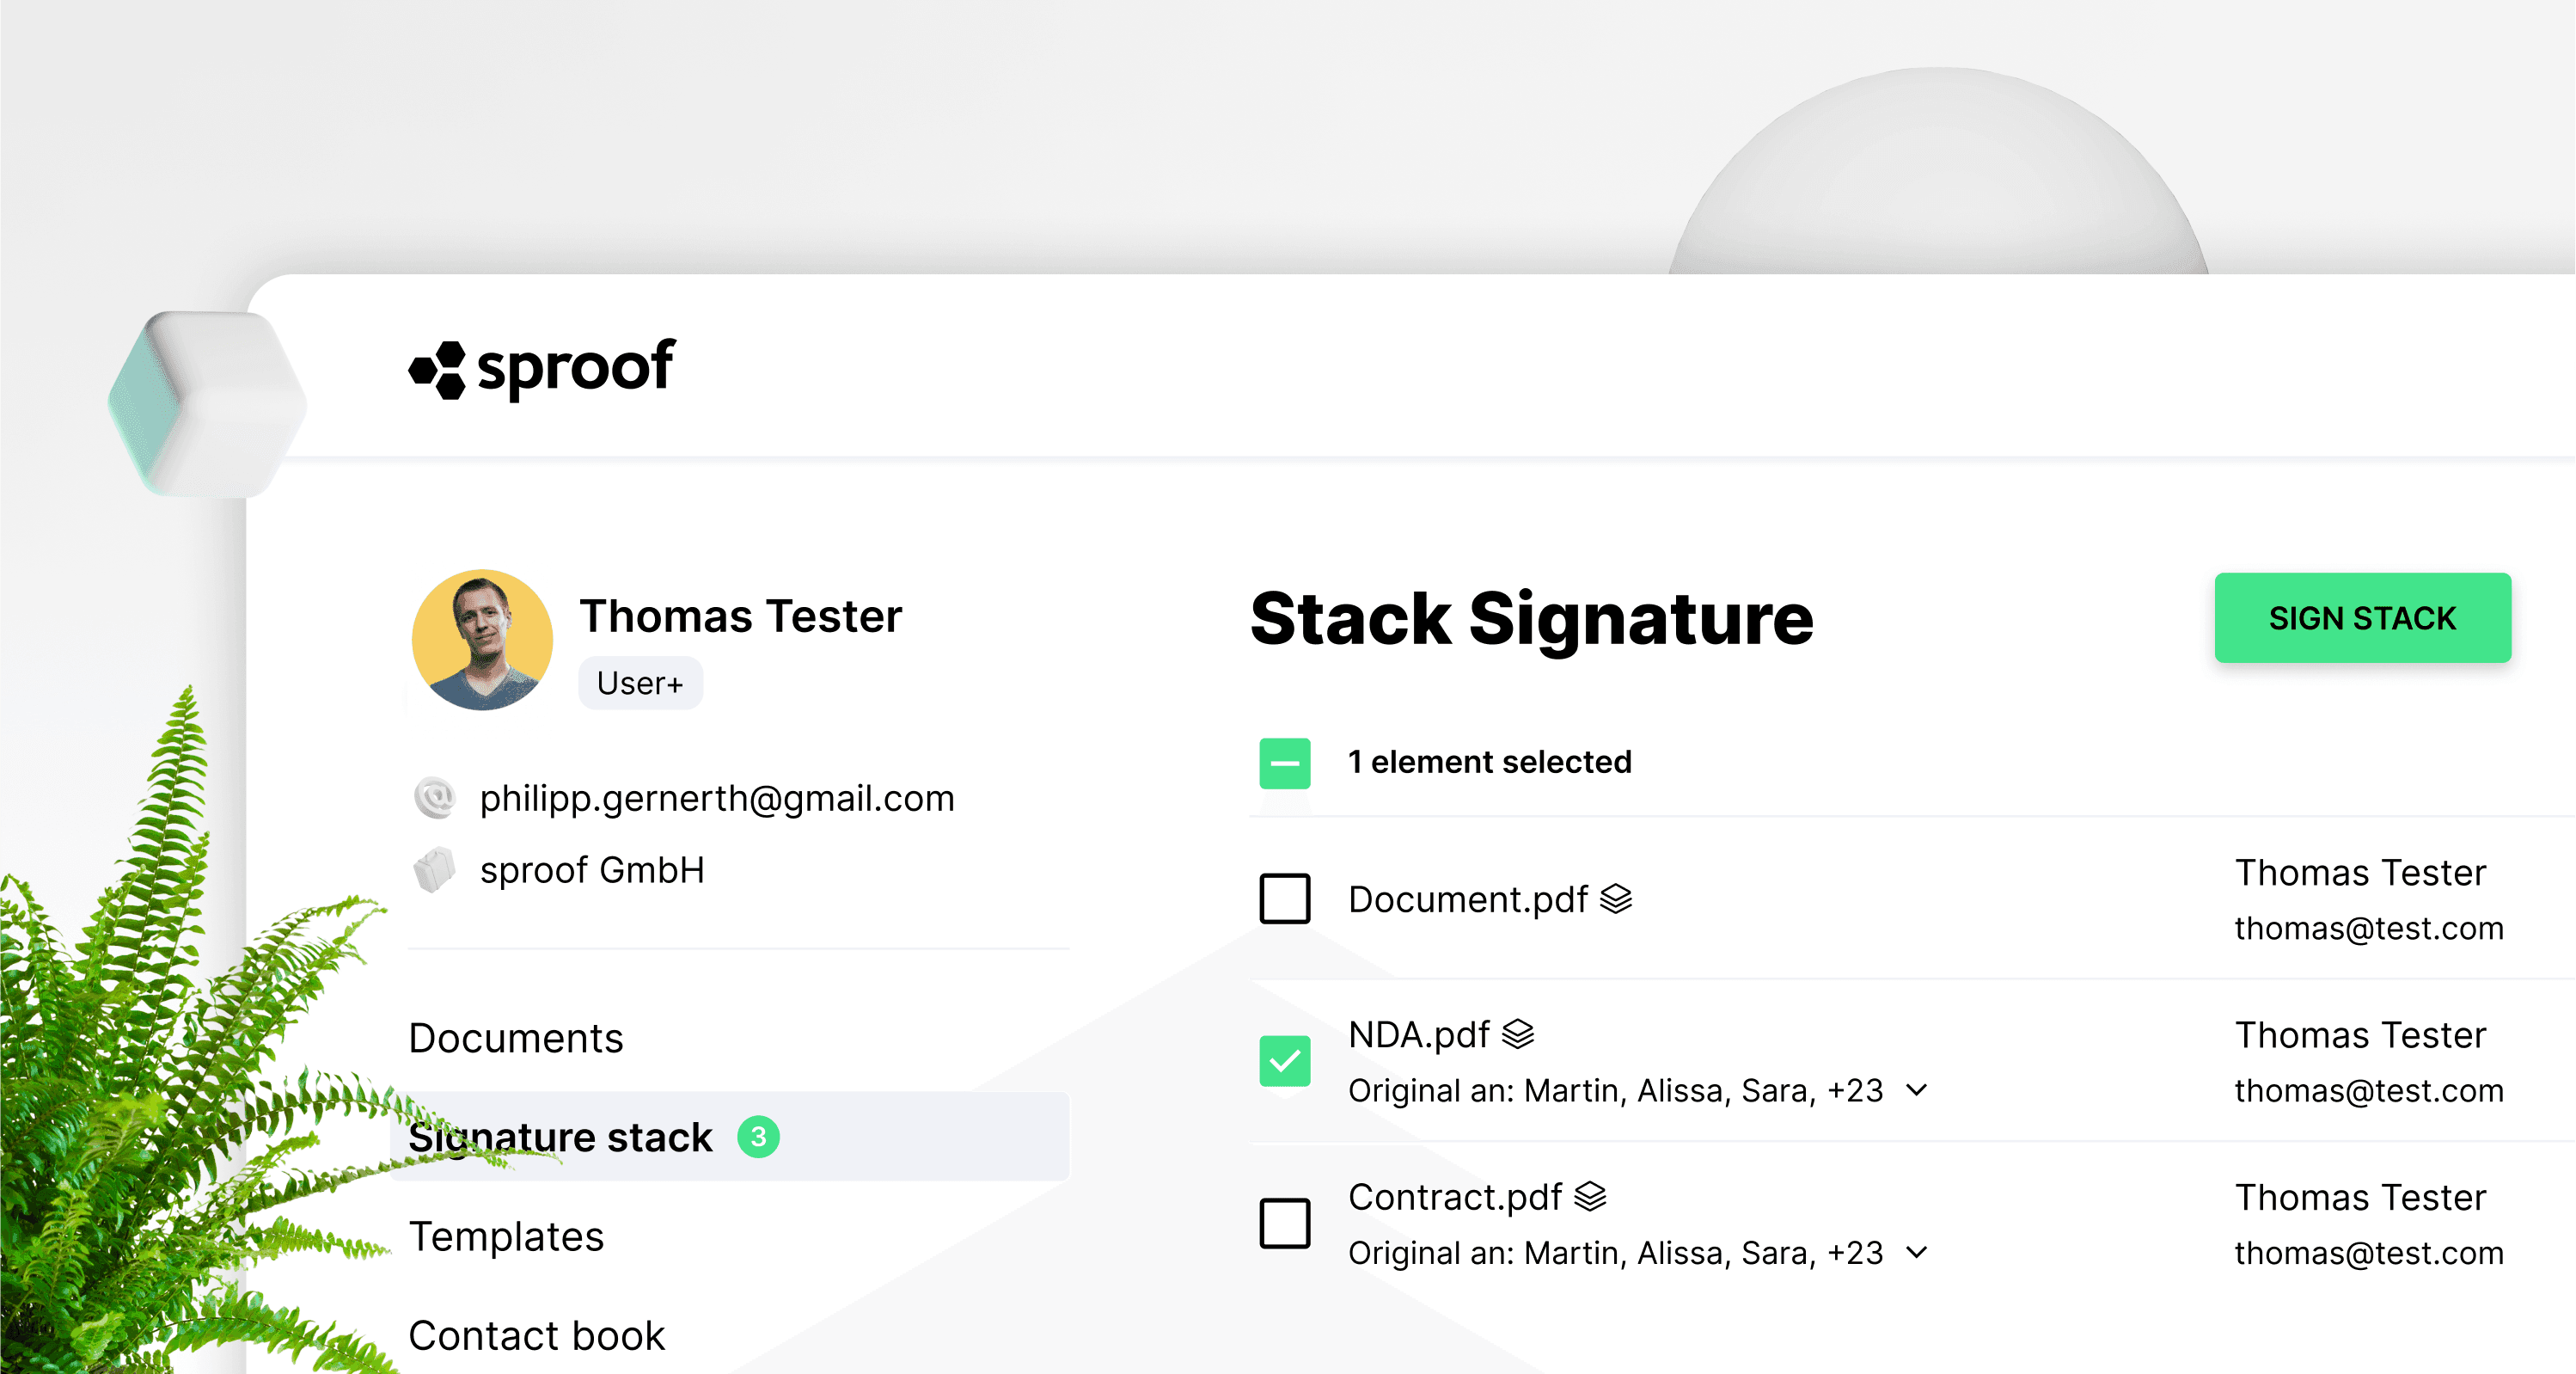
When you click "Add to Batch", the Signature Batch Overview page opens.
Here you can see all the documents that are already on the stack and sometimes the document you just added.
The icon next to the document name means that this document is on the stack. The blue lock next to it means that the document is qualified signed.
Click Documents on the left to push more documents onto the stack in the same way.
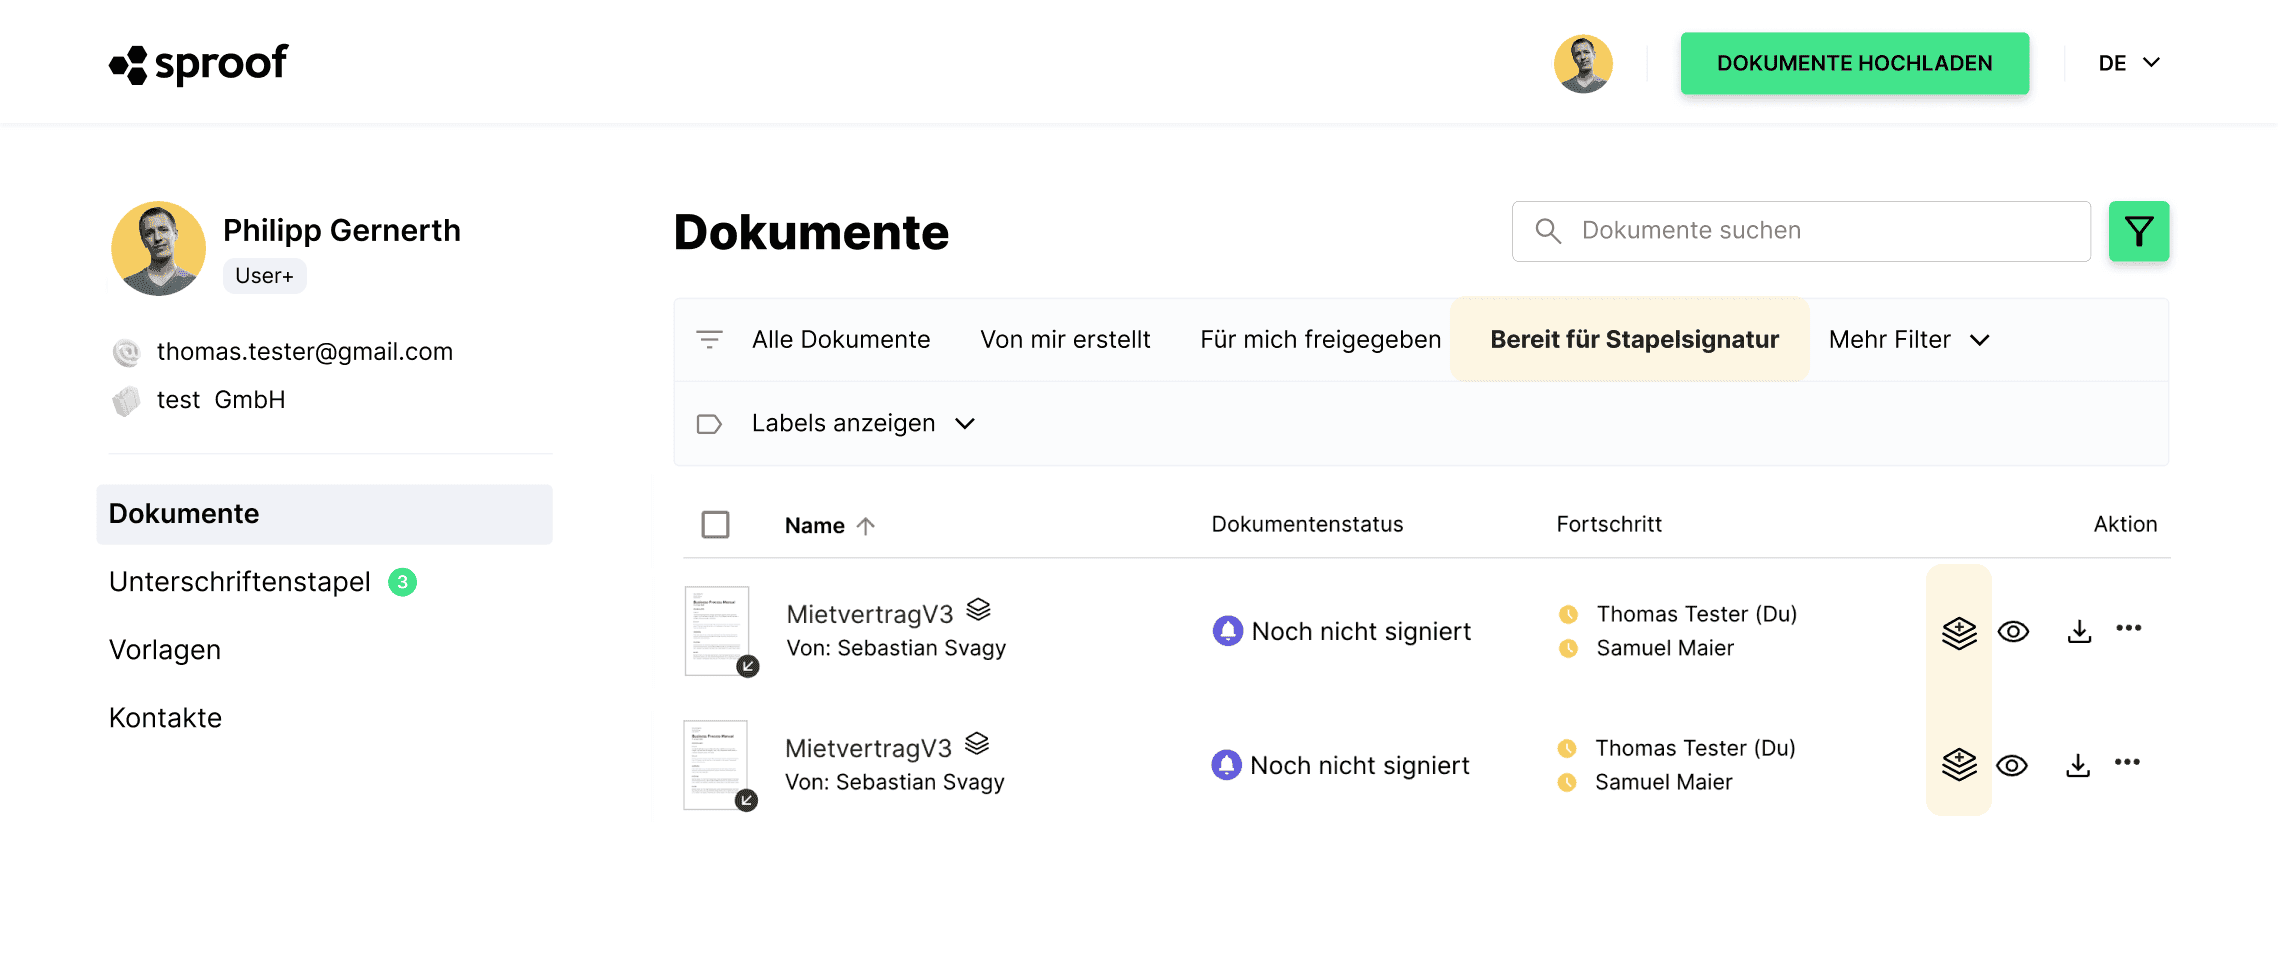
If you have been invited to sign and the placeholder has already been set on the document, then you can also use the filter function in the dashboard. Click on the green filter icon here and the main filters will appear. Click "Ready for batch signature" to display all documents that have a placeholder defined and can be signed immediately.
. If you have activated the filter function "Ready for batch signature", you can also mark several documents at once and "add them to the batch" at the same time with the click of a button.
. Furthermore, you can easily add or remove documents (with predefined placeholders) from the stack individually using the stack icon to the right of the eye icon. Clicking on the stack icon with a plus sign will add the document to the stack.
When you add one or more documents to the stack, this pop-up appears.
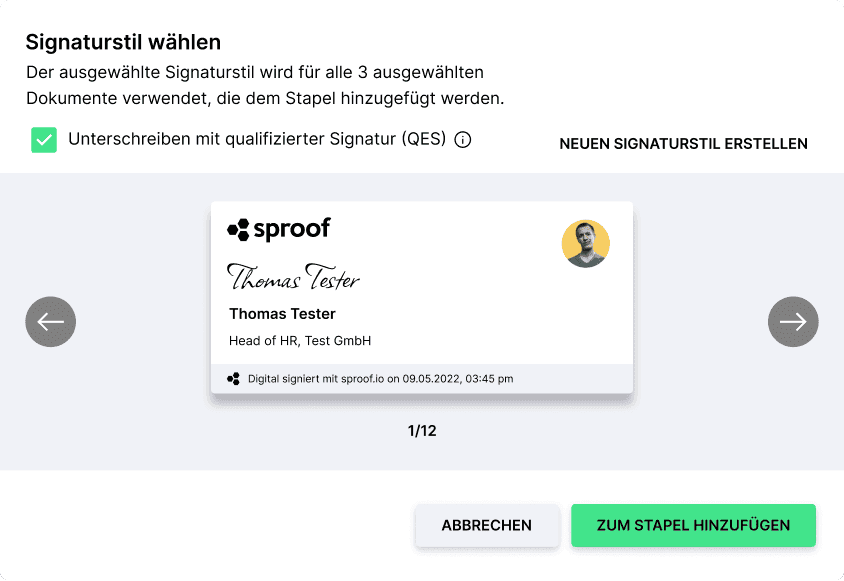
In this pop-up window you can decide which signature style you want to use for this document and whether you want to use qualified signing or not. If it was determined by the creator of the document that only QES is allowed, the checkbox cannot be unchecked and you are required to QES.
If multiple documents were selected and added to the batch at the same time, the entire selection of documents will be signed with the same standard and cannot be customized individually!
Attention: As soon as a document in the selection is committed to QES, all other selected documents are also signed with the QES and the checkbox cannot be deactivated! This can cause the QES signature quota to be used up more quickly and incur further costs.
For individual customizations per document, it is recommended to add the documents to the batch one by one and select the signature style and signature type.
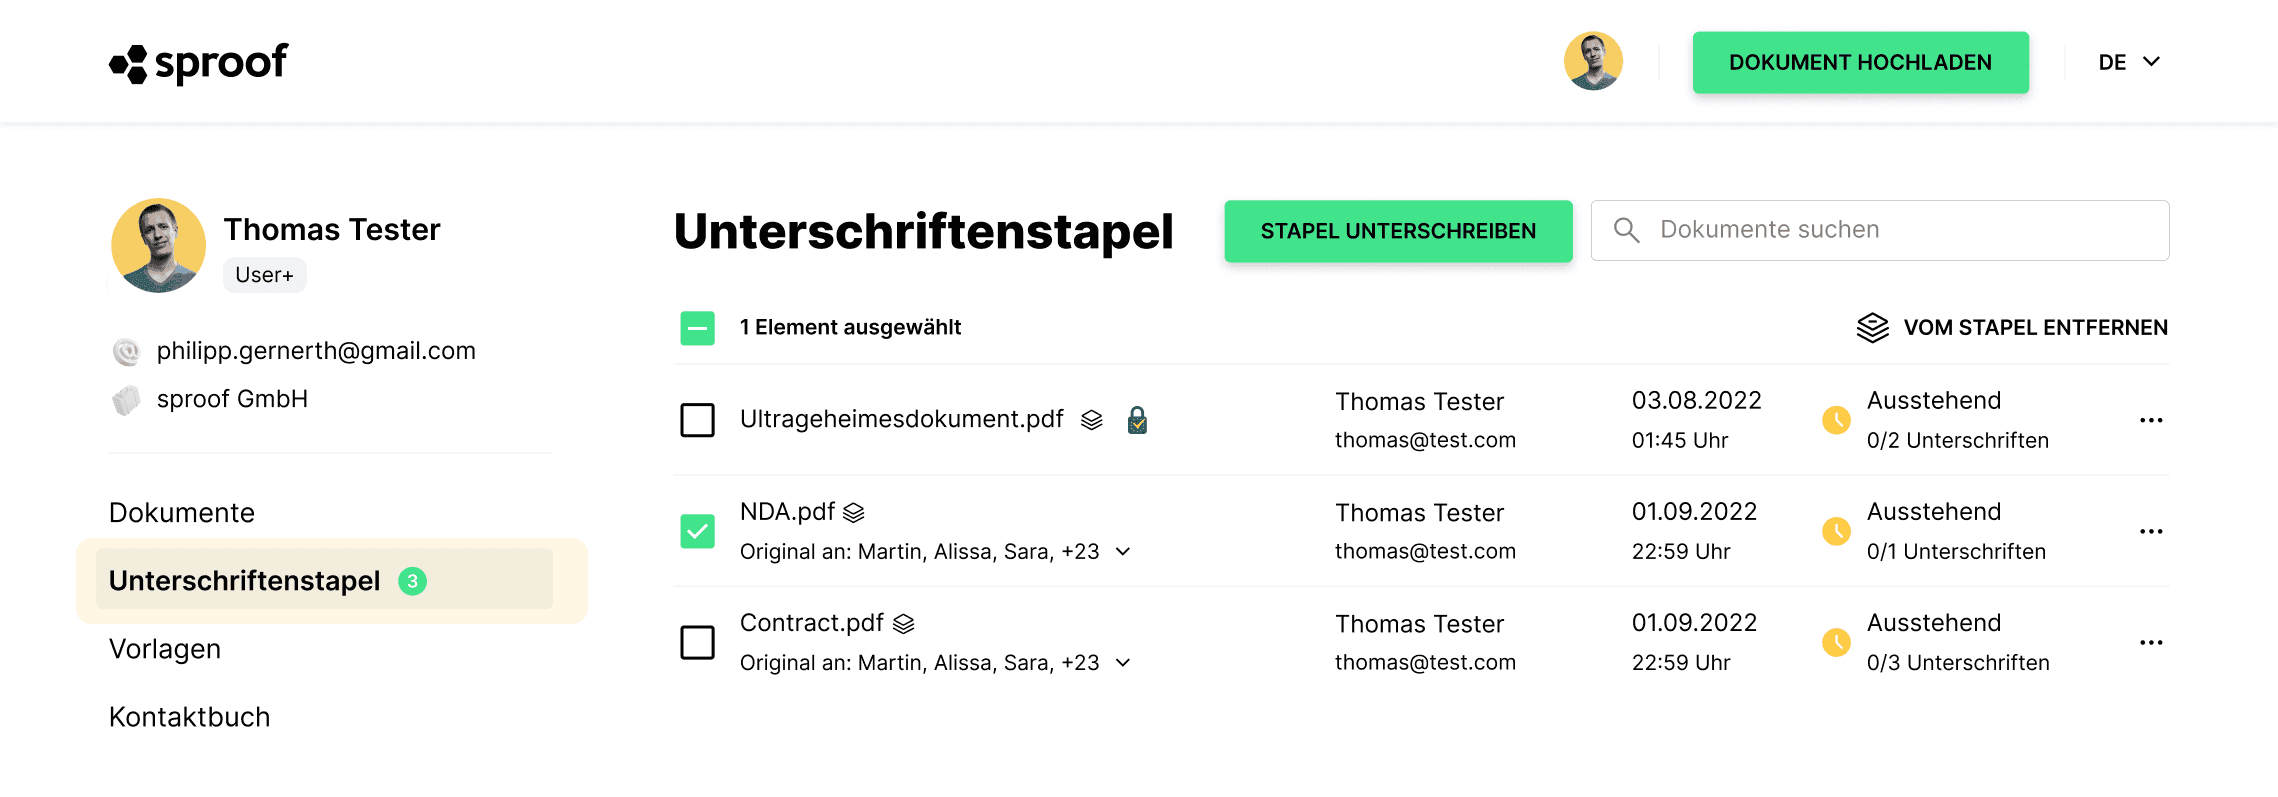
When you have added all the desired documents to the stack, go to the "Signature stack" on the left. Here you will see all the documents that are on the stack.
Next to the document name and batch symbol you will see a blue lock on some documents. These documents will be signed qualified, the others without lock will be signed advanced.
Check again if the correct documents are at the stack and then click "Sign stack" in the upper right corner.
If all documents need only advanced signatures, no further action is required from you and the documents will be marked as "signed" in the dashboard. If more signatures are still missing, only your signature progress will be changed to "signed" and the document status will remain "Pending"
.
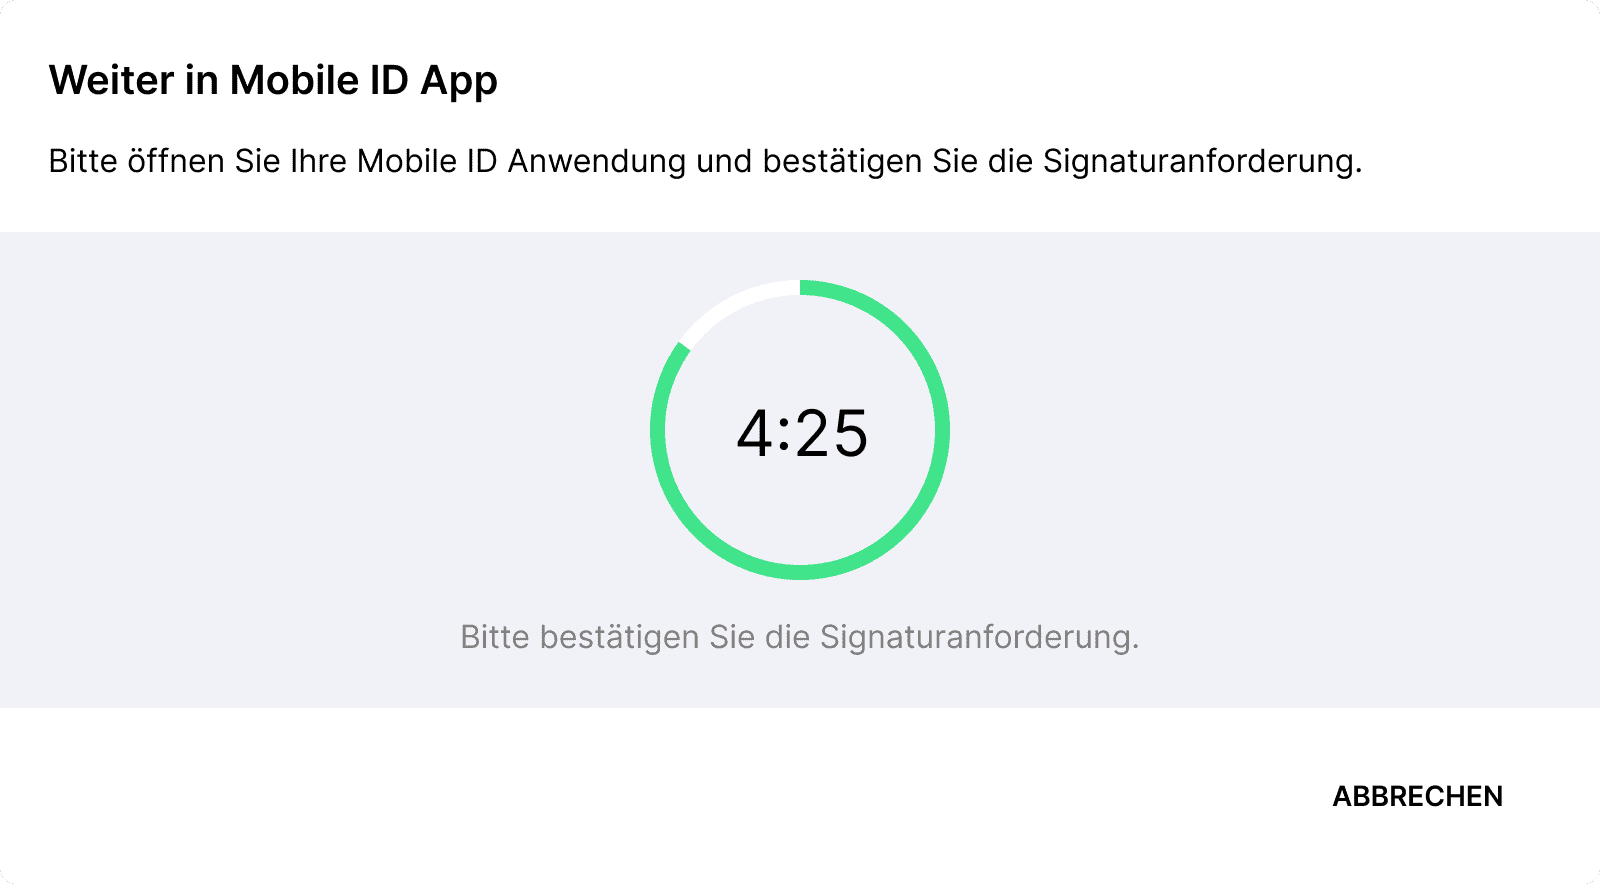
As soon as at least one document on the stack needs to be qualified signed, you will be prompted to complete the "process on your cell phone". To do so, confirm the authentication request in the Mobile ID app with your fingerprint or Face ID.
. After successful signing, the stack is emptied again and can be filled again. The successfully signed documents will be changed in the dashboard as "signed" or (only) your signature progress will be changed to "signed".
Have fun signing quickly with the batch signature!