Agreement
We use cookies on our website to provide you with the best possible experience. By clicking "Accept All" you agree to the use of all cookies and to our privacy policy.
The document envelope
You want to collect several documents in a folder and send them out for signing? The document envelope makes this process digitally very easy and helps you to create order.
Updated on 31.05.2023

References and related links:
- Tutorial on Signing yourself
- Tutorial on Collecting signatures (without workflow)
- Tutorial on Collecting signatures (with workflow)

Step by step
In this tutorial we will show you how to make the document folder work.
Click on "Upload Document" as usual. Now you can select and upload as many documents as you want.
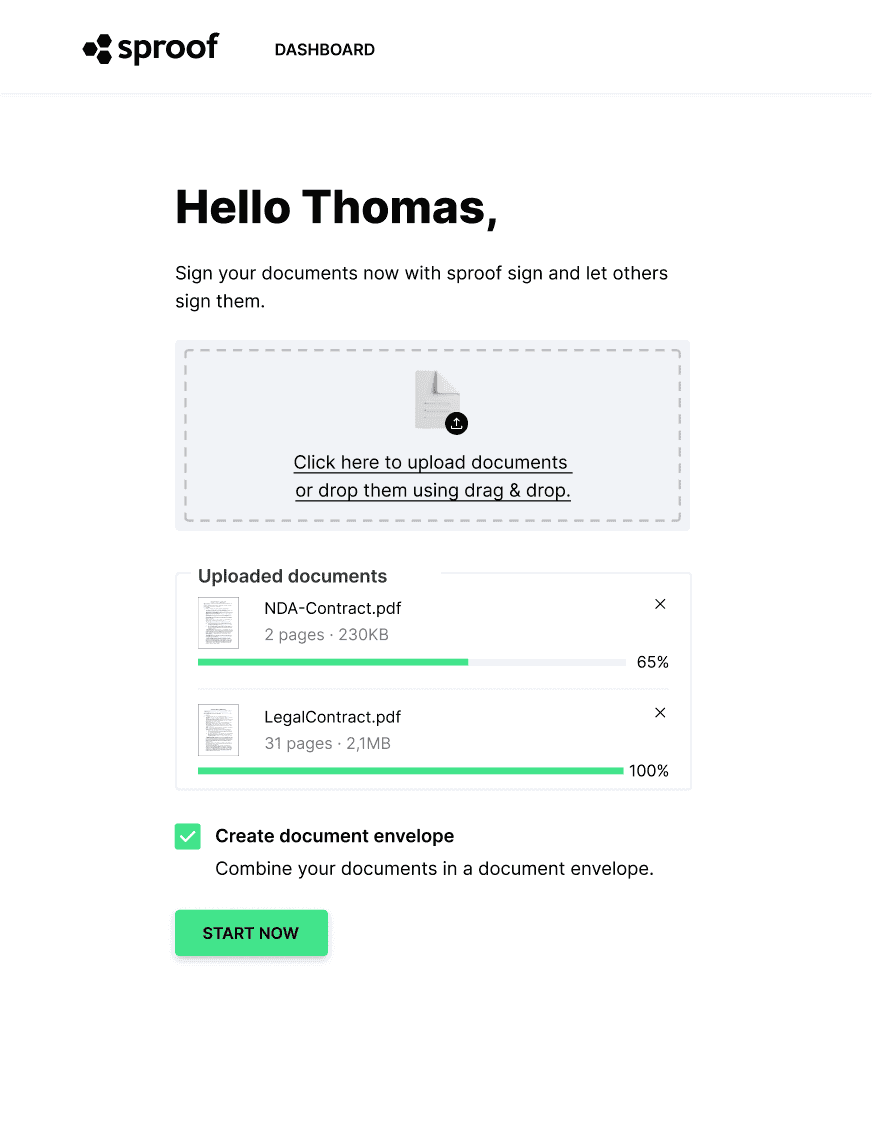
Check the "Create document folder" checkbox to combine freshly uploaded documents in a document folder and give the folder a name. The documents will be marked accordingly in the dashboard with the folder name.
Note: If this checkbox is not selected, all documents will be uploaded as individual documents in the dashboard and will not be linked together.
Click "Start Now" and you will land in the editor view of the new folder.
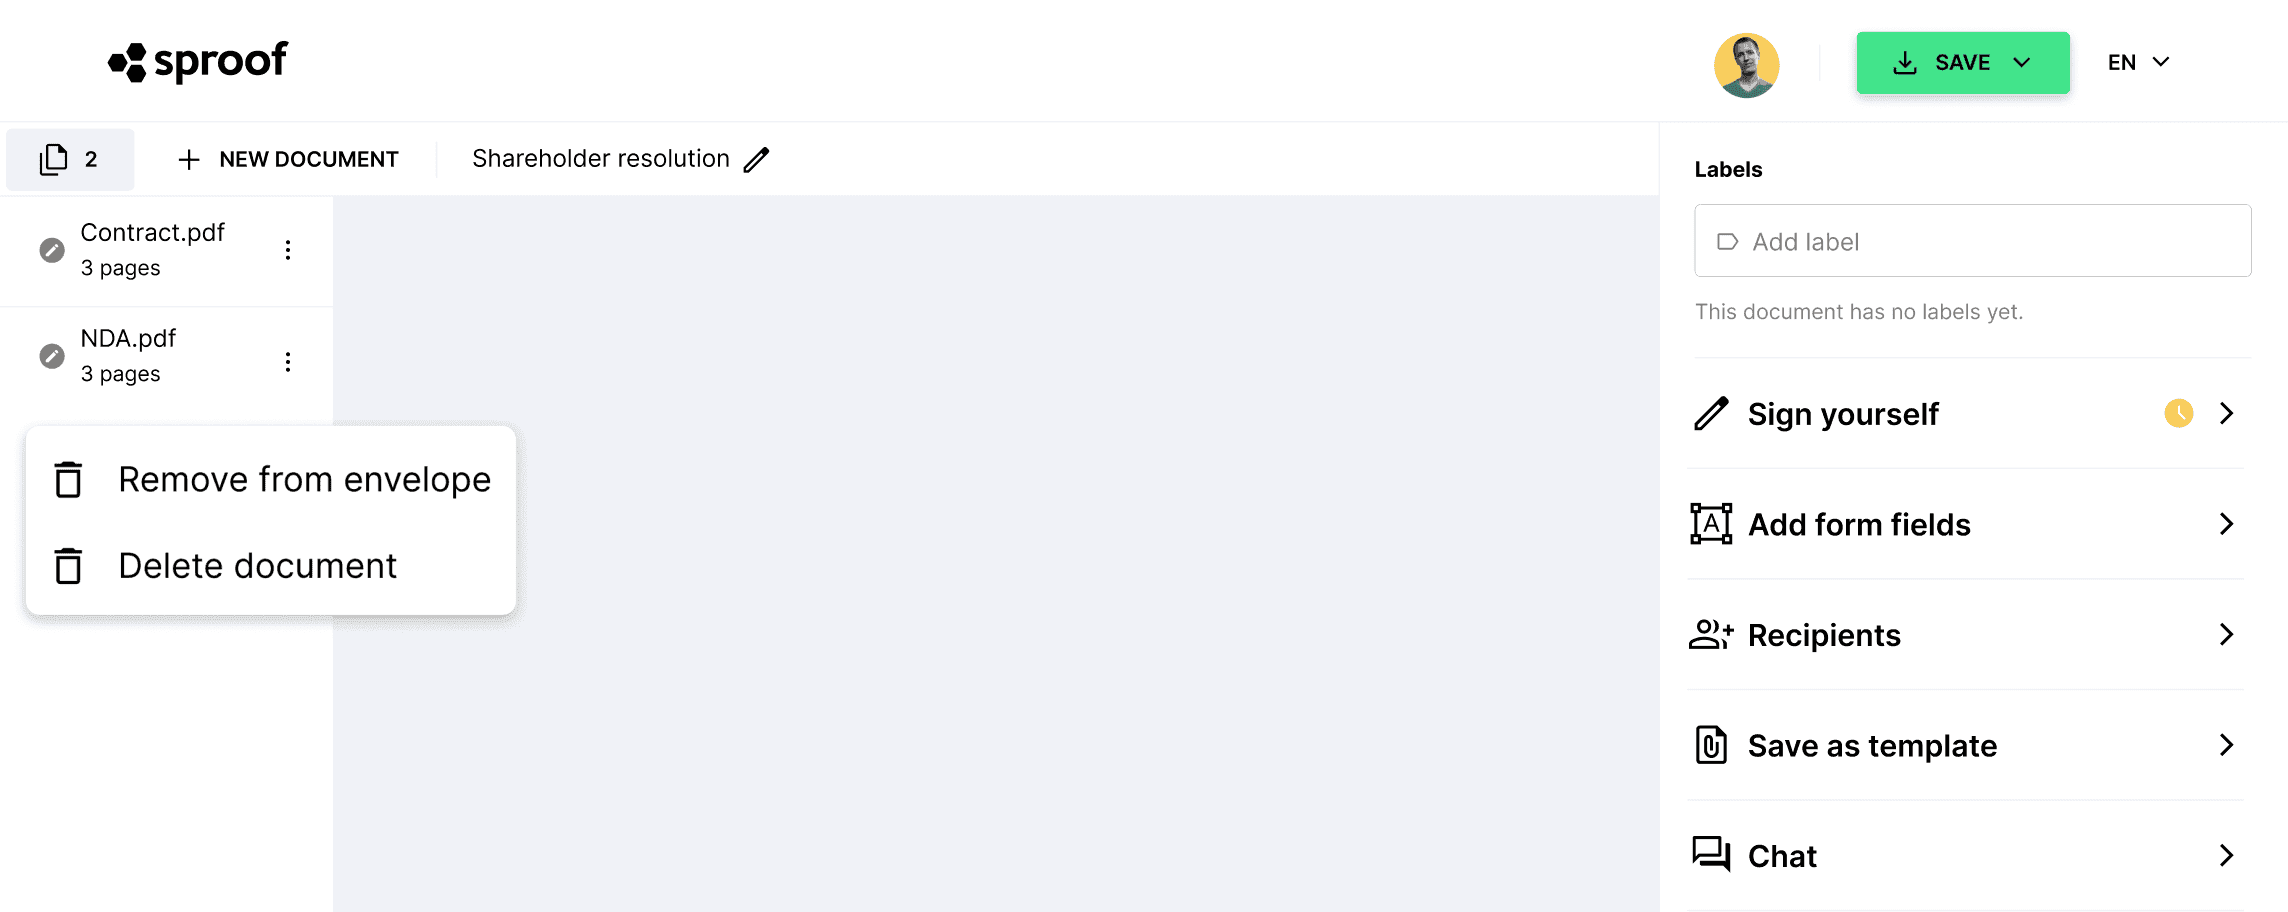
On the left you can see the documents included in the folder and above that the number of documents. By clicking on the respective document you can jump back and forth between the files.
To add more documents to the folder, click on "New Document" in the upper left corner and select the desired files.
You can edit the folder name at any time by clicking on the pencil icon next to the name.
By clicking on the three dots, you can remove a document from the folder or delete it completely.
On the right, you can sign yourself as usual, invite people to sign, define placeholders, use form fields, save the current document as a template or download it.
Note: At the moment, the documents still have to be signed individually. That is, after the signature card has been positioned, "Sign now" must be clicked. This must be repeated for each document in the folder that is to be signed.


Another way to create a document folder is in the Dashboard view. Select already uploaded documents and click on "Create document folder" at the top. When doing so, the document must not be included in any other folder, which can be seen by a label above the document.
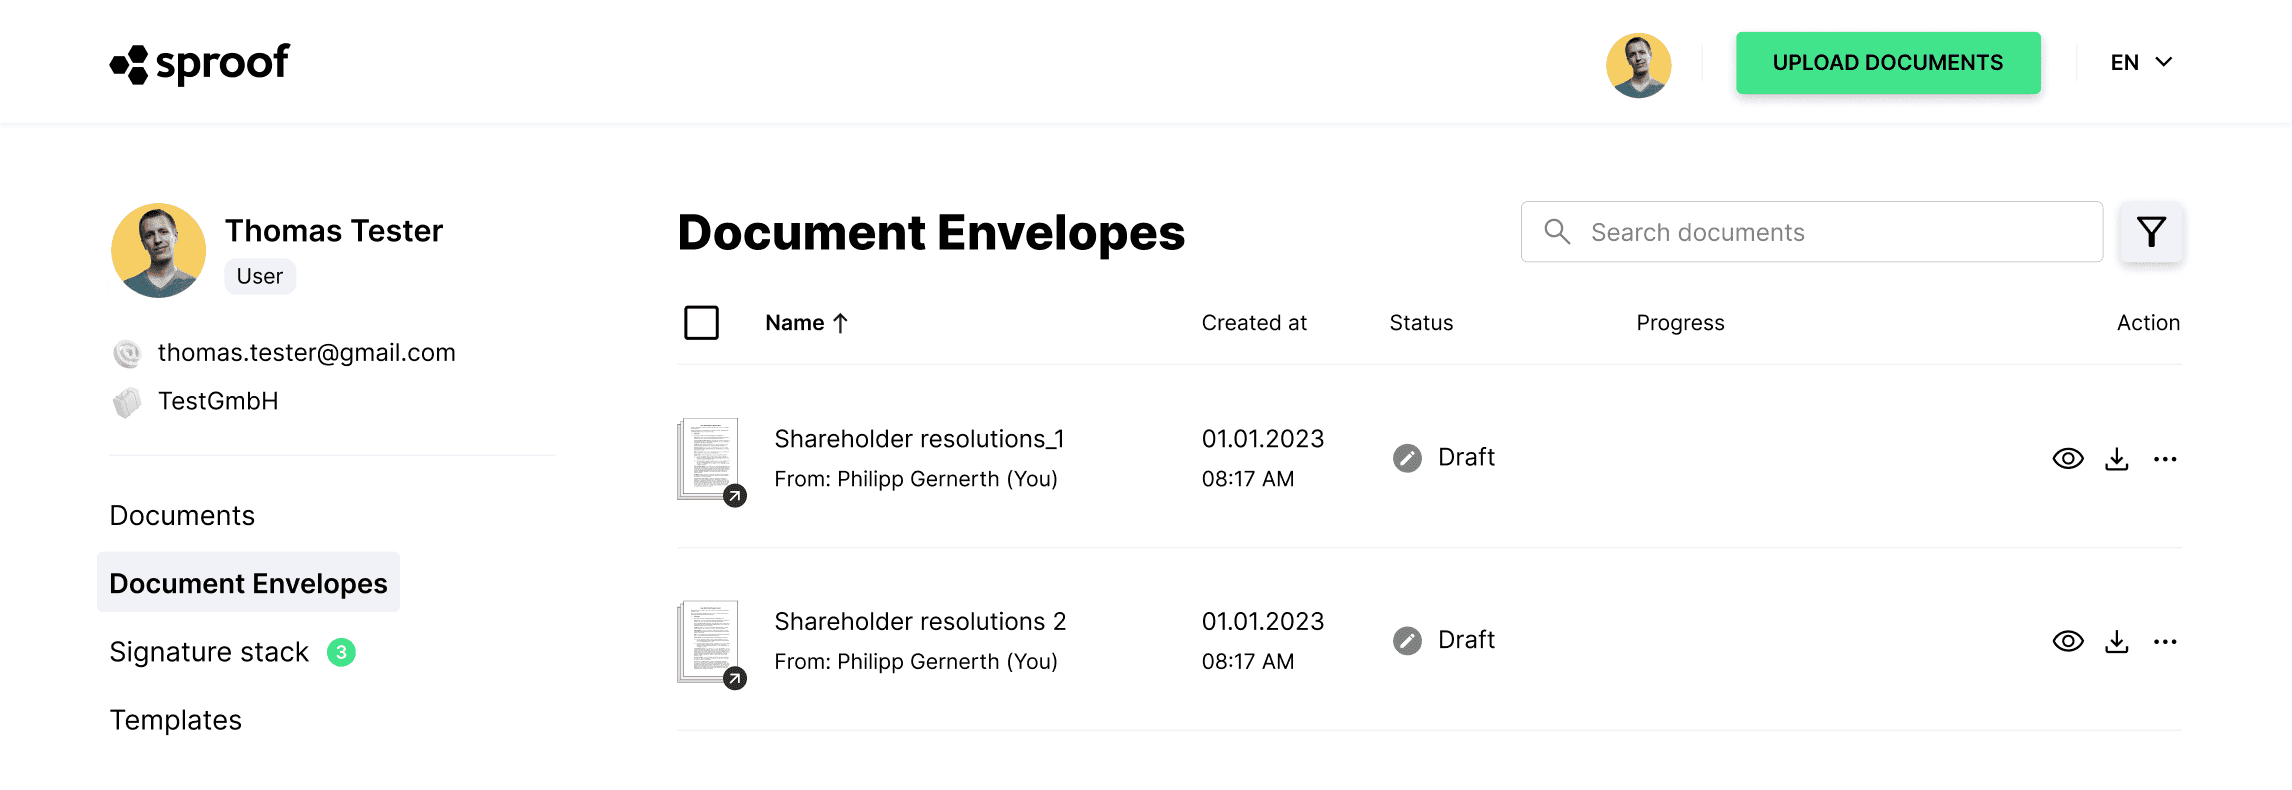
All document folders can be found in the menu on the left under the tab of the same name. Here you can see the status and progress, view details as well as preview. You can rename or delete the folder. By clicking on the folder name or on the action field "Open in editor", the folder is opened and can be used.