Agreement
We use cookies on our website to provide you with the best possible experience. By clicking "Accept All" you agree to the use of all cookies and to our privacy policy.
Create & use forms
Do you like to use forms for your work? In this tutorial we will show you how to easily create forms in sproof sign.
Updated on 04.05.2023

Step by step
Create forms
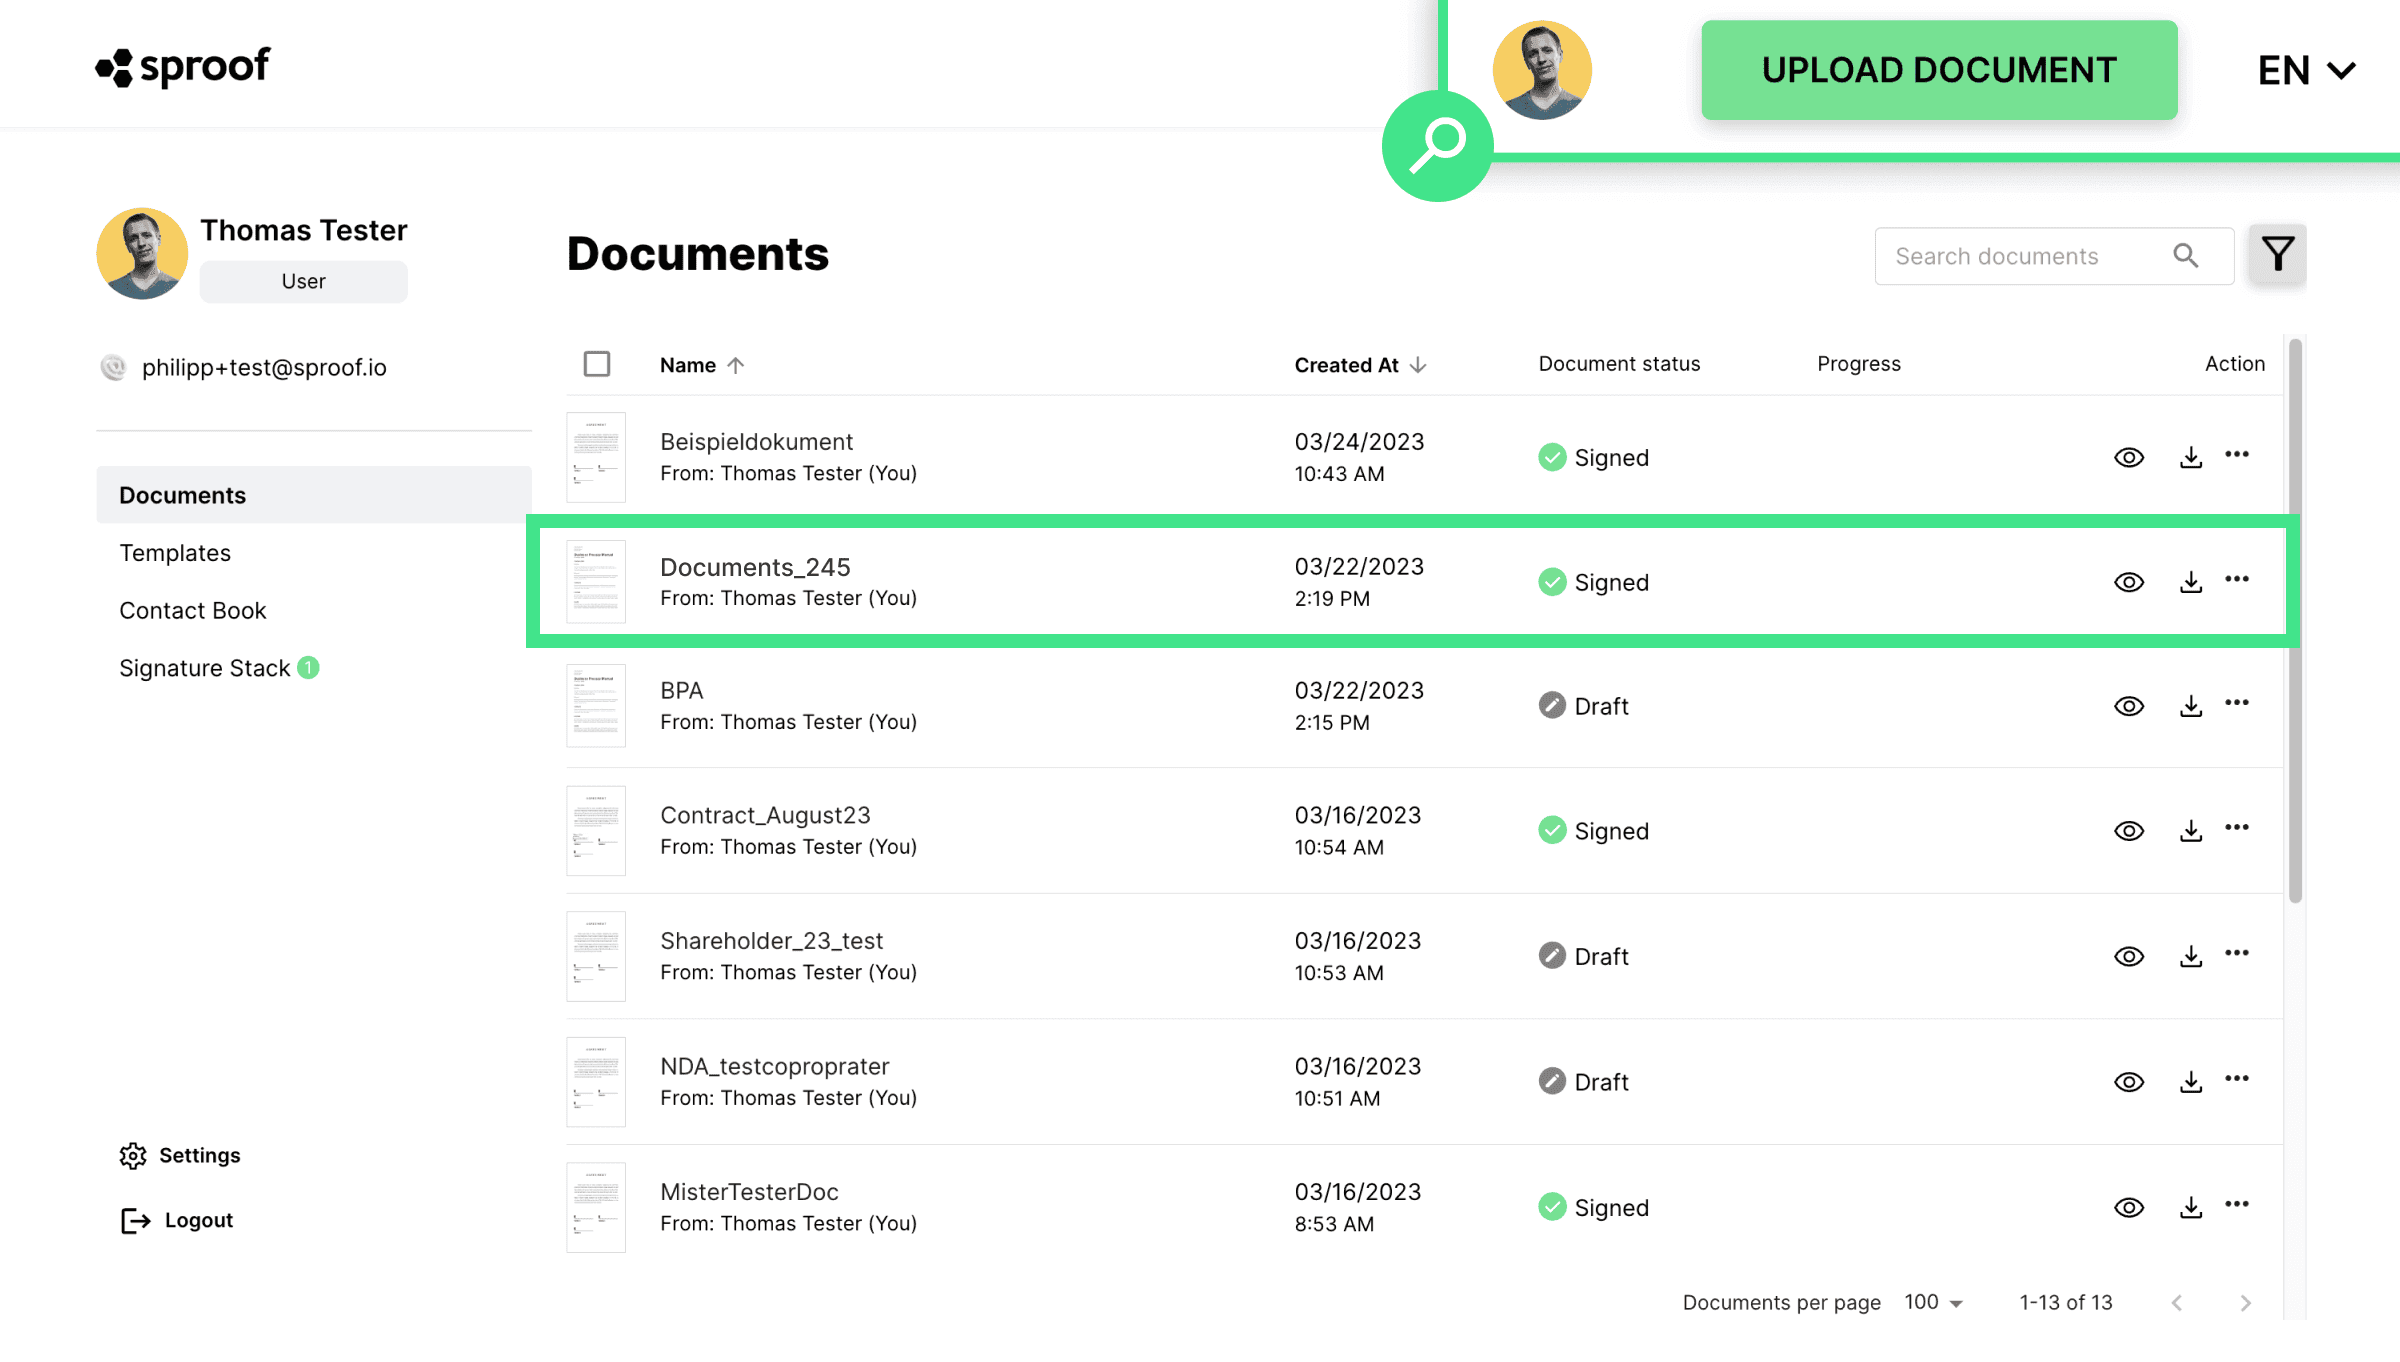
Once you have logged in and landed in the dashboard view, you can upload a document or open an existing document.

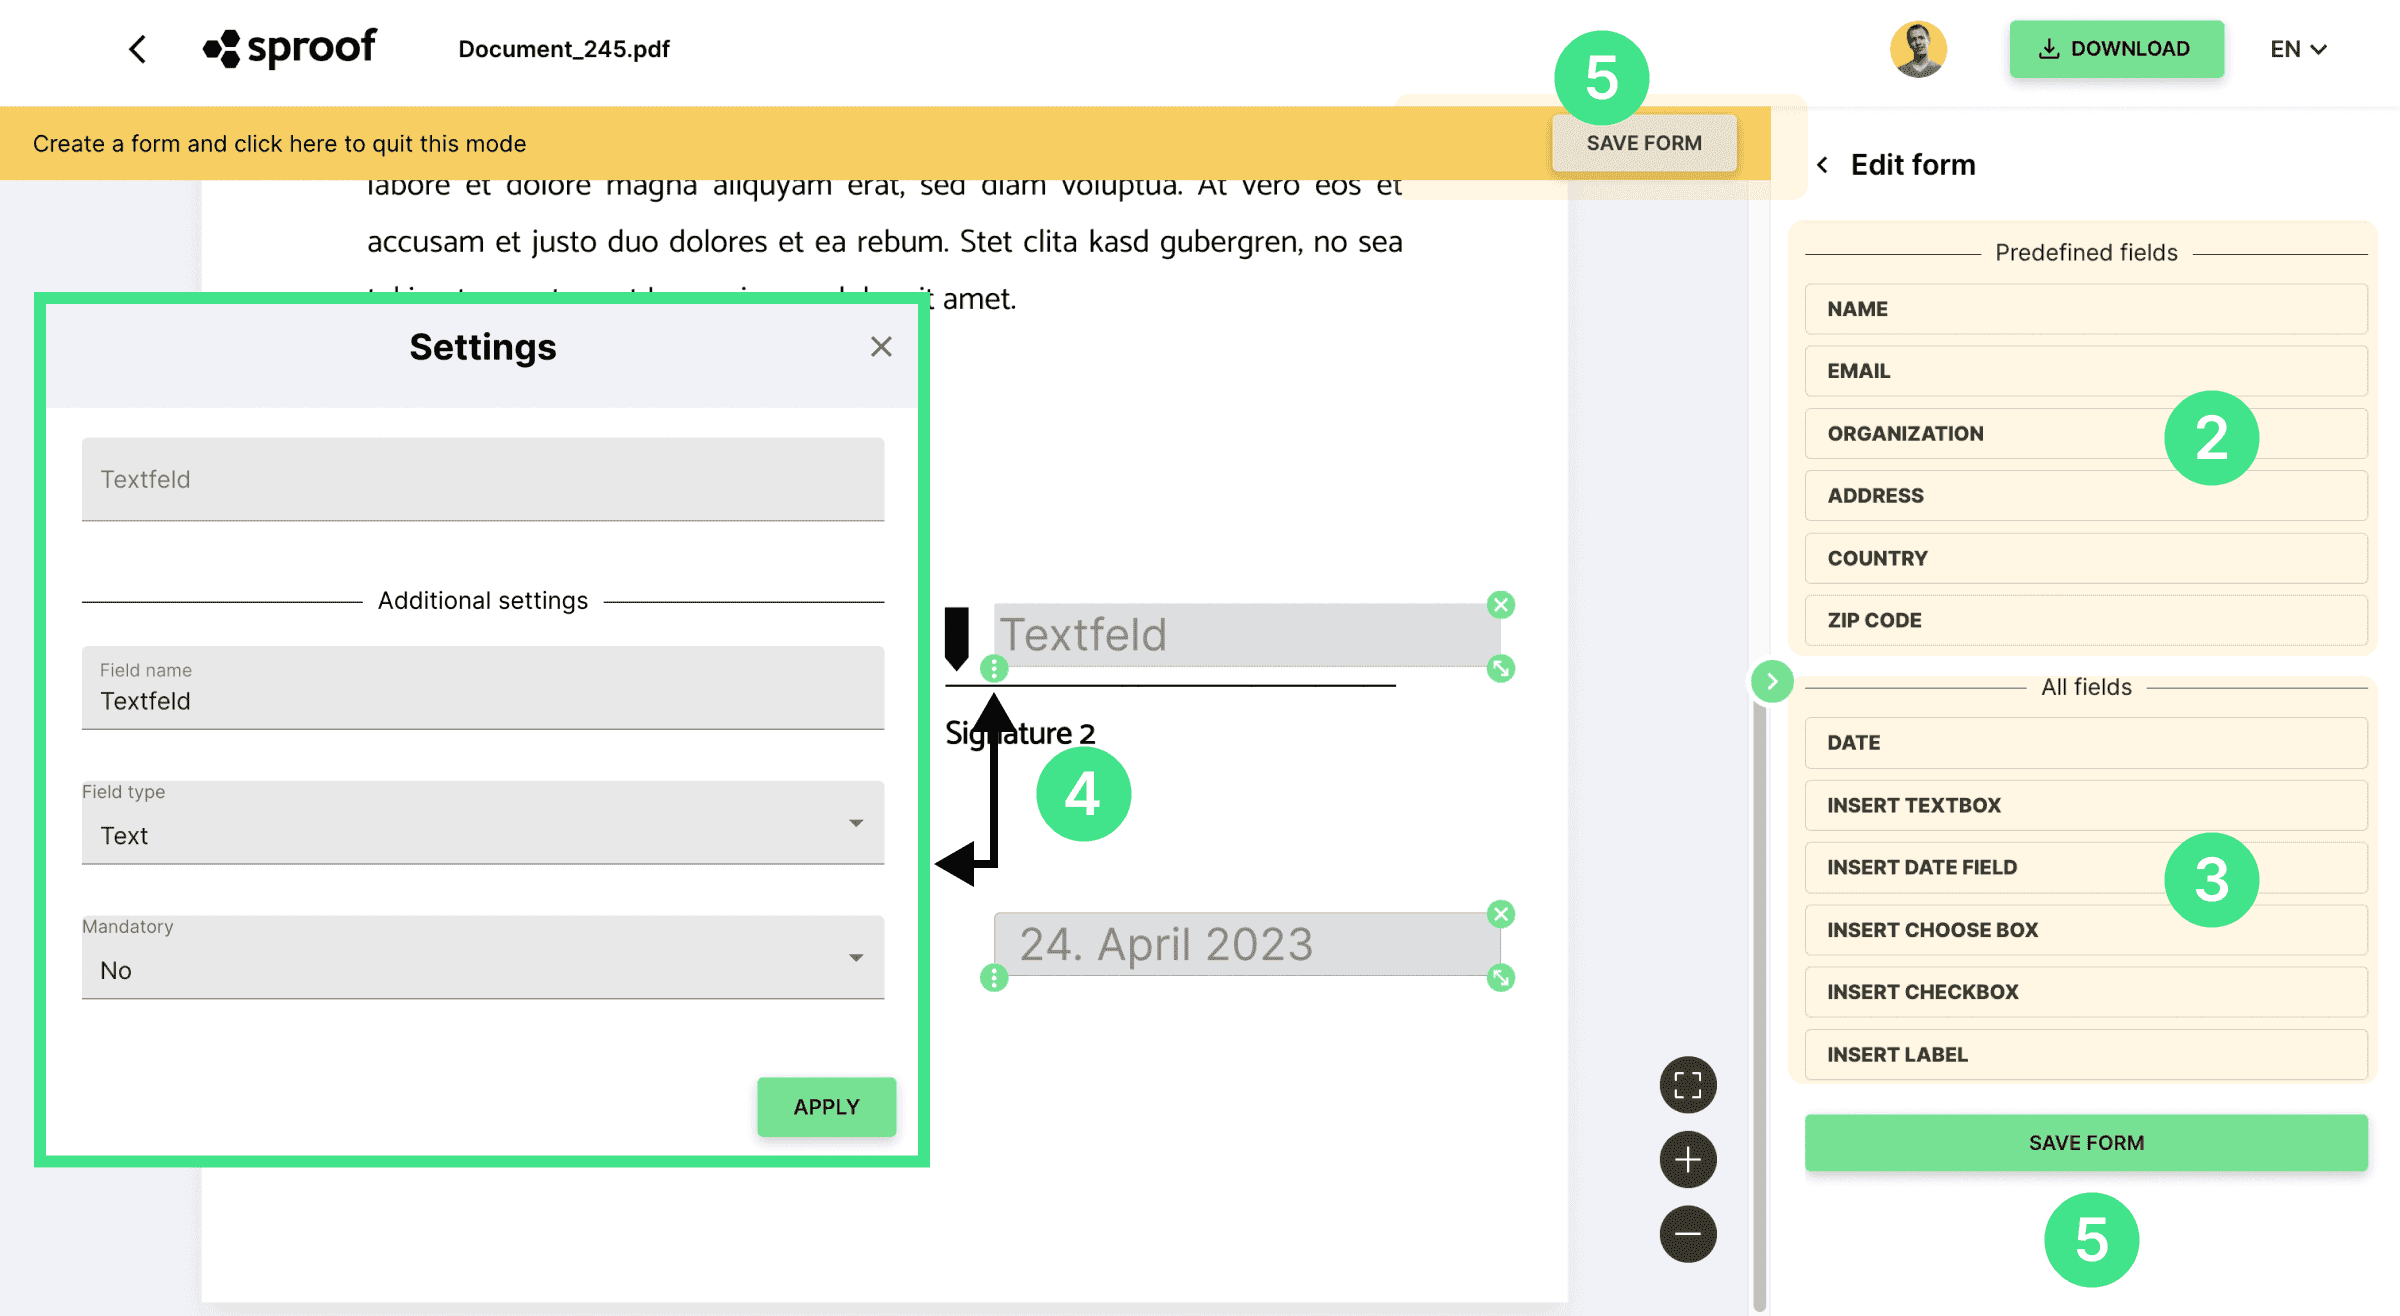
- Click " Edit Form" in the right bar to insert form fields.

- Here you can see already predefined fields, like name and email, which are used very often.
- Further down you have the option to define more fields.
You can choose between different types of form fields:
- Date
- Text field
- Select field
- Checkbox
- Designation
When you single click on a field, it will be added to the left side of the document. You can now drag & drop the field and zoom in and out by holding down the mouse button on this icon. Clicking on the X will remove the field again.
- Clicking on the three dots, the settings can be edited. This works very similar for most fields.
- When you have placed all the form fields and label, you can click "Save Form" here (top) or here (right).

Text fields
Field name. Here you enter a placeholder field name so everyone knows what data to enter here. For example, I choose "address".
Field type. Here you can specify whether the input format must correspond to a text, numbers or a date, or you can choose between other predefined formats, such as email or phone number. I choose "Address."
Mandatory field. Here you can define if the field must be filled in or if filling it in is optional. I'll stick with "No."
Input field. The input field at the very top can be pre-filled with the desired data (in my case "my address") if you want to fill out the form yourself. Otherwise, just leave the field blank. You can fill in the field yourself later or have the recipient fill it in. I enter my address directly in the field.
Click "apply" to save the changes you have made and customize the form field.
Date. When you insert a date field, the current date is inserted by default. In the field settings you can edit the date, field name and co. as explained before.
Select field. Add a selection field to be able to choose between several options. Enter a field name and add options to choose between. Options can also be removed from the list by clicking on the trash can. At the very top, you will now see a preview of the options and can make a pre-selection if you wish.
Checkbox. Furthermore, you can also add checkboxes. Enter a field name. At the top of the preview you can already accept the checkbox or not.
Designation. A label can be used to define a "caption" in front of the input field. For example, "address" in front of the address input field.

When you have saved the form, you have the option:
- save the form as a template to use it multiple times
- fill out the form yourself or
- invite a contact to sign and complete the form
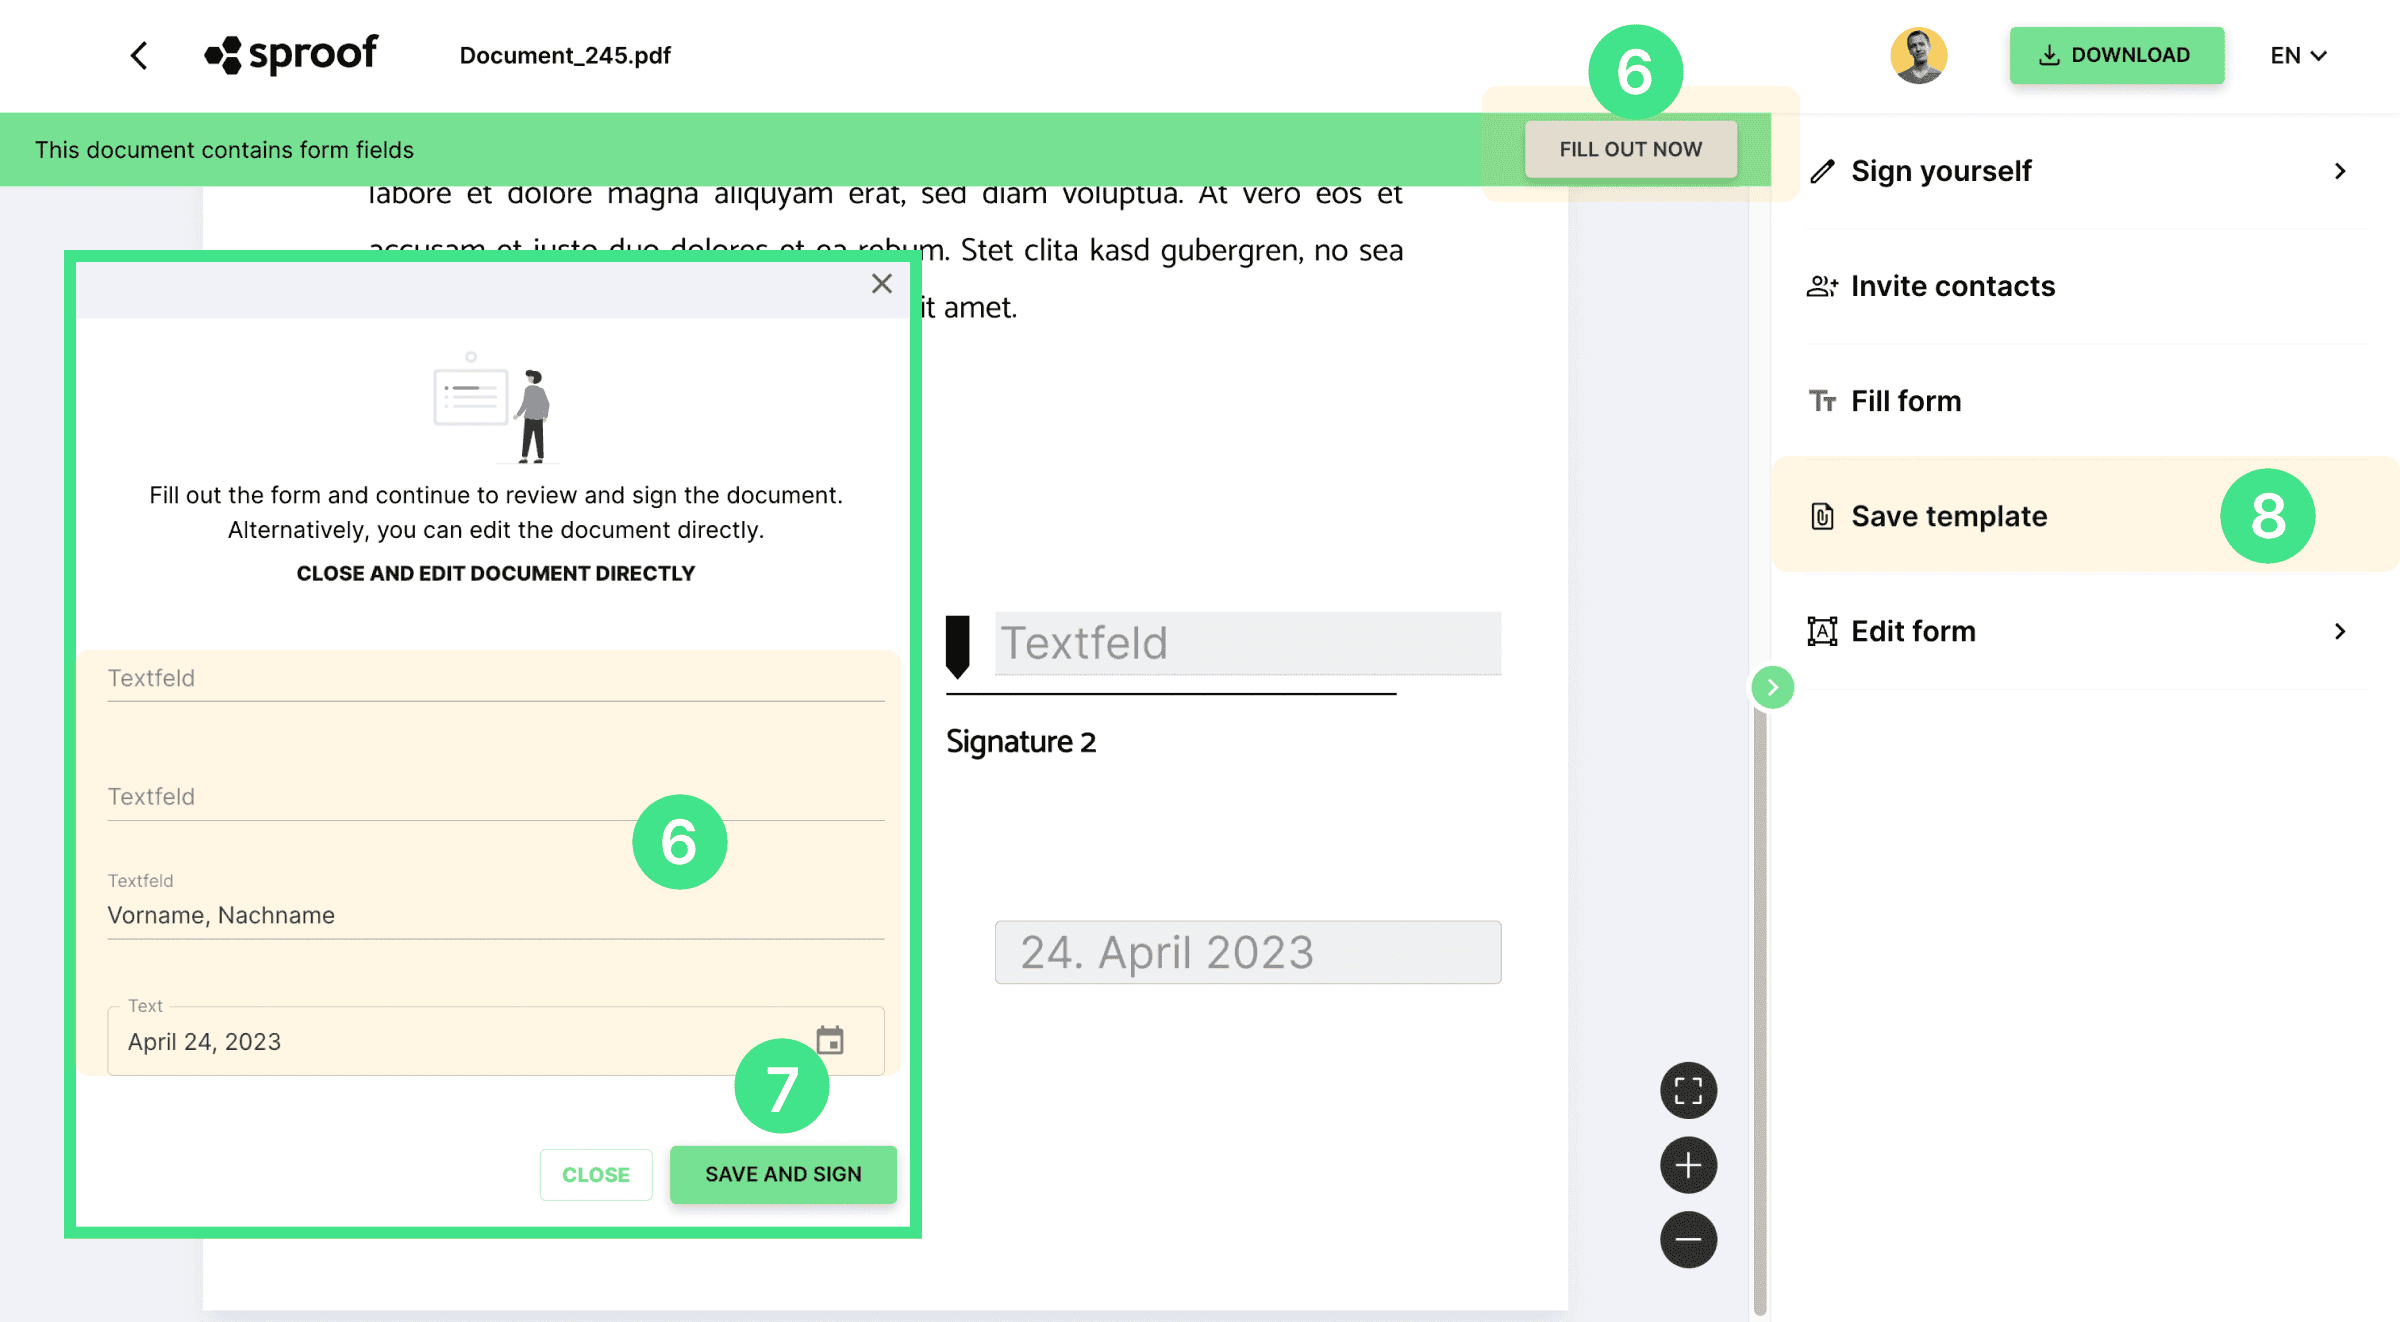
- Fill out the form (sender or recipient). To fill out the form, whether you are the sender or recipient of the document, either click "Fill Now" and a large input window will open with all the form fields OR click directly on each form field in the document to enter your data. If you accidentally close the large input window, you can reopen it by clicking "Fill Form" on the right. Should you be the creator of the document, you can also reopen the input window here under "Fill out now".
Note: Form fields can only be defined and filled in BEFORE signing.
Signing. Have you filled out the form fields via the large input window, you can press "save & sign" at the end. On the right, the familiar "Sign yourself" window opens and you can sign as usual. You can also find a separate video about this in the description.
If you have filled in the form fields directly in the document, you can click "Sign self" here on the right to sign and select signature type, signature style and position as usual.
- Were you invited to sign and the document contains form fields? Then also fill in the fields using the large input window and press "save and sign" OR enter the data directly in the document in the fields and click "sign now" here or "sign" here. Also in this case the usual sign window will open on the right side.
Save as template. You want to be the document with the same form fields several times and also send to different people independently, then you can easily save the document as a template.
- When you press "Save Template" here, a new document template will be created in the dashboard under Templates. You can find a separate tutorial on how to do this here .
And here's how working with forms in sproof sign works.